<?xml version="1.0" encoding="utf-8"?>
<feed xmlns="http://www.w3.org/2005/Atom" >
<generator version="1.0">blampub</generator>
<link href="https://blamster19.github.io/feed.xml" rel="self" type="application/atom+xml" />
<link href="https://blamster19.github.io/" rel="alternate" type="text/html"/>
<updated></updated>
<id>https://blamster19.github.io/feed.xml</id>
<title type="html">blamster19 - all stuff blamster</title>
<subtitle>blamster19's little corner of the Net.</subtitle>
<entry>
  <title type="html"> Static blog generation with Bash</title>
  <link href="https://blamster19.github.io/2026/08/20/static-blog-bash.html" rel="alternate" type="text/html" title="Setting up Nextcloud on Raspberry Pi 3 Model B"/>
  <published>  2026-08-20 14:30:00 +0200</published>
  <updated>2026-08-20T13:51:34+00:00</updated>
  <id>https://blamster19.github.io/2026/08/20/static-blog-bash.html</id>
  <content type="html" xml:base="https://blamster19.github.io/2026/08/20/static-blog-bash.html"><h1 id="what-x27-s-wrong-with-normal-ssgs">What&#x27;s wrong with normal SSGs?</h1>
<p>When I created this blog (2023) I used <a href="https://jekyllrb.com/">Jekyll Static Site Generator</a> (SSG) to produce HTML from Markdown files. You write the post in plain Markdown and the engine compiles it into a beautiful page with header and footer, pretty simple. I used GitHub Action to compile the site on every pushed commit.</p>
<p>Over time I&#x27;ve noticed several things that annoyed me so bad that I started to seek an alternative:</p>
<ul>
<li>the site source was unintelligible to me - I like to know how stuff works and I love to learn by example, but the SSG output is very obtuse and optimized for SEO and whatnot, which makes for an awful learning experience</li>
<li>I got interested in Small Web/<a href="https://indieweb.org/">IndieWeb</a>/<a href="https://smolweb.org/">smolweb</a> and my blog did not live up to that standard (more on that later)</li>
<li>GitHub changed the tools often enough that publishing every new post meant tweaking the Action configuration and upgrading Jekyll; things often broke and I had to do a few tries to get my site up</li>
<li>My site was not flexible enough for me; it might be due to my lack of knowledge about the tool I was using, but I didn&#x27;t want to spend time learning a tool that I would use a couple times a year if my knowledge would become obsolete after a few uses when new version changes everything</li>
</ul>
<p>Other than that, I had a few other goals I wanted to accomplish:</p>
<ul>
<li>learn Bash - although I daily drive GNU/Linux systems for more than 6 years I&#x27;ve never really had much use for classic tools like <code>sed</code>, <code>awk</code> or even <code>grep</code>; I wanted a fun challenge and rewriting my blog in Bash was an excellent choice</li>
<li>I wanted a system that will last - *nix shell environment is so stable that my generator will work in 2, 5 or even 10 years (probably with minor tweaks)</li>
<li>the source will be human-readable - manually crafted HTML and CSS is always nice to look at</li>
<li>I wanted to reactivate my blog and be more active - hopefully I will have more time to do cool stuff and write about it</li>
<li>I also have something big to write about, but I won&#x27;t spoil it now</li>
<li>I will be migrating from GitHub and will probably buy a proper domain; I&#x27;ve been using Codeberg for my private repositories for a year now and I&#x27;m ready to jump the ship</li>
</ul>
<h1 id="blog-page-structure">Blog page structure</h1>
<h2>Header and footer</h2>
<p>The first stage of rewriting the static site generator is the creation of header and footer. The content, written in Markdown and converted to (X)HTML, sits between those. Building the page comes down to essentially one command:</p>
<pre><code class="language-bash">cat header.html content.html footer.html
</code></pre>
<p>I wrote a new header and footer to match my old layout, wrote a CSS stylesheet to make my site pretty and then wrote the parsing part. When I was writing the HTML I tried to follow the rules laid out in the <a href="https://smolweb.org/guidelines.html">smolweb guidelines</a>. I don&#x27;t think I followed them very faithfully, but I hope I managed to produce something accessible that degrades gracefully. Browsing the page in <a href="https://lynx.invisible-island.net/">Lynx</a> works well enough.</p>
<h2>Body</h2>
<p>Processing the content was fun. I decided to use <a href="https://packages.debian.org/trixie/md2html"><code>md2html</code></a> utility available in Debian repos as a starting point. I could have written the parser myself in Bash, but I wanted to allocate finite time to the project and parsing Markdown was not a priority. Still, the output of that tool had to be sanitized.
My posts were originally written for Jekyll, so they contain the Yaml front-matter with page data at the beginning of the file. I had to parse it separately from the proper body and extract the title, type and creation date.
Figuring out how to make the converted output work in the context of the whole page was fun. This is the pipeline that I made:</p>
<pre><code class="language-bash"># footnotes parsing
  sed -E &#x27;
 s/^\[\^([^][]+)\]:[[:space:]]*/&lt;br \/&gt;&lt;a id=&quot;fn\1&quot; href=&quot;#ref\1&quot;&gt;&lt;sup&gt;\1&lt;\/sup&gt;&lt;\/a&gt; /
 s/\[\^([^][]+)\][[:space:]]*/&lt;a href=&quot;#fn\1&quot; id=&quot;ref\1&quot;&gt;&lt;sup&gt;\1&lt;\/sup&gt;&lt;\/a&gt; /g&#x27; | md2html --github -x |
# lower the headings
  sed \
    -e &#x27;s@&lt;h5&gt;@&lt;h6&gt;@g; s@&lt;/h5&gt;@&lt;/h6&gt;@g&#x27; \
    -e &#x27;s@&lt;h4&gt;@&lt;h5&gt;@g; s@&lt;/h4&gt;@&lt;/h5&gt;@g&#x27; \
    -e &#x27;s@&lt;h3&gt;@&lt;h4&gt;@g; s@&lt;/h3&gt;@&lt;/h4&gt;@g&#x27; \
    -e &#x27;s@&lt;h2&gt;@&lt;h3&gt;@g; s@&lt;/h2&gt;@&lt;/h3&gt;@g&#x27; |
# lower h1 to h2 and add id for toc linking
  perl -pe &#x27;s{&lt;h1&gt;(&lt;a href=&quot;#fn&lt;&quot; id=&quot;ref&lt;&quot;&gt;&lt;sup&gt;&lt;&lt;/sup&gt;&lt;/a&gt; +)&lt;/h1&gt;}{
   $t = $1;
   $id = lc($t);
   $id =~ s/&lt;a href=&quot;#fna-z0-9&quot; id=&quot;refa-z0-9&quot;&gt;&lt;sup&gt;a-z0-9&lt;/sup&gt;&lt;/a&gt; +/-/g;
   $id =~ s/^-+|-+$//g;
   &quot;&lt;h2 id=\&quot;$id\&quot;&gt;$t&lt;/h2&gt;&quot;}ge&#x27; |
# remove image CSS parameters from legacy posts
  sed -E &#x27;s/(&lt;img&lt;a href=&quot;#fn&gt;&quot; id=&quot;ref&gt;&quot;&gt;&lt;sup&gt;&gt;&lt;/sup&gt;&lt;/a&gt; *&gt;)\s*\{:&lt;a href=&quot;#fn}&quot; id=&quot;ref}&quot;&gt;&lt;sup&gt;}&lt;/sup&gt;&lt;/a&gt; *\}/\1/g&#x27;
</code></pre>
<p>I generate the HTML ToC, the title and publishing and modification dates and combine all that to create the content body.</p>
<p>If the layout of the page in the front-matter says <code>&quot;home&quot;</code>, then it is the index page that lists all the blog posts. To list all posts with their titles, dates and excerpts I do the following:</p>
<pre><code class="language-bash">local files=($(grep -l &#x27;^date: &#x27; * | while read -r file; do
  local date=$(grep &#x27;^date: &#x27; &quot;$file&quot; | cut -d&#x27; &#x27; -f2)
  printf &quot;%s\n&quot; &quot;$file&quot;
done | sort -n | cut -f2-))
for ((i = ${#files[@]} - 1; i &gt;= 0; i--)); do
  local post_file=&quot;${files[i]}&quot;
  local date_md=$(grep &#x27;^date: &#x27; &quot;$post_file&quot; | cut -d&#x27; &#x27; -f2-)
  local date_utc=$(date -u -d &quot;$date_md&quot; +&quot;%Y-%m-%dT%H:%M:%SZ&quot;)
  local title=$(grep &#x27;^title: &#x27; &quot;$post_file&quot; | cut -d&#x27; &#x27; -f2-)
  local excerpt=$(grep &#x27;^excerpt: &#x27; &quot;$post_file&quot; | cut -d&#x27; &#x27; -f2-)
  local url=$(
    printf &quot;%s&quot; &quot;$post_file&quot; |
      sed &#x27;s/^\(.\{4\}\)./\1\//;
   s/^\(.\{7\}\)./\1\//;
   s/^\(.\{10\}\)./\1\//;
   s/\.markdown/\.html/&#x27;
  )
  echo &quot;&lt;a href=&quot;$url&quot;&gt;&lt;h3&gt;$title&lt;/h3&gt;&lt;/a&gt;&quot;
  echo &quot;&lt;small&gt;$date_utc&lt;/small&gt;&lt;br /&gt;&quot;
  echo &quot;&lt;p&gt;$excerpt&lt;/p&gt;&quot;

</code></pre>
<p>This goes through all the posts in creation chronological order and writes the titles, UTC dates and excerpts.</p>
<h2>Compilation</h2>
<p>The script I wrote compiles a single site. My blog is of course composed of many files and not all of them need to be compiled every time I change something. The obvious choice of a tool to conditionally compile changed files was <code>make</code>. This was the most tedious and time-consuming part of my project because I cannot write Makefiles for the life of me. I managed to make something like this:</p>
<pre><code class="language-bash">PAGES_SRC := pages-md
POSTS_SRC := _posts
HTML_OUT := html

PAGES_MD := $(wildcard $(PAGES_SRC)/*.markdown)
POSTS_MD := $(wildcard $(POSTS_SRC)/*.markdown)

PAGES_HTML := $(patsubst $(PAGES_SRC)/%.markdown,$(HTML_OUT)/%.html,$(PAGES_MD))
POSTS_HTML := $(foreach f,$(POSTS_MD),$(HTML_OUT)/$(shell echo $(notdir $(f)) | sed -E &#x27;s/^([0-9]{4})-([0-9]{2})-([0-9]{2})-(.*)\.markdown$$/\1\/\2\/\3\/\4.html/&#x27;))
POSTS_HTML_DIRS := $(foreach f,$(POSTS_MD),$(HTML_OUT)/$(shell echo $(notdir $(f)) | sed -E &#x27;s/^([0-9]{4})-([0-9]{2})-([0-9]{2})-(.*)\.markdown$$/\1\/\2\/\3/&#x27;))

define post_rule
$(HTML_OUT)/$(shell echo $(notdir $(1)) | sed -E &#x27;s/^([0-9]{4})-([0-9]{2})-([0-9]{2})-(.*)\.markdown$$/\1\/\2\/\3\/\4.html/&#x27;): $(1) | $(HTML_OUT)/$(shell echo $(notdir $(1)) | sed -E &#x27;s/^([0-9]{4})-([0-9]{2})-([0-9]{2})-(.*)\.markdown$$/\1\/\2\/\3/&#x27;)
 /bin/bash ./blampub.sh $$&lt; &gt; $$@
endef

all: $(PAGES_HTML) $(POSTS_HTML) $(HTML_OUT)/feed.xml

$(HTML_OUT)/%.html: $(PAGES_SRC)/%.markdown
 /bin/bash ./blampub.sh $&lt; &gt; $@

$(foreach f,$(POSTS_MD),$(eval $(call post_rule,$(f))))

$(POSTS_MD): | $(POSTS_HTML_DIRS)

$(POSTS_HTML_DIRS):
 mkdir -p $@

$(HTML_OUT)/feed.xml:
 /bin/bash ./feedgen.sh &gt; $@

clean:
 find $(HTML_OUT)/ -mindepth 1 -not -path &#x27;*/assets*&#x27; -delete
</code></pre>
<p>The main complication was the handling of post files names. Each markdown source file has a name like <code>yyyy-mm-dd-arbitrary-post-title.markdown</code>. The output page is stored in <code>yyyy/mm/dd/arbitrary-post-title.html</code>. I needed to extract the date from the filename, create the proper directory structure and preserve the rest of the filename. The fact that the name could contain hyphens complicated the matter, because I could not simply turn every <code>-</code> into <code>/</code> and have the path for free. This is why I need the lengthy <code>post_rule</code> that generates appropriate rule for every source file that exists in the <code>foreach</code> loop.</p>
<h2>Feed</h2>
<p>The Atom feed was trivial to implement. It is mostly <code>echo</code>ing the XML boilerplate and the parsed Markdown file. This time I do not lower the heading levels. I reused the code for parsing and listing posts in chronological order.</p>
<h1 id="outcome">Outcome</h1>
<p>The result I got is a nice, understandable static site generator that I hope will serve me well. I learned a bit of Bash in the process which is what I wanted. In the process of migrating to the new generator I had to upgrade some posts to remove MathJax script CDN linking. Now I use a minimal installation of <a href="https://temml.org/">Temml</a> that sits in the website assets and is loaded in the browser to turn every <code>$$text$$</code> into LaTeX math.</p></content>
  <author>
    <name>blamster19</name>
  </author>
  <summary type="html">I migrated my blog to a custom Bash site generator</summary>
</entry>
<entry>
  <title type="html"> Setting up Nextcloud on Raspberry Pi 3 Model B</title>
  <link href="https://blamster19.github.io/2025/03/16/nextcloud-server.html" rel="alternate" type="text/html" title="Setting up Nextcloud on Raspberry Pi 3 Model B"/>
  <published>  2025-03-16 02:36:00 +0100</published>
  <updated>2025-03-16T01:36:00+00:00</updated>
  <id>https://blamster19.github.io/2025/03/16/nextcloud-server.html</id>
  <content type="html" xml:base="https://blamster19.github.io/2025/03/16/nextcloud-server.html"><h1 id="prelude">Prelude</h1>
<p>On my way to true digital independence I decided to set up my own cloud service. I tried to find the most hassle-free way to do it, hence I went with a Nextcloud instance on a Raspberry Pi 3 Model B I had lying around. It was not a totally trivial task since everything had to be set up in a quite restrictive confines of Eduroam network and without an external display. I managed to get a working service, but frequent connection issues I am having due to reverse proxy and network setup prevent me from fully enjoying the functionality of my server. Still, the project was worth the time it took.</p>
<h1 id="system-setup">System setup</h1>
<p>For my system I have decided to go with plain <a href="https://www.raspberrypi.com/software/operating-systems/">Raspberry Pi OS Lite 64 bit</a>. I used the <em>Raspberry Pi Imager</em> app from Flathub. After flashing and booting up my Pi, the machine connected to my hotspot.
Te first thing I did was to install <a href="https://www.raspberrypi.com/documentation/services/connect.html">Raspberry Pi Connect</a> to never lose the access to my Raspberry Pi in case I have problems connecting through SSH in my dorm&#x27;s WI-Fi. I issued</p>
<pre><code class="language-bash">$ sudo apt install rpi-connect-lite
$ loginctl enable-linger
$ rpi-connect on
$ rpi-connect signin
</code></pre>
<p>and signed in. I rebooted the Pi to see if I set up everything correctly. Establishing connection through RPi Connect takes a while, but works.<br />
Next I set up the network connection. Eduroam which is a bit different from your usual Wi-Fi connection. I ran</p>
<pre><code class="language-bash">$ sudo nmtui
</code></pre>
<p>and added a connection with such parameters:</p>
<pre><code class="language-bash">           Profile name eduroam_________________________________
                 Device wlan0 (B8:27:EB:AA:7E:5A)_______________
                                                                
+ WI-FI                                                         
|                  SSID eduroam_________________________________
|                  Mode &lt;Client&gt;                                
|                                                               
|              Security &lt;WPA &amp; WPA2 Enterprise&gt;                 
|        Authentication &lt;PEAP&gt;                                  
|    Anonymous identity PROVIDED BY UNI_________________________
|                Domain ________________________________________
|               CA cert ________________________________________
|      CA cert password ________________________________________
|                       [ ] Show password                       
|          PEAP version &lt;Automatic&gt;                             
|  Inner authentication &lt;MSCHAPv2&gt;                              
|              Username PROVIDED BY UNI_________________________
|              Password PROVIDED BY UNI_________________________
|                       [ ] Show password                       
|                       &lt;Store password for all users&gt;          
|                                                               
|                 BSSID ________________________________________
|    Cloned MAC address ________________________________________
|                   MTU __________ (default)                    
\                                                               
                                                                
- IPv4 CONFIGURATION    &lt;Automatic&gt;                             
- IPv6 CONFIGURATION    &lt;Automatic&gt;                             
                                                                
[X] Automatically connect                                       
[X] Available to all users                                      
</code></pre>
<p>I do not need a certificate to connect but I know some schools require it, so refer to your network staff&#x27;s manual. For me this did the trick, although I had to wait a couple of minutes for my RPi to show up in Connect.<br />
I wanted to store my data on external USB SSD drive, which is already formatted to ext4. I set up automatic mount:</p>
<pre><code class="language-bash">$ sudo mkdir /mnt/ssd-data-mount
$ sudo mount -t ext4 /dev/sda1 /mnt/ssd-data-mount/
$ sudo systemctl daemon-reload
$ sudo blkid
</code></pre>
<p>I took note of the <code>UUID=</code> value, made a backup of <code>/etc/fstab</code> and edited it by appending</p>
<pre><code class="language-bash">UUID=d49402b9-7e8c-4cfc-aba5-253585a8911c /mnt/ssd-data-mount ext4 defaults,auto,users,rw,nofail 0 0
</code></pre>
<p>where the value of <em>UUID</em> is the one I copied from previous command. In the end I created a directory for my data:</p>
<pre><code class="language-bash">$ mkdir /mnt/ssd-data-mount/nextcloud-data
$ sudo chmod 750 -R /mnt/ssd-data-mount/nextcloud-data
$ sudo chown www-data:www-data /mnt/ssd-data-mount/nextcloud-data -R
</code></pre>
<h1 id="webserver">Webserver</h1>
<p>Now I could set up the proper functionality of my cloud server.<br />
First I installed and configured <em>UFW</em></p>
<pre><code class="language-bash">$ sudo apt install ufw
$ sudo ufw allow 80
$ sudo ufw allow 443
$ sudo ufw allow 3478
$ sudo ufw enable
</code></pre>
<p>Since I cannot port forward in the Eduroam network I settled for <a href="https://loophole.cloud/">Loophole</a> to tunnel the traffic to my Pi. I downloaded the CLI Linux arm64 executable from their website. Next I created a <code>~/server-config</code> directory where I store all the behind-the-scenes configuration scripts. I <code>unzip</code>ped the package into my new directory, <code>cd</code>ed into it and ran</p>
<pre><code class="language-bash">$ ./loophole account login
</code></pre>
<p>and logged in in the browser. Now to run the forwarding just run</p>
<pre><code class="language-bash">$ ./loophole http 443 --hostname HOSTNAME
</code></pre>
<p>where <code>HOSTNAME</code> is some name you will remember.<br />
I created <code>startup-script.sh</code> populated with</p>
<pre><code class="language-bash">#!/bin/bash

cd ~/server-config
./loophole http 443 --hostname HOSTNAME &amp;
./loophole http 80 --hostname HOSTNAME &amp;
</code></pre>
<p>and made it executable and immediately added te service to <em>systemd</em> by creating a file <code>/etc/systemd/system/server-startup.service</code>:</p>
<pre><code>[Unit]
Description=Startup script activation
After=multi-user.target
After=network-online.target
Wants=network-online.target

[Service]
Type=simple
User=pi
ExecStart=/home/pi/server-config/startup-script.sh

[Install]
WantedBy=multi-user.target
</code></pre>
<p>and finally</p>
<pre><code class="language-bash">$ sudo systemctl daemon-reload
$ sudo systemctl enable server-startup.service
</code></pre>
<p>I also set <code>/etc/hostname</code> to my domain from <em>Loophole</em>, e.g. <code>HOSTNAME.loophole.site</code>.<br />
I went with bare metal <em>Nextcloud</em> install instead of Docker one. I installed the prerequisites</p>
<pre><code class="language-bash">$ sudo apt install apache2 mariadb-server libapache2-mod-php 
$ sudo apt install php-gd php-json php-mysql php-curl php-mbstring php-intl php-imagick php-xml php-zip php-fpm
$ sudo service apache2 restart
</code></pre>
<p>and downloaded Nextcloud</p>
<pre><code class="language-bash">$ cd /var/www/html
$ sudo wget https://download.nextcloud.com/server/releases/latest.zip
$ sudo unzip latest.zip
$ sudo chmod 750 nextcloud -R
$ sudo chown www-data:www-data nextcloud -R
</code></pre>
<p>I setup of MySQL:</p>
<pre><code class="language-bash">$ sudo mysql
</code></pre>
<p>and in the interactive console I issued:</p>
<pre><code>CREATE USER &#x27;nextcloud&#x27; IDENTIFIED BY &#x27;password&#x27;;
CREATE DATABASE nextcloud;
GRANT ALL PRIVILEGES ON nextcloud.* TO &#x27;nextcloud&#x27;@localhost IDENTIFIED BY &#x27;password&#x27;;
FLUSH PRIVILEGES;
quit
</code></pre>
<p>Next I set the contents of <code>/etc/apache2/sites-available/nextcloud.conf</code> to</p>
<pre><code>Alias /nextcloud &quot;/var/www/html/nextcloud/&quot;

&lt;Directory /var/www/html/nextcloud/&gt;
  Require all granted
  AllowOverride All
  Options FollowSymLinks MultiViews

  &lt;IfModule mod_dav.c&gt;
    Dav off
  &lt;/IfModule&gt;

&lt;/Directory&gt;
</code></pre>
<p>then</p>
<pre><code class="language-bash">$ sudo a2enmod headers
$ sudo systemctl reload apache2
</code></pre>
<p>I also edited <code>/var/www/html/nextcloud/config/config.php</code> so that <code>trusted_domains</code> <strong>contains my domain and not the IP addresses</strong> and also changed and added the following fields a few lines down:</p>
<pre><code>&#x27;overwrite.cli.url&#x27; =&gt; &#x27;example.com&#x27;,
&#x27;overwritehost&#x27; =&gt; &#x27;example.com&#x27;,
</code></pre>
<p>where <code>example.com</code> is your domain obtained from Loophole (without <code>http://</code> part). This is important because otherwise the site will redirect to <code>127.0.0.1</code> everytime you want to access it through your domain. Leaving the IP of Raspberry Pi in my local network produced error 502 when accessed from the outside, even it I could access it through my domain inside of the network.<br />
Now I could access my Nextcloud page and start tweaking and uploading my data.</p>
<h1 id="result">Result</h1>
<p>The Nextcloud server on Raspberry Pi 3 works, but is far from perfect. The web interface is not snappy and file uploads are slow, but for a device eight years of age and with 1 GB of RAM it fares pretty well. Unfortunately my Eduroam setup frequently breaks for seemingly no reason, website either throws error 502 or is unreachable. This is remedied either by reboot (sometimes a few times) or by leaving it be in hope it works again (sometimes it does!).<br />
Before writing this post I tested similar setup (Loophole forwarding included) in my private network at home and to my surprise it was quite stable. Unfortunately, when I moved it over to the dorm my SSD died, probably because of a faulty power outlet. Before that I managed to run it for about two weeks during which I set up auto sync of photos and GPS tracking data from my phone and backup of files from my laptop. Overall file syncing worked like a charm. The same cannot be said about browsing said data in web UI. Loading photos took ages and browsing treks in <a href="https://apps.nextcloud.com/apps/gpxpod">GpxPod</a> froze the server to the point of needing reboot. <a href="https://apps.nextcloud.com/apps/previewgenerator">Preview Generator</a> helped, but was not enough to get smooth experience.</p>
<h1 id="conclusion">Conclusion</h1>
<p>Setting up a Nextcloud instance on Raspberry Pi is a good introduction to server management and selfhosting. I believe Raspberry Pi 4 or 5 would be more appropriate choice for this task than 3, but for those ready to forgo most of the bells and whistles of Nextcloud it can be a very usable option as well.</p></content>
  <author>
    <name>blamster19</name>
  </author>
  <summary type="html">Hosting your own data storage and online services is a fun pastime project if you do not mind occasional data loss… just kidding.</summary>
</entry>
<entry>
  <title type="html"> DIY Smartwatch </title>
  <link href="https://blamster19.github.io/2024/06/12/diy-smartwatch.html" rel="alternate" type="text/html" title="Setting up Nextcloud on Raspberry Pi 3 Model B"/>
  <published>  2024-06-12 23:39:00 +0200</published>
  <updated>2026-08-20T14:10:28+00:00</updated>
  <id>https://blamster19.github.io/2024/06/12/diy-smartwatch.html</id>
  <content type="html" xml:base="https://blamster19.github.io/2024/06/12/diy-smartwatch.html"><h1 id="motivation">Motivation</h1>
<p>The pinnacle of microcontroller lab I attended this semester is my own project based on any microcontroller I could get my hands on. I thought hard about things that are cool but also useful, things which will not end up at the bottom of my drawer. Recently gathering data has been my jam, and this has led me to the idea of a smartwatch. I figured a gizmo measuring my heartbeat and saturation is a good starter and the rest will come later.</p>
<h1 id="construction">Construction</h1>
<h2>Hardware</h2>
<p>I set off in search of parts and quickly found what I needed. Waveshare provided me with more than what I wanted: <a href="https://www.waveshare.com/rp2040-touch-lcd-1.28.htm">Waveshare RP2040 Touch LCD 1.28&quot;</a>. This is a touch-enabled round display integrated with RP2040 microcontroller, accelerometer+gyroscope module, RTC and battery header. Almost fully-featured smartwatch in itself, and to be honest I feel quite dirty using it in my project, but due to time, money and volume constraints this is the best decision.</p>
<p>Arguably, one might complain that the board has no connectivity, thus why the first draft included ESP32 which would talk to RP2040 through exposed GPIO ports. However, because of coming deadline and various difficulties with that soution, the idea was dropped (for now).</p>
<p>From the beginning the most important part besides the chip and screen was pulse oximeter. I reviewed all available options which did not cost a small fortune and settled for <a href="https://www.analog.com/en/products/max30102.html">MAX30102</a> board from local eshop. This model does not contain green LED (like in MAX30105). Green light makes for better wrist measurements, but I could not find any such modules and just hoped for luck.</p>
<p>At this point my sole concern has been battery dimensions. I found <a href="https://www.akyga.com/products/906-lithium-polymer-battery-3-7v-85mah-pcm-connector-socket-2-54-jst-2-pins-l-150mm.html">Li-Pol Akyga 85 mAh 1S 3,7 V</a> which might just barely fit in what I had in mind.</p>
<h2>Code</h2>
<p>I started by writing some basic program to show date and time. As time has been critical factor I decided to use MicroPython for the first time. Sites around the web adviced me to use Thonny IDE, so I complied. I plugged my RP2040 touch screen board with BOOT button pressed and in a matter of seconds I could flash MicroPython right away. Pretty simple.</p>
<p>The first thing I did was copy the <a href="https://www.waveshare.com/wiki/RP2040-Touch-LCD-1.28#Demo">example code from Waveshare</a> and strip it off the demo functionality. This way I obtained a neat driver for my board which I placed in separate file. My next step was date and time - it turns out the whole deal is done in a few lines of MicroPython:</p>
<pre><code class="language-python">from machine import RTC
import time

...

rtc = RTC()

def draw_ui(LCD):
    t = time.localtime()
    time_string = str(t[3])+&#x27;:&#x27;+&#x27;{:02d}&#x27;.format(t[4])+&#x27;:&#x27;+&#x27;{:02d}&#x27;.format(t[5])
    LCD.fill(0)
    LCD.write_text(time_string, 25, 105, 3, 65535)
    date_string = str(t[0])+&#x27;-&#x27;+&#x27;{:02d}&#x27;.format(t[1])+&#x27;-&#x27;+&#x27;{:02d}&#x27;.format(t[2])
    LCD.write_text(date_string, 40, 140, 2, 65535)
    LCD.show()

while True:
    draw_ui(LCD)

LCD.fill(0)
LCD.show()
</code></pre>
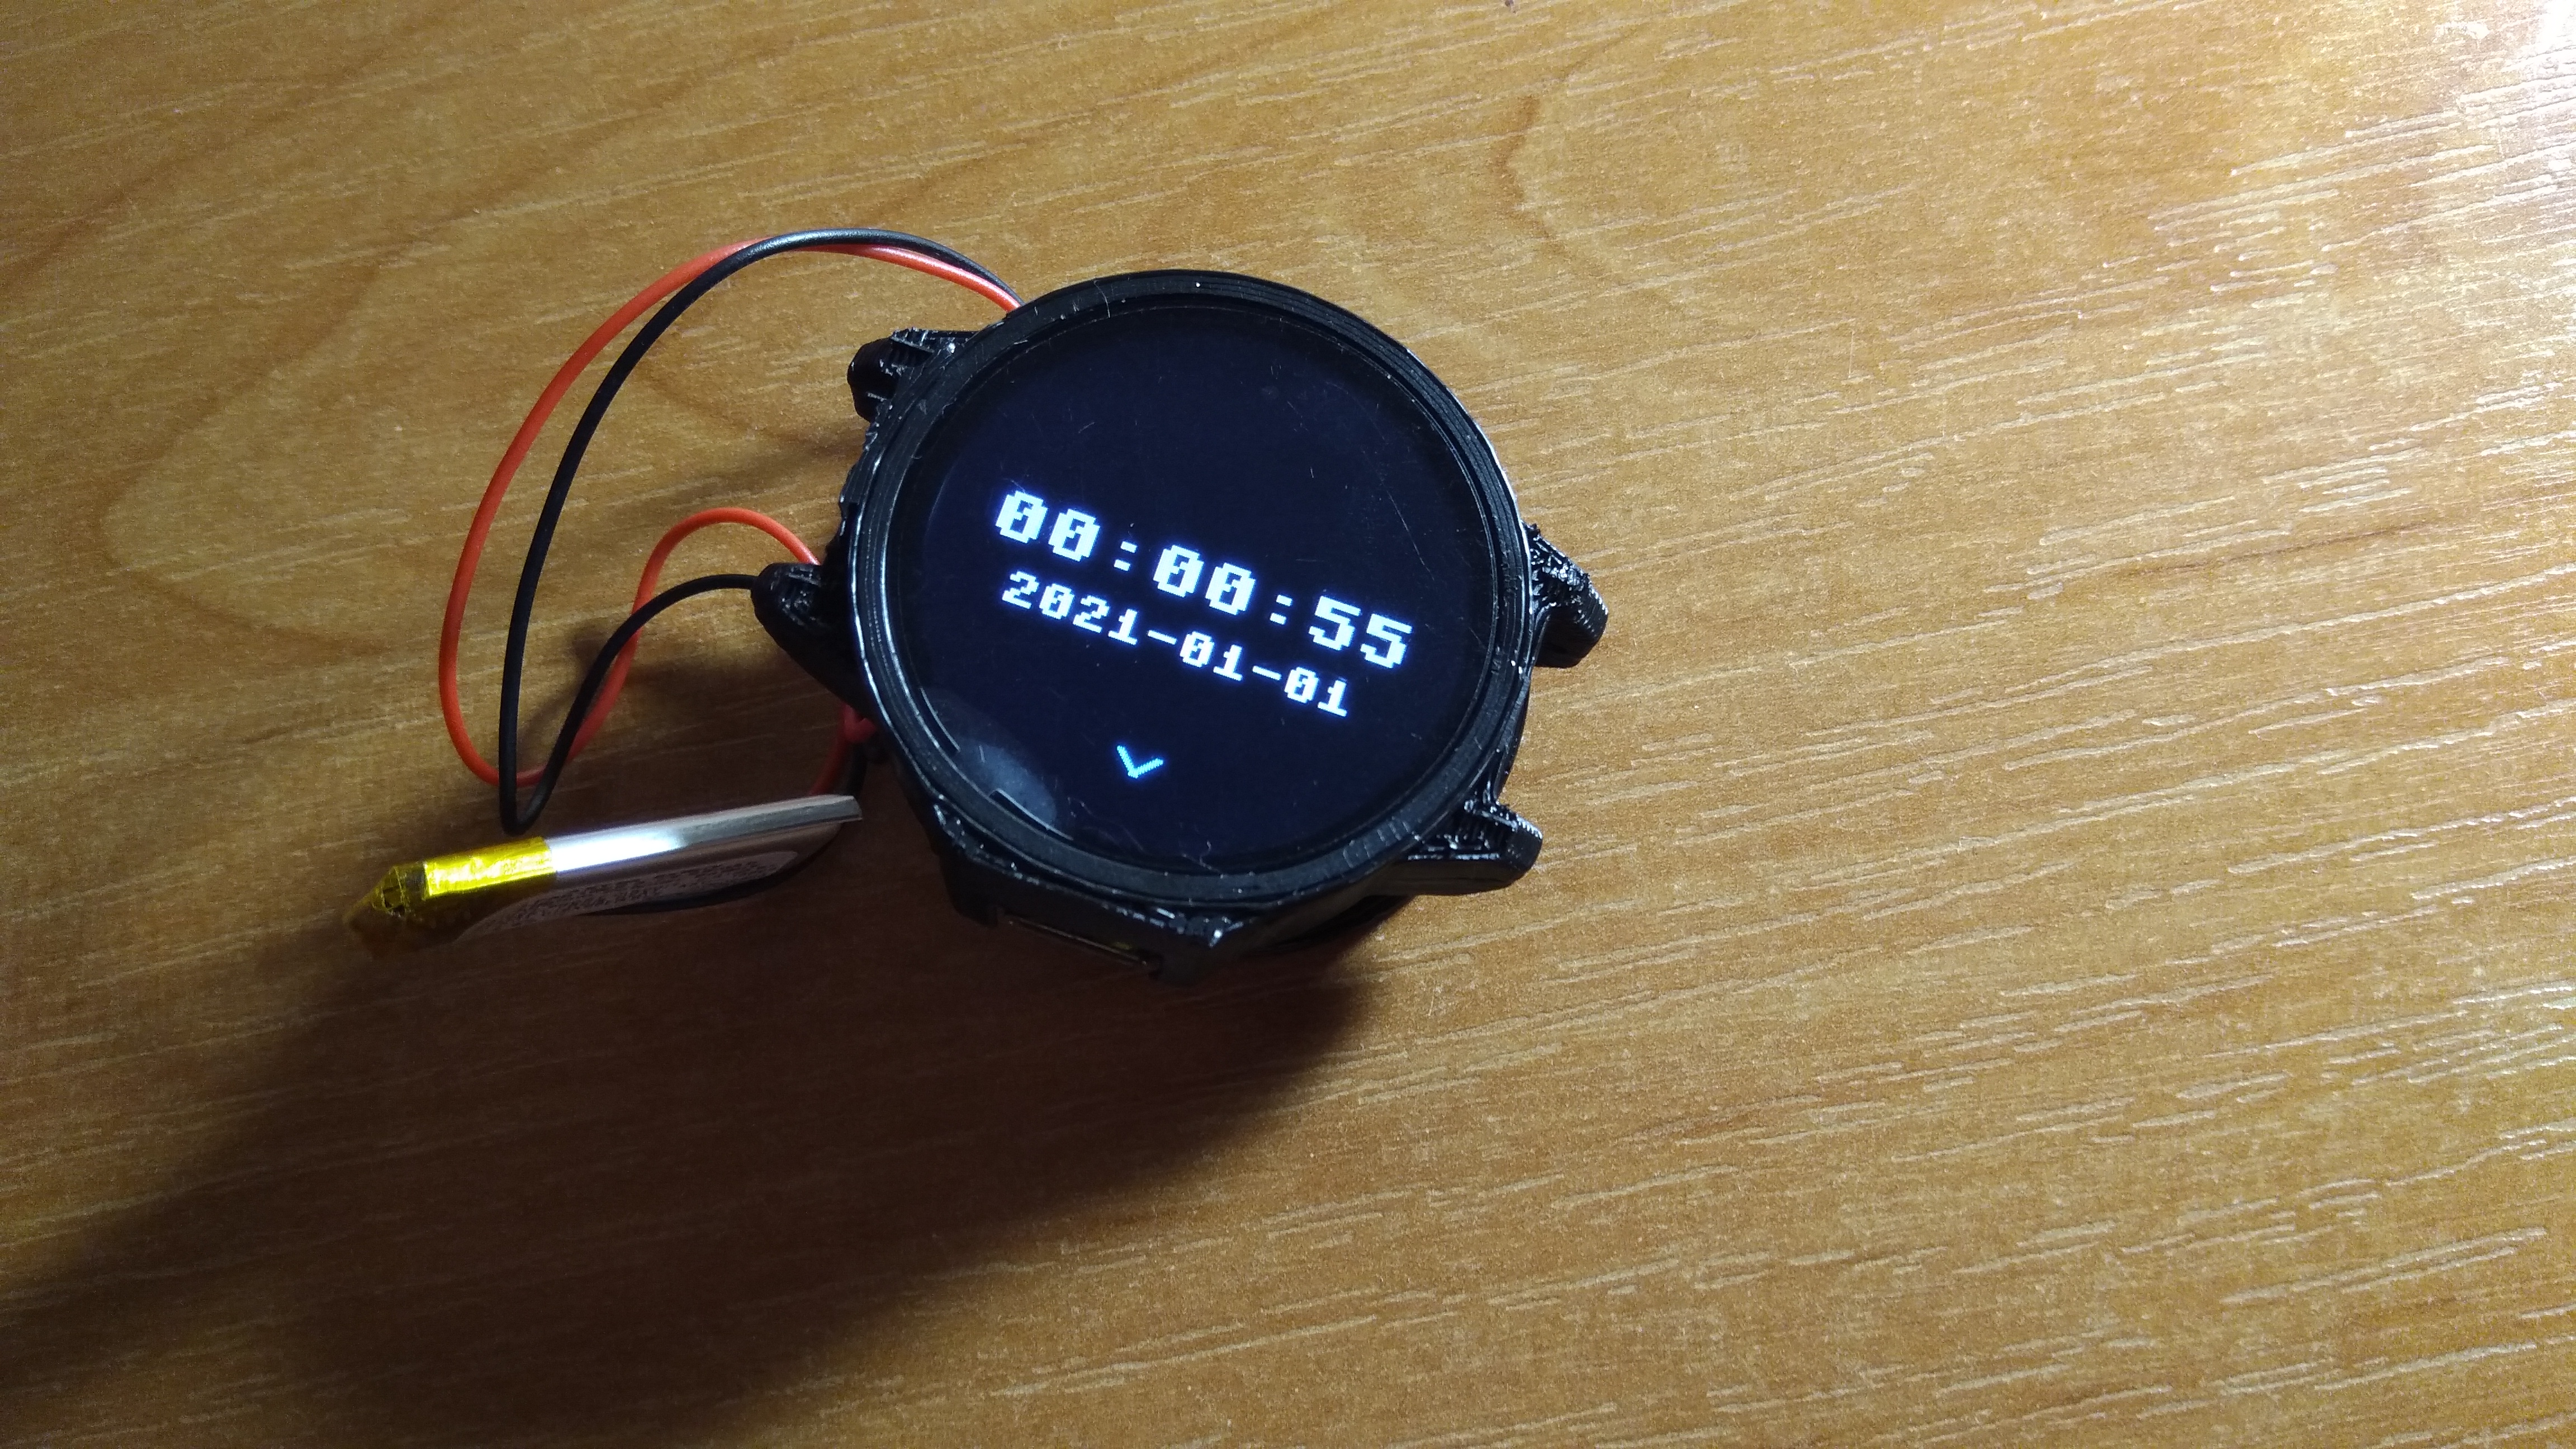
<p>To me that short time necessary to get something to work was astonishing. Here I was holding a working watch done in five minutes. Happy with the result I eagerly started to give my code some structure. In the following steps I added panels which you can swipe up and down along with arrows showing whether there are more panels to swipe to. I tried to incorporate LVGL Python bindings to make nicer visuals, but my efforts went in vain, so I prioritized quick progress over doing things elegantly.</p>
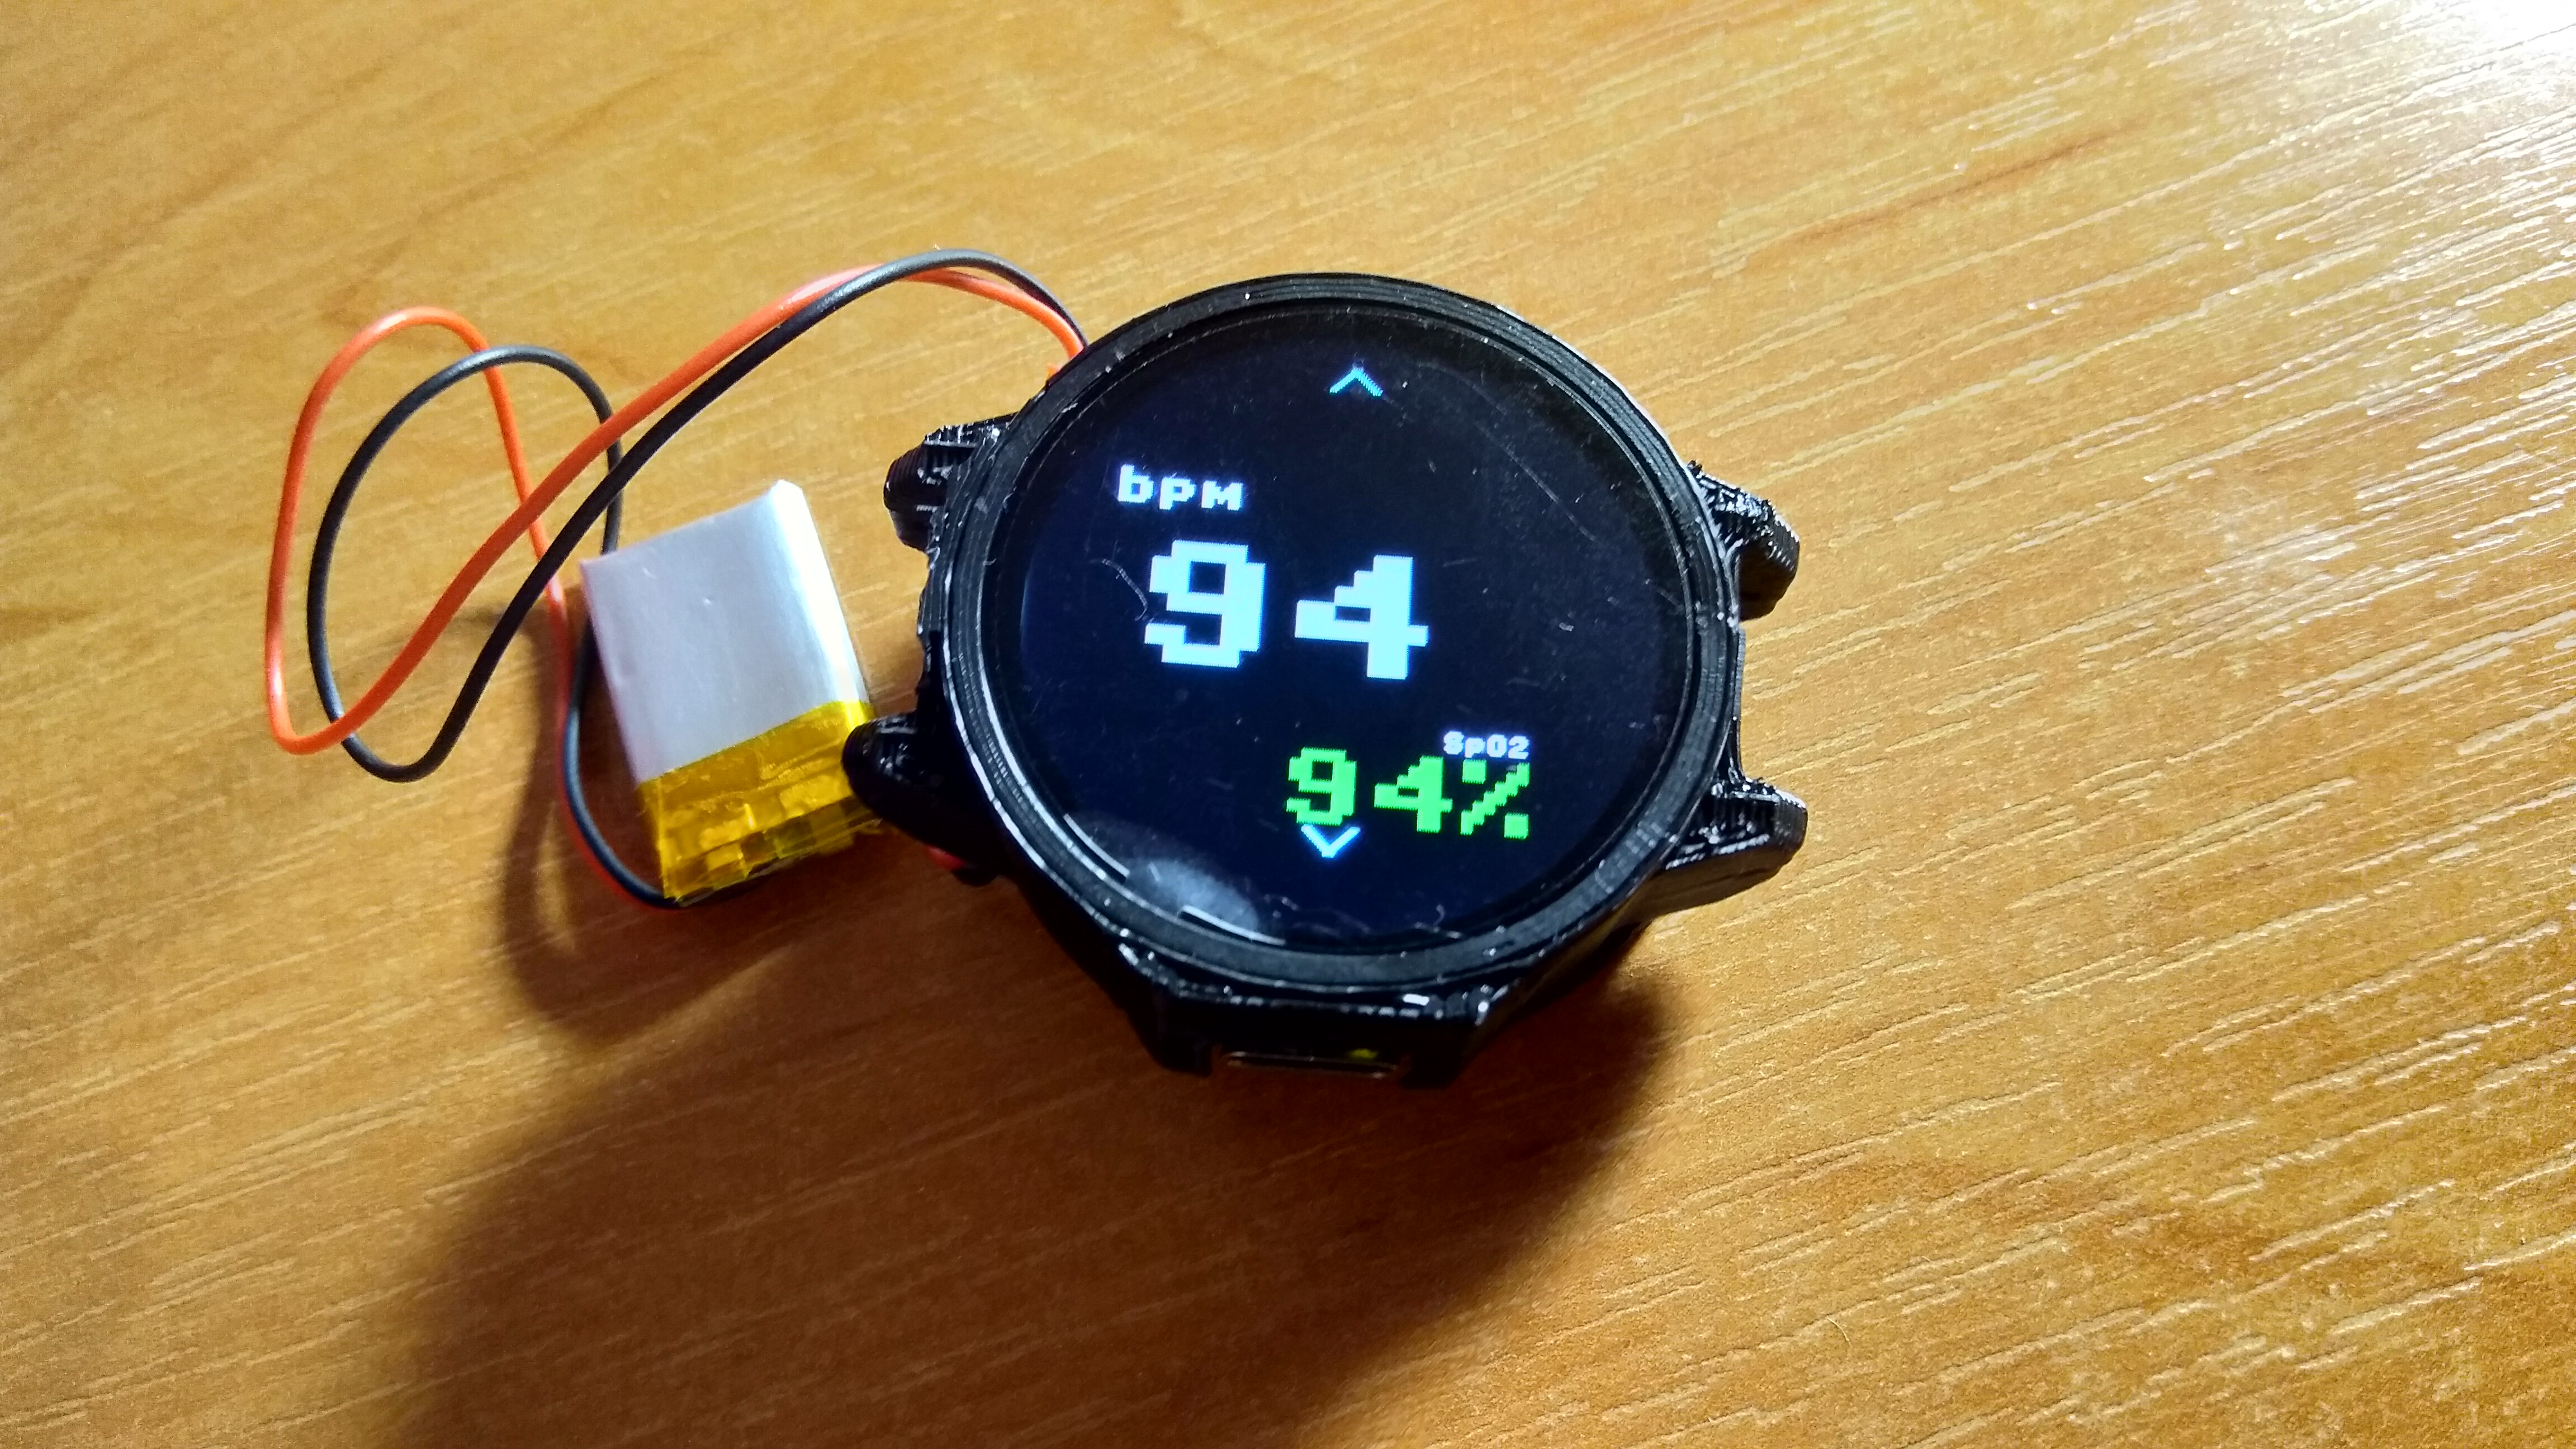
<p>The biggest challenge was to utilize the pulse oximeter. There is a library called <a href="https://github.com/n-elia/MAX30102-MicroPython-driver">MAX30102-MicroPython-driver</a>, but it has no ready example of $SpO_2$ measurement. I searched for some other solutions like MAX30105 drivers and even thought about running C pulse oximeter code on one core and MicroPython interface on the other, but in the end I settled for MAX30102-MicroPython-driver with modified example code. The modified parts were pin definitions, red LED measurement logging and some sampling rate values. I also added saturation measurement as follows:</p>
<pre><code class="language-python">R = sum(red_peaks[:][0]) / sum(ir_peaks[:][0]) * len(ir_peaks[:][0]) / len(red_peaks[:][0])
spo2 = 100 - 5 * R
</code></pre>
<p>Where <code>red_peaks</code> and <code>ir_peaks</code> are lists generated by peak finding function.</p>
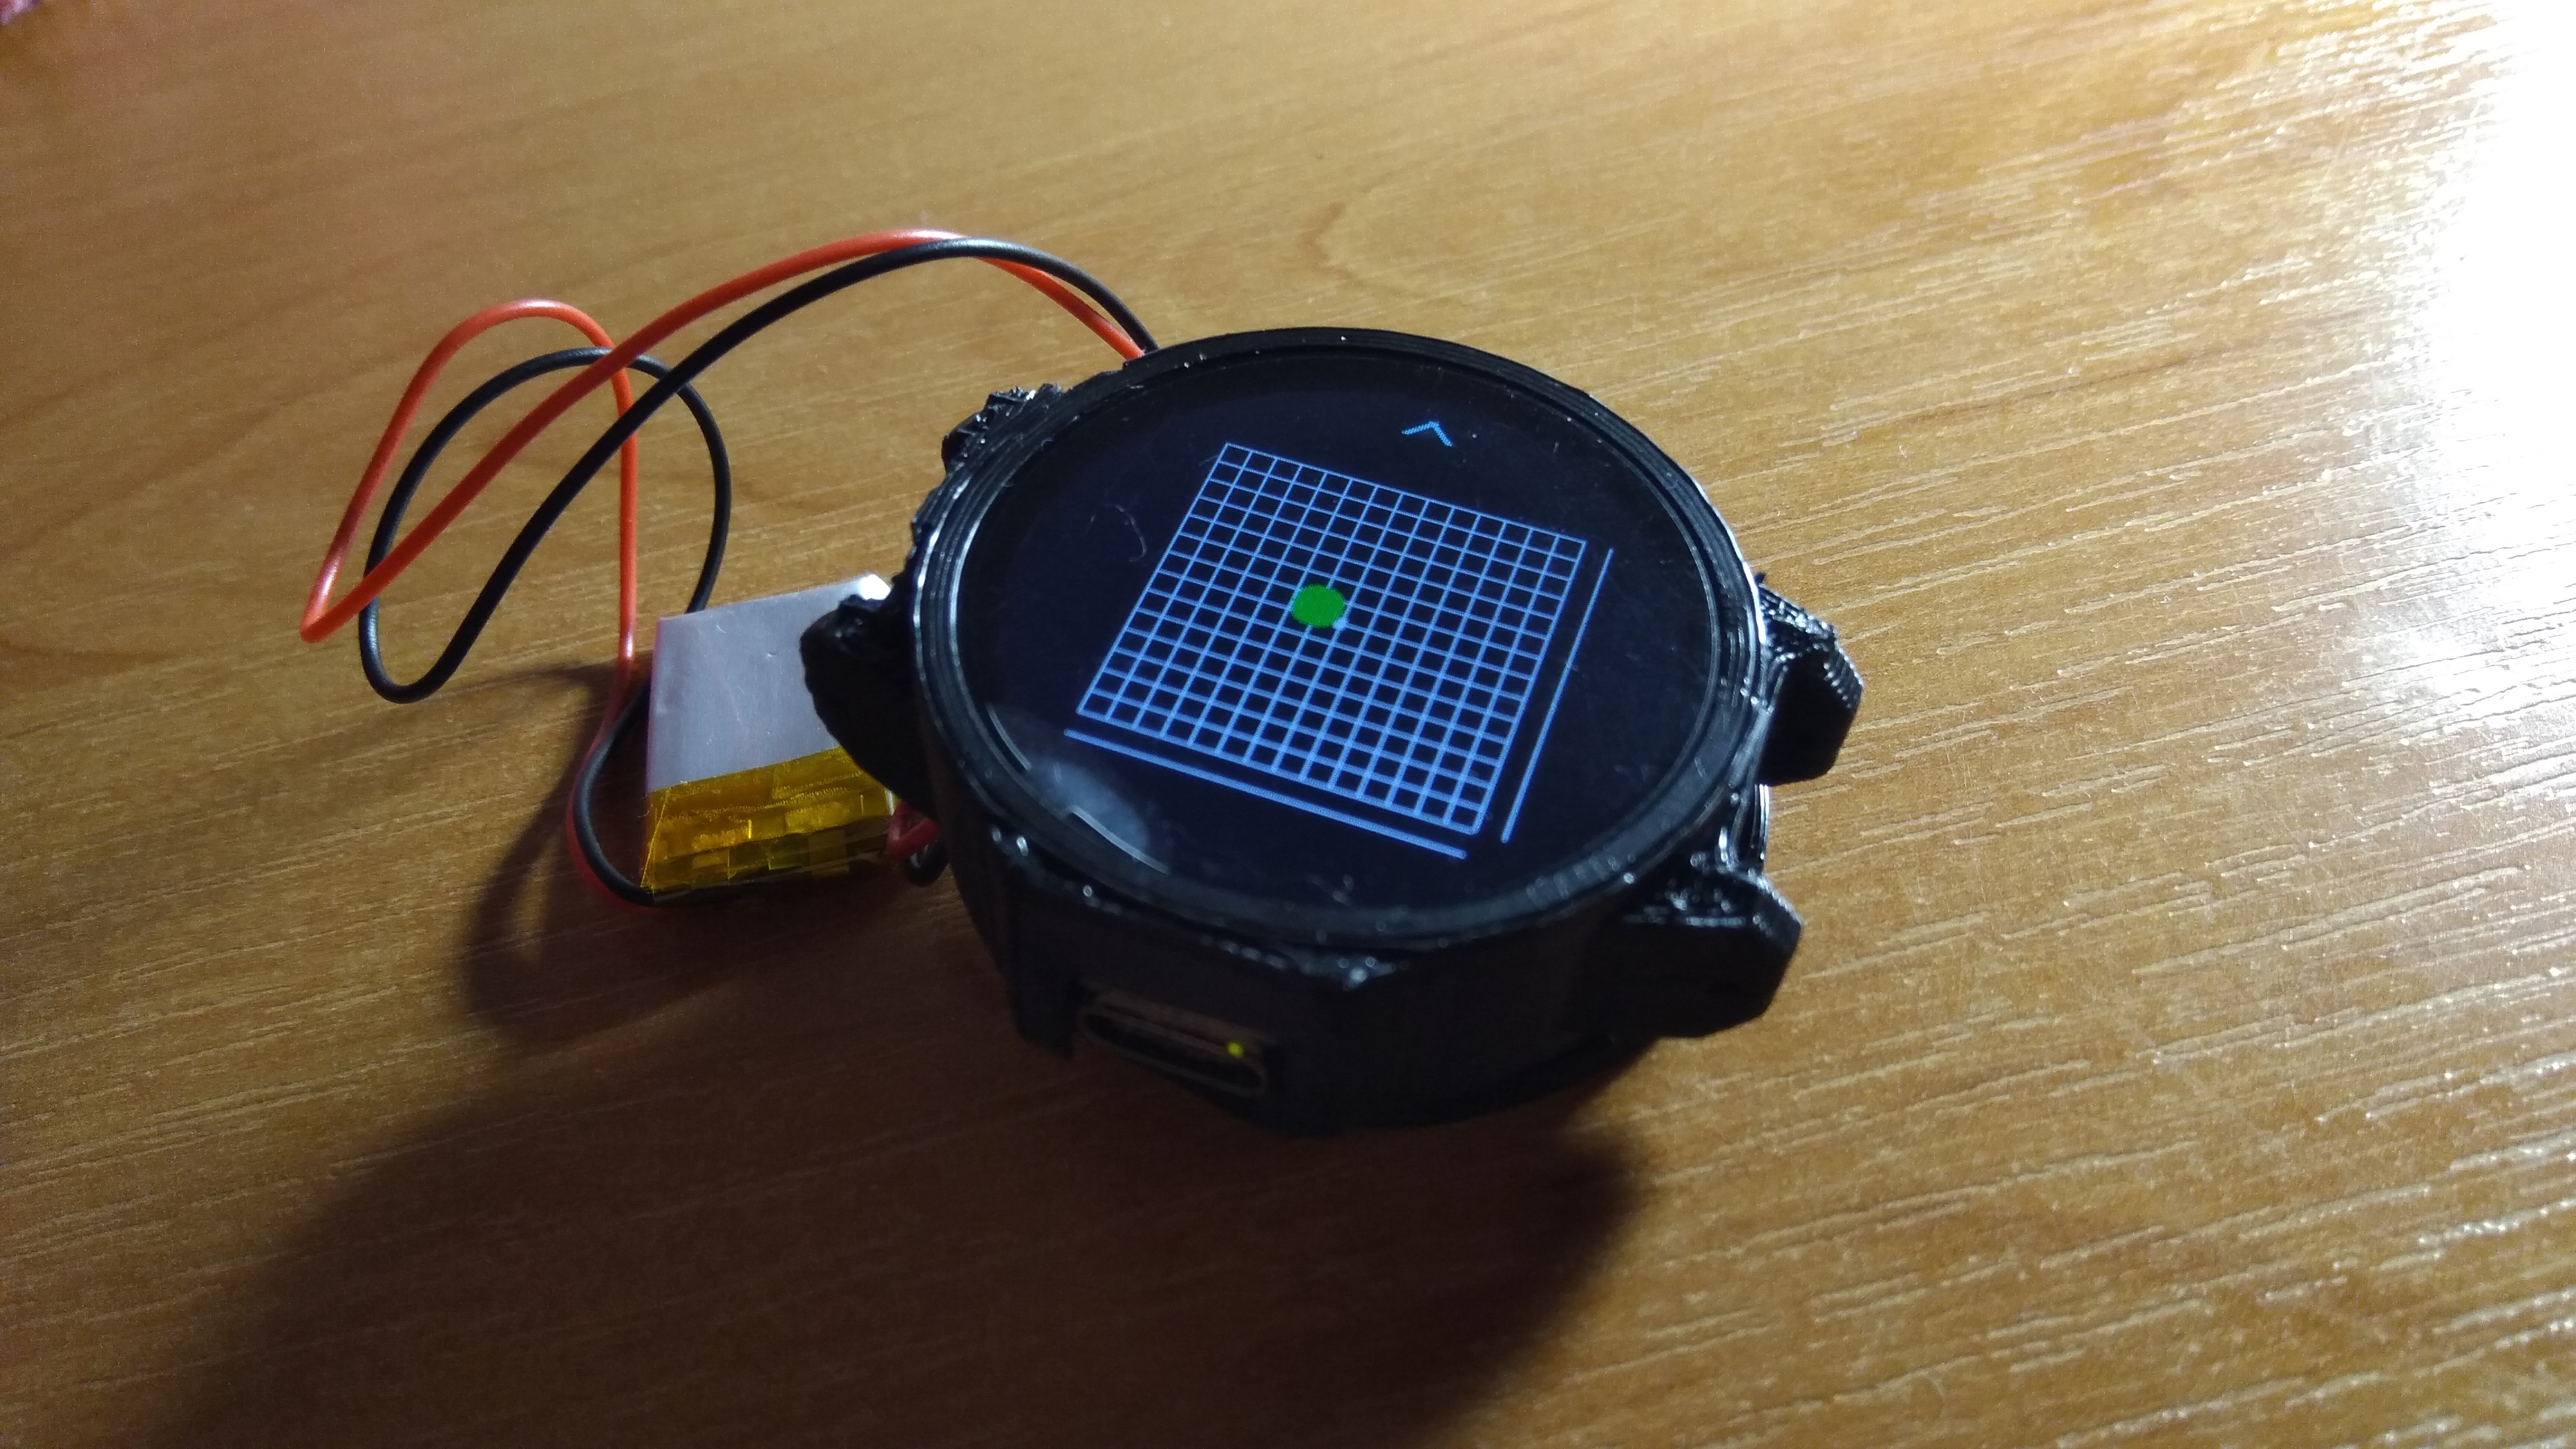
<p>The last functionality I added to my firmware was level bubble. It is just a circle placed at scaled X and Y output of onboard accelerometer.</p>
<p>The whole code is available <a href="https://github.com/blamster19/diy-smartwatch">in my repository</a>.</p>
<h2>Pinout</h2>
<p>There is not much to say about pinout. I connected the MAX30102&#x27;s SDA to pin 26 and SCL to pin 27 of Waveshare board, although any GPIO pin pair would be ok after slight code change.</p>
<h2>Case</h2>
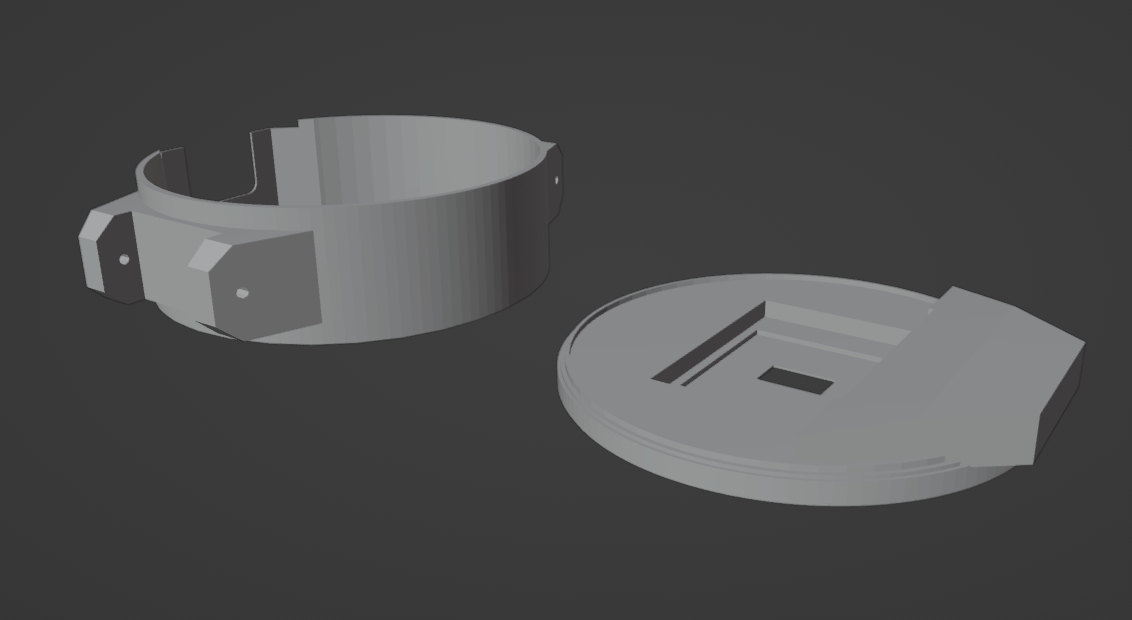
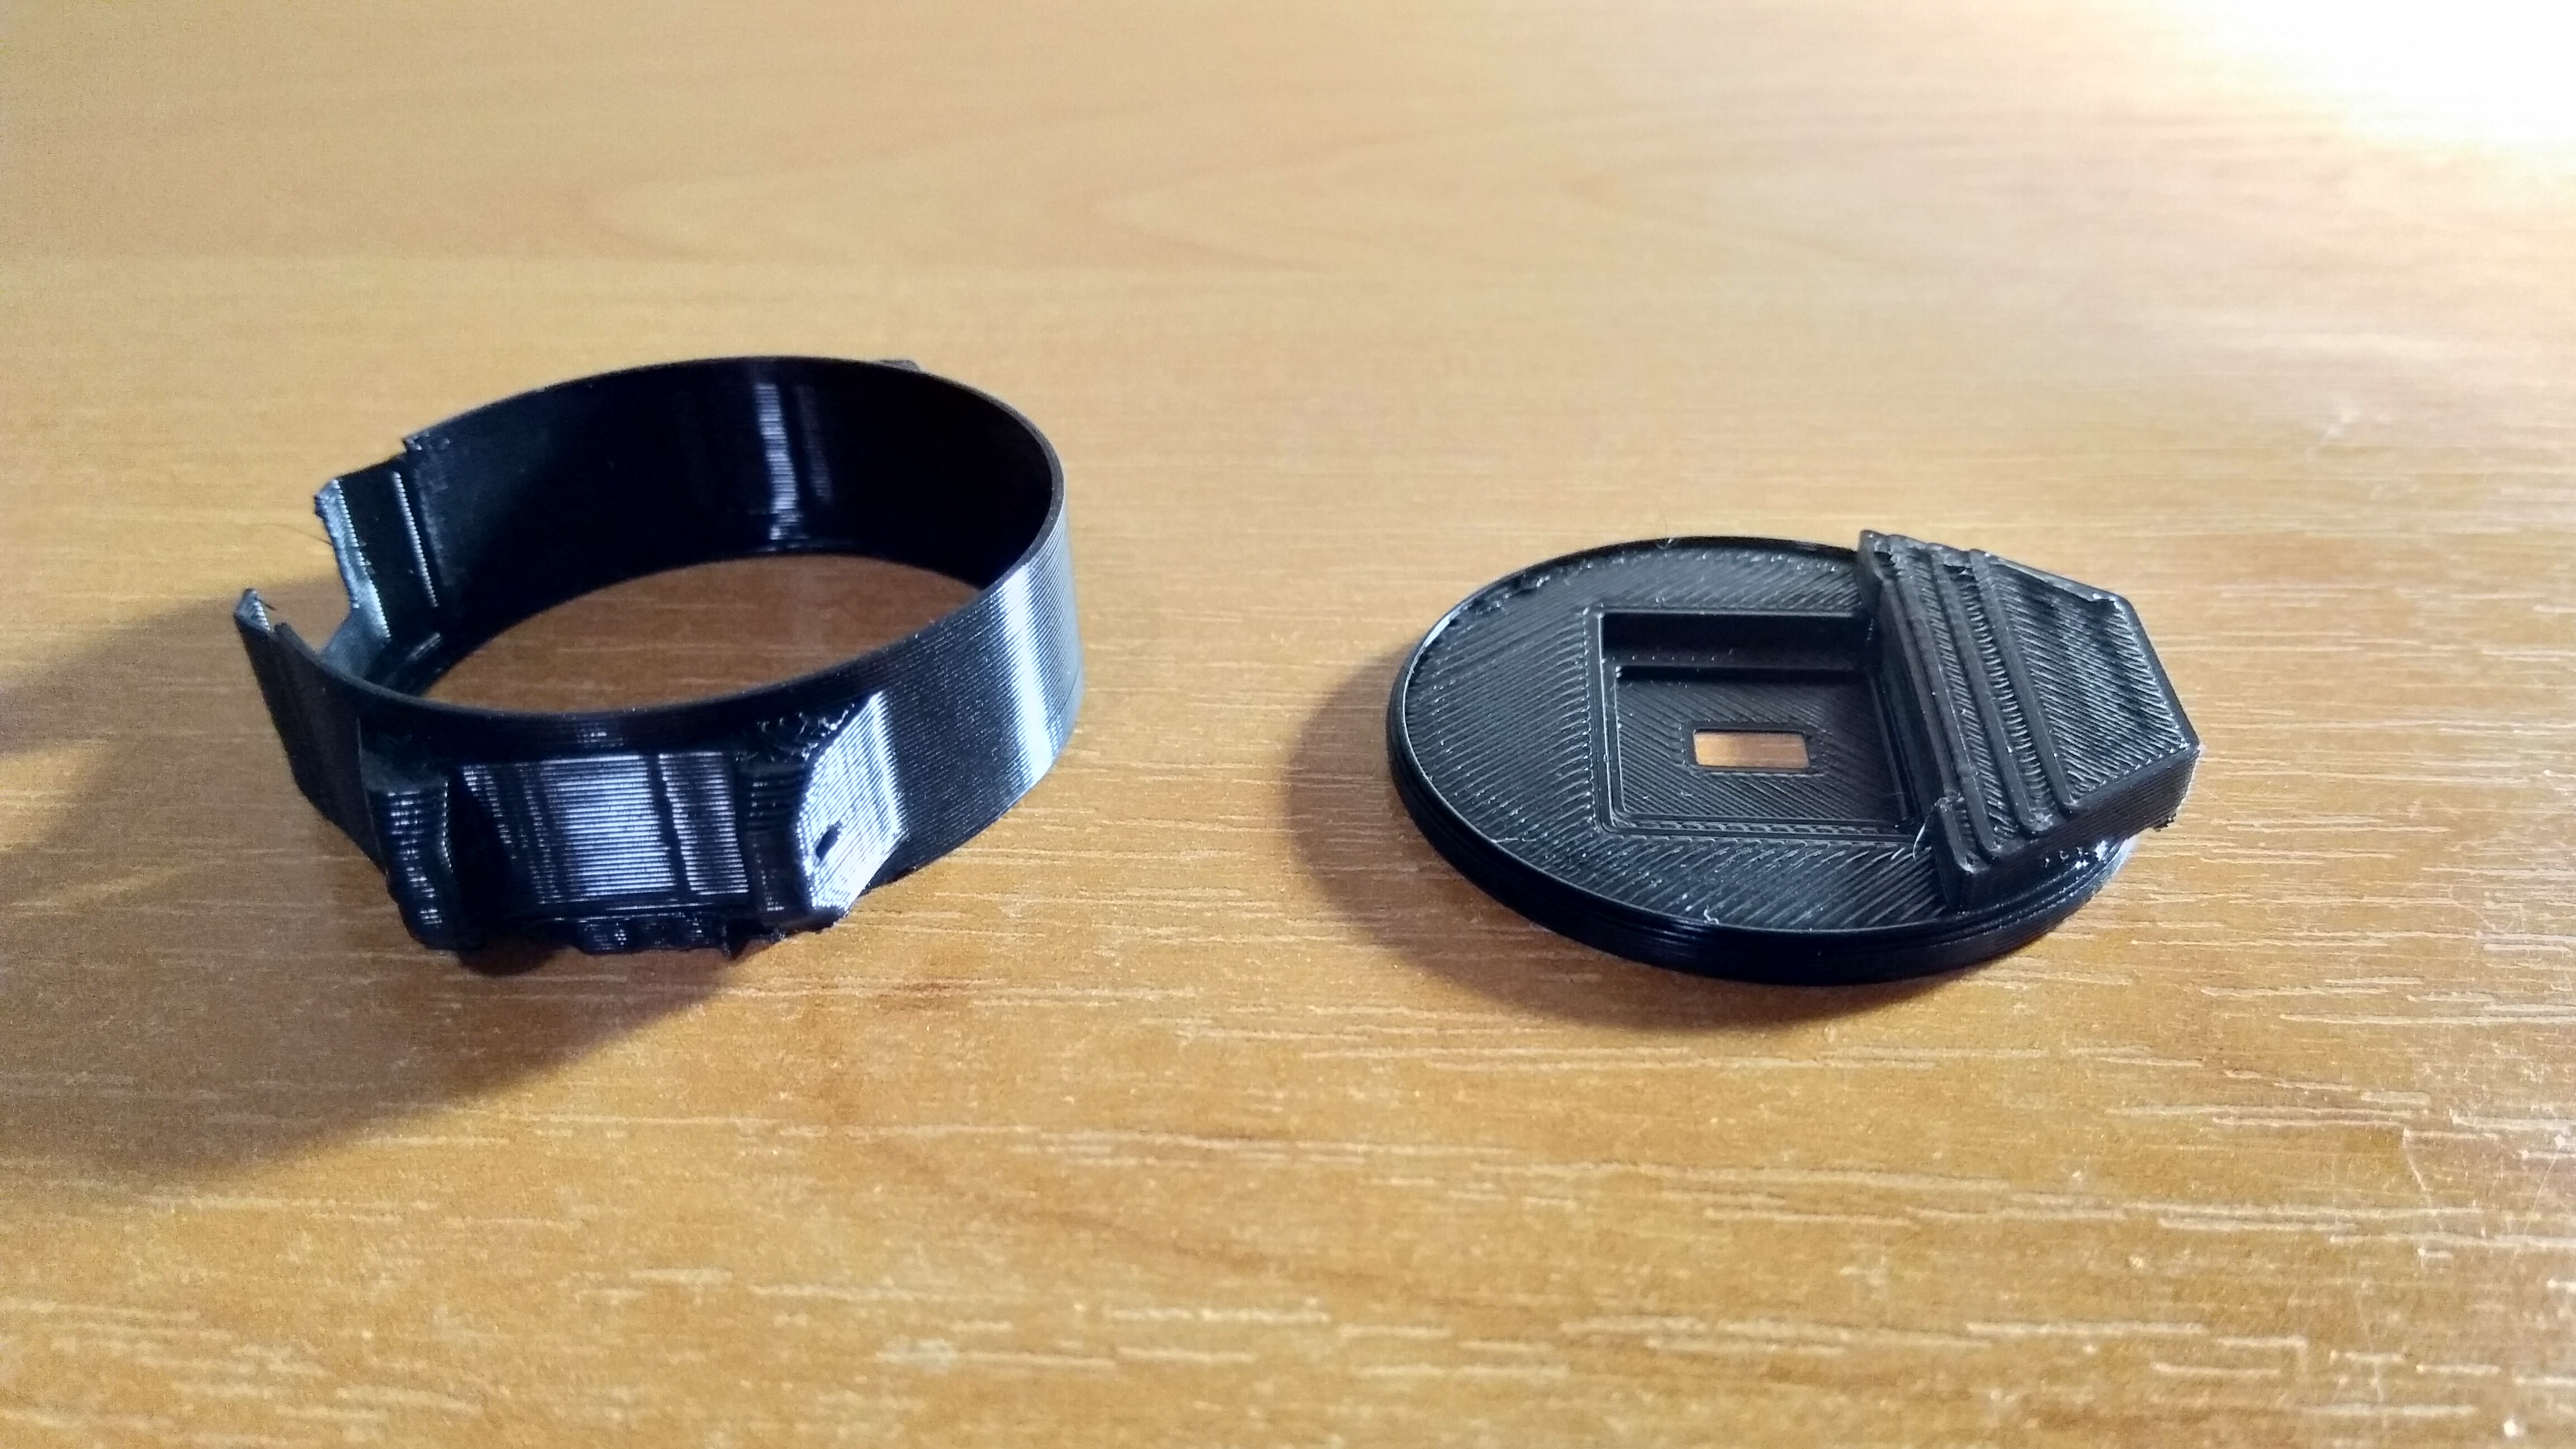
<p>I settled for 3D printed model of my making. It is made of PLA with 0,4 mm nozzle (available at my faculty). Fits very tightly.</p>
<p><img src="/assets/images/postimages/diysmartwatch/3dmodel.png" alt="Case 3D model" /></p>
<p><img src="/assets/images/postimages/diysmartwatch/printed.jpg" alt="Printed" /></p>
<p>At the time of writing the case is too short to fit all cables; this will be repaired as last-minute effort before deadline, the student way.</p>
<h1 id="closing-remarks">Closing remarks</h1>
<p>The case needs some polishing when it comes to housing all the stuff, but overall effect is quite satisfactory for a project done in about one week. Sometimes the MicroPython code crashes, probably something related to pulse oximeter thread, but I had no time to repair it yet. For me this is, first and foremost, a platform to test new ideas and as such it suits its purpose well.</p>
<p><img src="/assets/images/postimages/diysmartwatch/datetime.jpg" alt="Date and time" />
<img src="/assets/images/postimages/diysmartwatch/bpm.jpg" alt="BPM and $SpO_2$" />
<img src="/assets/images/postimages/diysmartwatch/level.jpg" alt="Level bubble" /></p>
<p>Things to do later: install straps, print more precisely, fix buggy code, add more software features, add a way to turn this thing off (shhh!).</p></content>
  <author>
    <name>blamster19</name>
  </author>
  <summary type="html">What is the best assignment project that is easy to do and useful? DIY smartwatch!</summary>
</entry>
<entry>
  <title type="html"> Adding new drive to LUKS encrypted setup</title>
  <link href="https://blamster19.github.io/2023/12/27/adding-luks-drive.html" rel="alternate" type="text/html" title="Setting up Nextcloud on Raspberry Pi 3 Model B"/>
  <published>  2023-12-27 23:59:30 +0200</published>
  <updated>2023-12-27T23:05:30+00:00</updated>
  <id>https://blamster19.github.io/2023/12/27/adding-luks-drive.html</id>
  <content type="html" xml:base="https://blamster19.github.io/2023/12/27/adding-luks-drive.html"><p>After two years of flawless usage of my ThinkPad E15 gen-2 I ran out of space on its default 256 GB SSD drive. For christmas I bought myself a new shiny <a href="https://www.kingston.com/en/ssd/kc3000-nvme-m2-solid-state-drive">1 TB M.2 SSD</a> and appended it to my LVM setup. The setup was:</p>
<pre><code class="language-bash">$ lsblk
NAME                     MAJ:MIN RM   SIZE RO TYPE  MOUNTPOINTS
nvme1n1                  259:0    0 953,9G  0 disk
nvme0n1                  259:1    0 238,5G  0 disk
├─nvme0n1p1              259:2    0   476M  0 part  /boot/efi
├─nvme0n1p2              259:3    0   954M  0 part  /boot
└─nvme0n1p3              259:4    0 237,1G  0 part
  └─nvme0n1p3_crypt      254:0    0 237,1G  0 crypt
    ├─vg--1ThinkPad-swap 254:1    0  27,9G  0 lvm   [SWAP]
    ├─vg--1ThinkPad-root 254:2    0  37,3G  0 lvm   /
    ├─vg--1ThinkPad-var  254:3    0    14G  0 lvm   /var
    ├─vg--1ThinkPad-tmp  254:4    0   1,9G  0 lvm   /tmp
    └─vg--1ThinkPad-home 254:5    0   156G  0 lvm   /home
</code></pre>
<p>I followed <a href="https://unix.stackexchange.com/questions/618877/how-can-i-add-a-new-physical-volume-to-extend-an-existing-luks-encrypted-lvm-vo">this answer on Stack Exchange</a> tailoring it to my needs. After booting up with SSD in place I opened <em>GNOME Disks</em> utility and checked the name and path to my new asset, in my case, <code>/dev/nvme1n1</code> (visible in window titlebar upon selecting the drive). I also ran benchmark to find that the average read rate is 1,8 GB/s and write rate 1,0 GB/s. I also wanted to be able to unlock both drives at once, which I managed to do by using <a href="https://unix.stackexchange.com/questions/392284/using-a-single-passphrase-to-unlock-multiple-encrypted-disks-at-boot">this</a> tip.</p>
<p>I proceeded to execute the following commands based on Stack Exchange:</p>
<pre><code class="language-bash">$ sudo cryptsetup luksFormat /dev/nvme1
$ sudo cryptsetup luksOpen /dev/nvme1
$ sudo -e /etc/crypttab
</code></pre>
<p>in it, I had one line about my old drive. I copied it and changed the name and UUID to match the new drive data like so:</p>
<pre><code>nvme0n1p3_crypt UUID=85c7f21e-b237-4ba6-84c3-11e737968a67 none luks,initramfs,keyscript=decrypt_keyctl
nvme1n1_crypt UUID=81e37db2-a64e-47d6-ace0-b037416712c6 none luks,initramfs,keyscript=decrypt_keyctl
</code></pre>
<p>I took the UUID from the output of <code>$ sudo blkid</code>. The <code>initramfs</code> flag is very important; without it my new partition did not mount and the OS dropped to <em>initramfs</em> on every boot. I had to manually <code>cryptsetup luksOpen</code> it and exit to load into GUI. Solution was inspired by <a href="https://unix.stackexchange.com/questions/643344/linux-mint-20-with-luks-and-lvm-hangs-on-boot-after-upgrade">this problem</a>. Then I did:</p>
<pre><code class="language-bash">$ sudo update-initramfs -c -k all
$ sudo cryptsetup luksOpen /dev/nvme1n1 nvme1n1_crypt
</code></pre>
<p>and entered the new passphrase. Moving on:</p>
<pre><code class="language-bash">$ sudo pvcreate /dev/mapper/nvme1n1_crypt
$ sudo vgs
</code></pre>
<p>This showed me that my volume group is <code>vg-1ThinkPad</code>. Next I executed:</p>
<pre><code class="language-bash">$ sudo vgextend vg-1ThinkPad /dev/mapper/nvme1n1_crypt
</code></pre>
<p>I wanted to create aditional partition for data with very original name <code>data</code> (I will leave moving <code>/home</code> fot another time), so I created and formatted it to ext4:</p>
<pre><code class="language-bash">$ sudo lvcreate -l 100%FREE -n data vg-1ThinkPad /dev/mapper/nvme1n1_crypt
$ sudo mkfs.ext4 /dev/vg-1ThinkPad/data
</code></pre>
<p>Finally I chose a mount point:</p>
<pre><code class="language-bash">$ sudo mkdir /mnt/data
$ sudo mount /dev/vg-1ThinkPad/data /mnt/data/
</code></pre>
<p>and added appropriate line to <code>/etc/fstab</code></p>
<pre><code>/dev/mapper/vg--1ThinkPad-data /mnt/data            ext4    defaults   0    2
</code></pre>
<p>I installed <code>keyutils</code> from <em>apt</em> and updated <code>initramfs</code> again just in case and also run <code>update-grub</code>. And voilà. You have a fresh partition ready to be clogged with data.</p></content>
  <author>
    <name>blamster19</name>
  </author>
  <summary type="html">A not-so-obvious task of extending available space.</summary>
</entry>
<entry>
  <title type="html"> DIY Raspberry Pi ebook reader, part 3 - epaper display</title>
  <link href="https://blamster19.github.io/2023/09/27/rpi-ebook-3.html" rel="alternate" type="text/html" title="Setting up Nextcloud on Raspberry Pi 3 Model B"/>
  <published>  2023-09-27 22:12:40 +0200</published>
  <updated>2023-09-27T20:11:53+00:00</updated>
  <id>https://blamster19.github.io/2023/09/27/rpi-ebook-3.html</id>
  <content type="html" xml:base="https://blamster19.github.io/2023/09/27/rpi-ebook-3.html"><h1 id="not-your-usual-screen">Not your usual screen</h1>
<p>I have to point out that epaper display does not work like normal LCD or OLED display you normally connect to Raspberry Pi. Instead of video driver, it comes with a library full of drawing routines you execute manually, like <code>clear</code>, <code>draw</code>, <code>update</code> and the like.<a href="#fn1" id="ref1"><sup>1</sup></a> This is not the end of differences, though. You have to be more mindful of refresh rate as those heavily impact longevity of a display. Typically you do not want to refresh more often than something like twice a minute, and certainly not every second (Waveshare <a href="https://www.waveshare.com/wiki/7.5inch_e-Paper_HAT_Manual">recommends</a> 180 s). Another important thing to keep in mind is the full refresh cycle which consists of repeated flashes of black and white - it is required to fully clear the image and prevent ghosting, and is tied to how epaper displays work.</p>
<h1 id="trip-to-the-source">Trip to the source</h1>
<p>There is no more fun than to do a knee-deep dive into the inner workings of a program. I want to know how vendor library does what it does in the included demo, and try to replicate the effect. Here is a little breakdown of my excursion.<br />
For starters I cloned <a href="https://github.com/waveshareteam/e-Paper">the repository</a> and explored the directory structure. I am interested in <code>RaspberryPi_JetsonNano/c/</code>, and especially <code>RaspberryPi_JetsonNano/c/examples/EPD_7in5_V2_test.c</code>. The file includes <code>EPD_Test.h</code> and <code>EPD_7in5_V2.h</code>. The latter is located in <code>RaspberryPi_JetsonNano/c/lib/e-Paper/</code>; it consists of width and height <code>#define</code>s and declarations of what seems to be the core functionality. It also includes <code>DEV_Config.h</code>, which declares GPIO pins used by the driver.<br />
I need to know how to communicate with the screen. A quick glance at <code>DEV_Config.c</code> sufficed to find a very interesting part:</p>
<pre><code class="language-c">#ifdef RPI
    EPD_RST_PIN     = 17;
    EPD_DC_PIN      = 25;
    EPD_CS_PIN      = 8;
    EPD_PWR_PIN     = 18;
    EPD_BUSY_PIN    = 24;
</code></pre>
<p>Now I know where to tap into the hardware to send my commands.</p>
<h1 id="inspired-engineering">Inspired engineering</h1>
<p>In terms of commands in question I settled for <a href="https://crates.io/crates/epd-waveshare">epd-waveshare</a> Rust library. I am sure rewriting the whole Waveshare library would be lots of fun, but I have to focus on making the project in finite time. I imported <a href="https://crates.io/crates/linux-embedded-hal">linux-embedded-hal</a> and <a href="https://crates.io/crates/embedded-graphics">embedded-graphics</a> and began writing code.<br />
The first thing I had to do to use the display is to define all pins. I sifted through all example code I could find, and, coupled with the documentation and pinout, I came up with something like this:</p>
<pre><code class="language-rust">let mut spi = Spidev::open(&quot;/dev/spidev0.0&quot;)?;
let options = SpidevOptions::new()
    .bits_per_word(8)
    .max_speed_hz(10_000_000)
    .mode(spidev::SpiModeFlags::SPI_MODE_0)
    .build();
spi.configure(&amp;options).expect(&quot;spi configuration&quot;);

let cs_pin = Pin::new(26);
cs_pin.export().expect(&quot;cs_pin export&quot;);
while !cs_pin.is_exported() {}
cs_pin
    .set_direction(Direction::Out)
    .expect(&quot;cs_pin Direction&quot;);
cs_pin.set_value(1).expect(&quot;cs_pin Value set to 1&quot;);

let busy = Pin::new(24);
busy.export().expect(&quot;busy export&quot;);
while !busy.is_exported() {}
busy.set_direction(Direction::In).expect(&quot;busy Direction&quot;);

let dc = Pin::new(25);
dc.export().expect(&quot;dc export&quot;);
while !dc.is_exported() {}
dc.set_direction(Direction::Out).expect(&quot;dc Direction&quot;);
dc.set_value(1).expect(&quot;dc Value set to 1&quot;);

let rst = Pin::new(17);
rst.export().expect(&quot;rst export&quot;);
while !rst.is_exported() {}
rst.set_direction(Direction::Out).expect(&quot;rst Direction&quot;);
rst.set_value(1).expect(&quot;rst Value set to 1&quot;);

let mut delay = Delay {};

let mut epd = Epd7in5::new(&amp;mut spi, cs_pin, busy, dc, rst, &amp;mut delay)?;
let mut display = Display7in5::default();
</code></pre>
<p>Which is not basically the code copied from the examples. Yeah, totally. <a href="https://www.waveshare.com/wiki/7.5inch_e-Paper_HAT_Manual">The wiki</a> thankfully lists all the pins - I made sure to read the BCM2835 column and confirmed that indeed my HAT and HATs in the examples use the same pins.<br />
To make something happen I invoke:</p>
<pre><code class="language-rust">epd.wake_up(&amp;mut spi, &amp;mut delay)?;
</code></pre>
<p>then I render blank screen:</p>
<pre><code class="language-rust">epd.clear_frame(&amp;mut spi, &amp;mut delay)?;
epd.display_frame(&amp;mut spi, &amp;mut delay)?;
</code></pre>
<p>Cool. Now I want to see something on the screen. I do the most basic thing I could possibly imagine - draw a line:</p>
<pre><code class="language-rust">let _ = Line::new(Point::new(0, 120), Point::new(0, 295))
    .into_styled(PrimitiveStyle::with_stroke(Black, 1))
    .draw(&amp;mut display);
</code></pre>
<p>and update:</p>
<pre><code class="language-rust">epd.update_frame(&amp;mut spi, &amp;display.buffer(), &amp;mut delay)?;
epd.display_frame(&amp;mut spi, &amp;mut delay)?;
</code></pre>
<p>and, after exhausting day, I sleep:</p>
<pre><code class="language-rust">epd.sleep(&amp;mut spi, &amp;mut delay)?;
</code></pre>
<p>I tried to replicate the overall structure of examples from Waveshare, especially the explicit sleep-wake up commands. This is where I did a test. I connected the HAT to Raspberry Pi, display to the HAT, and <code>scp</code>&#x27;d my hot fresh binary.</p>
<h1 id="troubles">Troubles</h1>
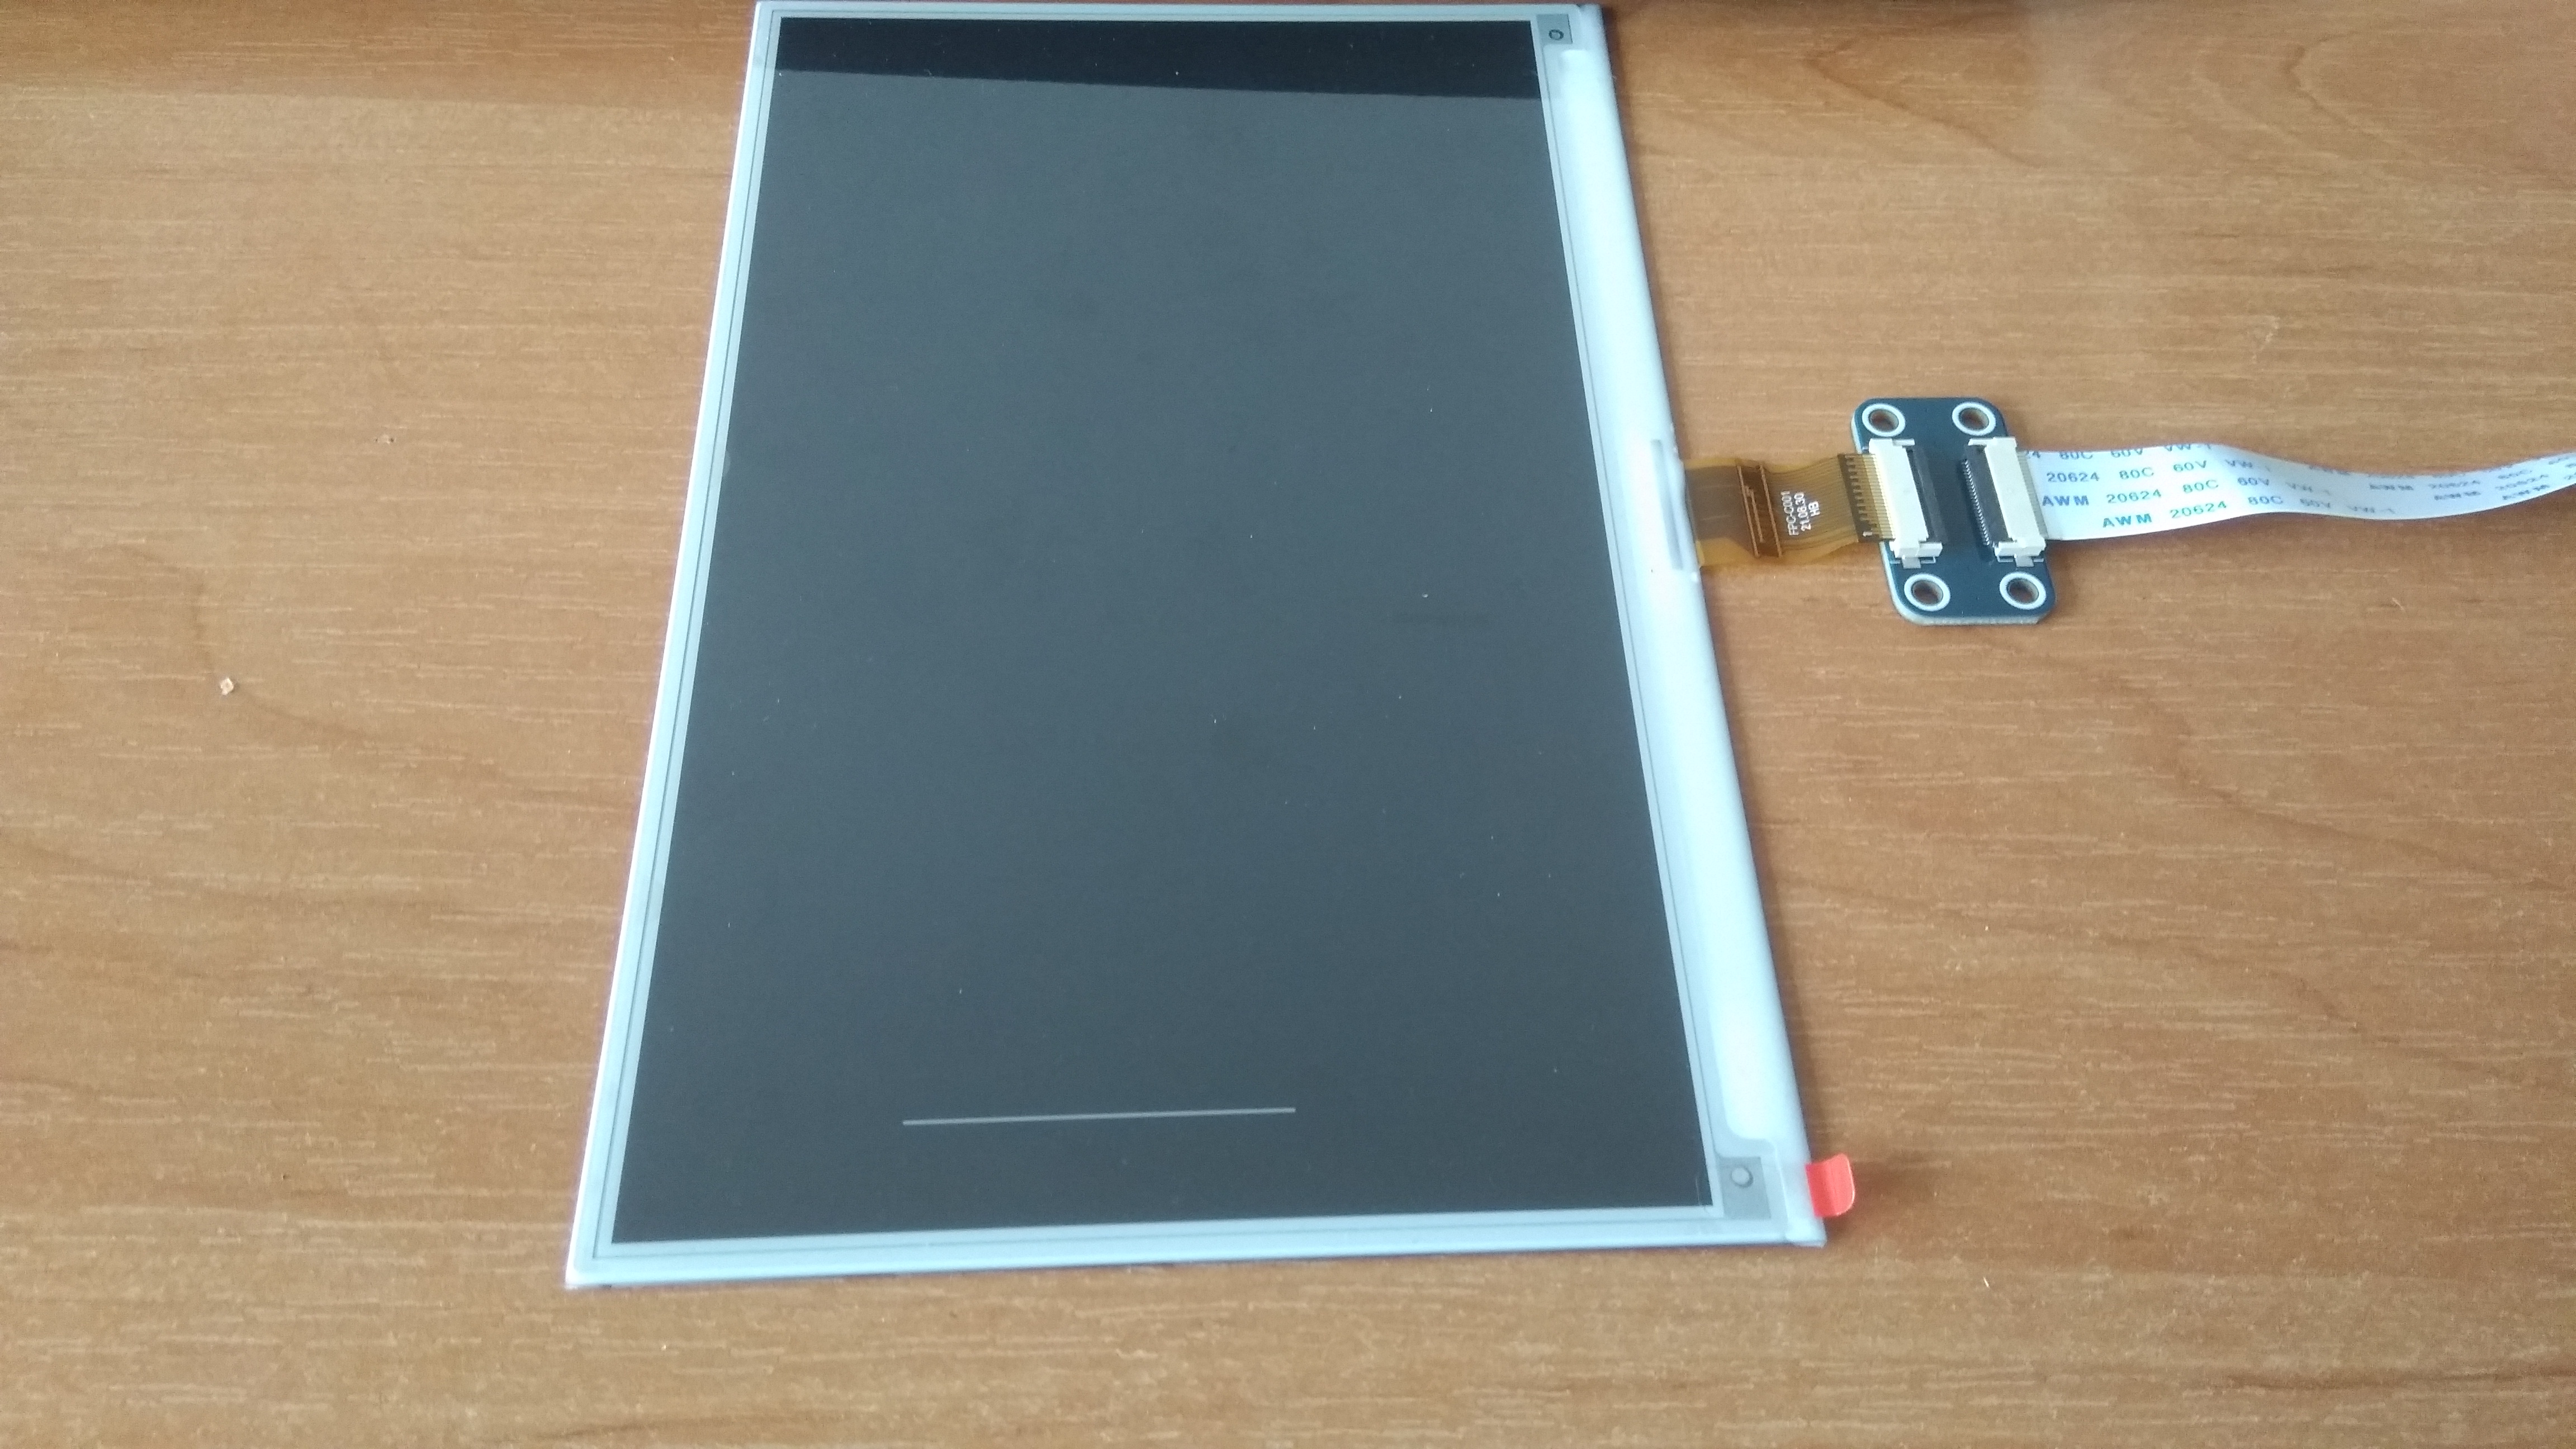
<p>The process stopped at wake up call. After a while, the display went through flickering refresh twice, then stopped at <code>update_frame</code>. Another moment passed before the display flickered, painted white line on black background and the program exited. When I commented out <code>wake_up</code>, the proces got stuck on <code>clear_frame</code> and everything else was as before.<br />
It looks like the communication between Pi and screen is horribly slow. Besides that, I thought the colors would be inverted (black line on white background). I had to make more digging.<br />
<img src="/assets/images/postimages/rpiebook/invertedlinecolors.jpg" alt="colors are inverted" />
The issue with horrendous delay appears to be <a href="https://github.com/caemor/epd-waveshare/issues/34">a known thing</a>, the same with <a href="https://github.com/caemor/epd-waveshare/issues/70">inverted colors</a>. Well, at least I know where the problem lies. After some more time spent on GitHub I found <a href="https://github.com/caemor/epd-waveshare/pull/141">this</a>, which intrigued me very much. This fix sends data blocks instead of sending data bit by bit. Maybe the answer was right before my eyes. I instructed Cargo to download crate from commit <em>97425d5</em> and made necessary changes in my code to reflect changes to the interface. I compiled and ran the code only to see almost the same thing. The screen does not show the line (although the background is white, so that is a partial win), but has no delay on <code>update_frame</code>. The delay on <code>clear_frame</code> persists and lasts about 30 seconds.<br />
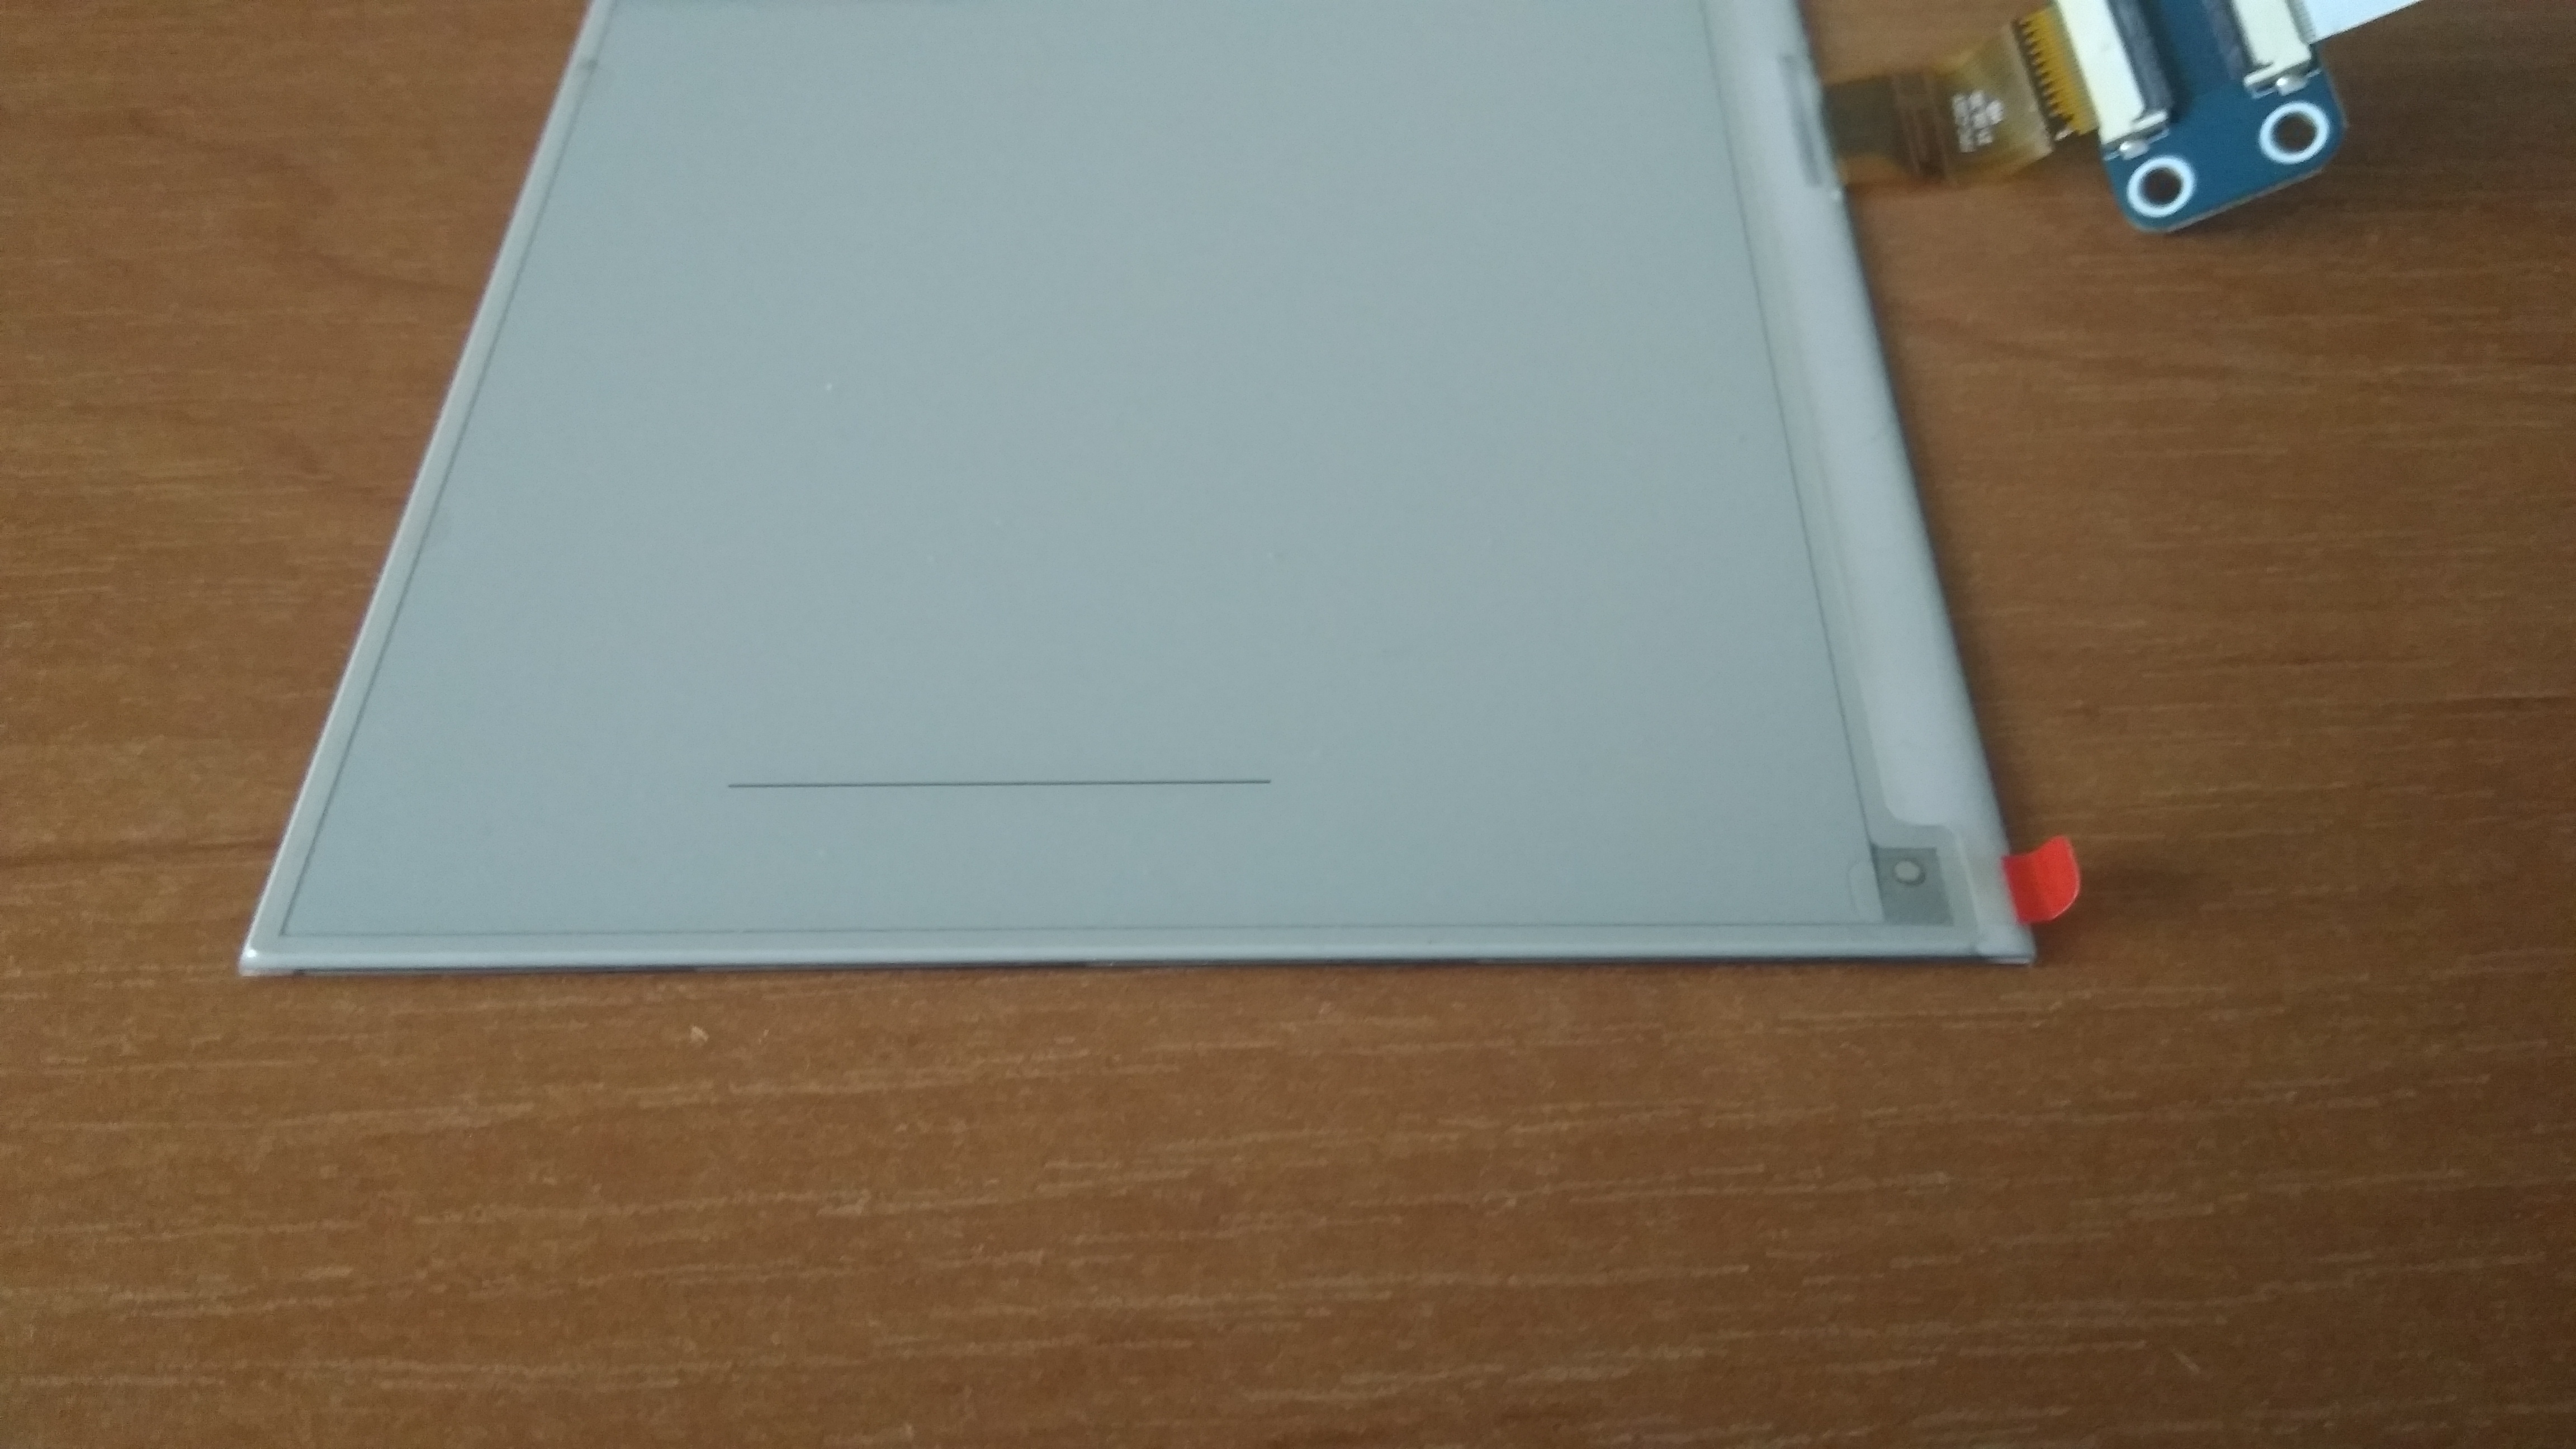
Then I found the culprit when it comes to the line not showing up. I deduced it might have something to do with the color problem not being really solved and boy, was I right. The colors are still messed up in a sense that the background works ok, but I was drawing white line on white background. After changing <code>Black</code> in <code>.into_styled(PrimitiveStyle::with_stroke(Color::Black, 1))</code> to <code>White</code>, a black line shows up on a white background.<br />
<img src="/assets/images/postimages/rpiebook/lineonepaper.jpg" alt="now it is good" />
The next day I figured what was taking so long - it was <code>clear_frame</code> command. The <code>update_frame</code> and <code>display_frame</code> work fine. Also, the <code>display_frame</code> after <code>clear_frame</code> is redundant. Leaving the problem for the next day works wonders! Although I found the culprit, it did not really solve my problem. Clearing frame is essential, but is exceptionally slow, unacceptably so.</p>
<h1 id="words">Words</h1>
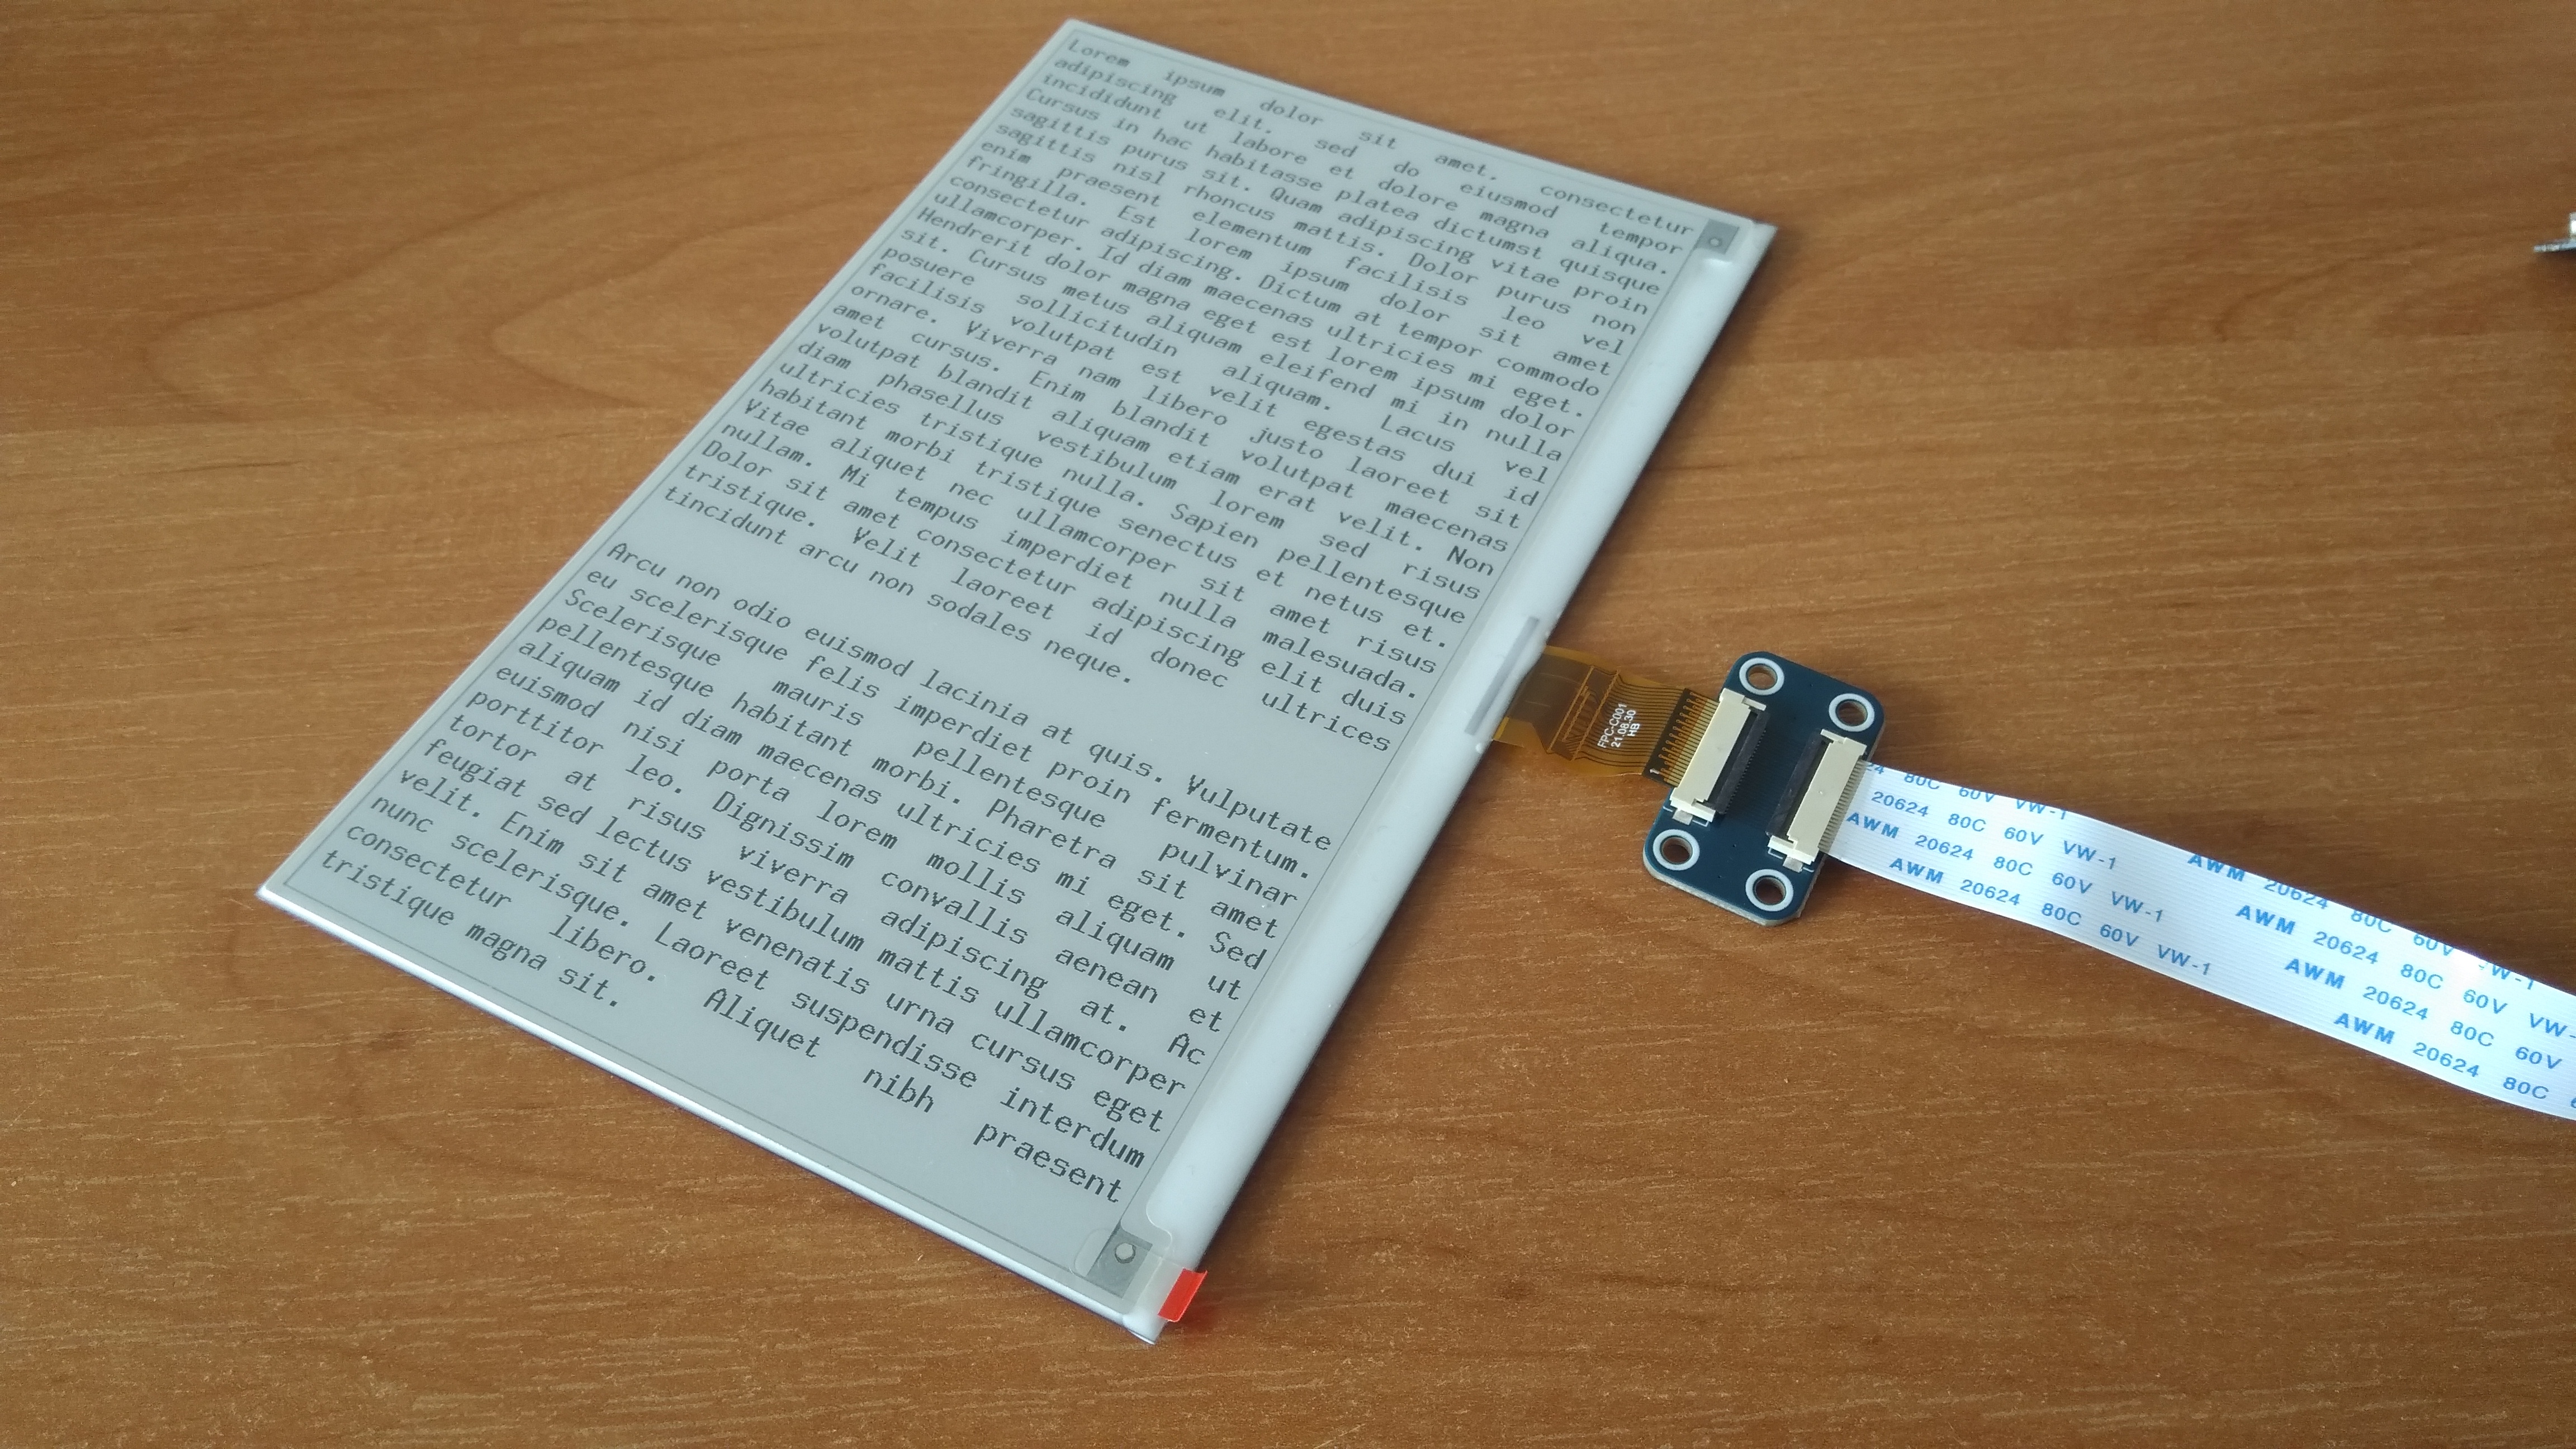
<p>Rendering graphics seems to be working fine, so this was time to test the essential part of ebook reader - text display. Text generated by the <em>embedded-graphics</em>, however, is fitted in just one and can go beyond the display. From now on I will be using <a href="https://crates.io/crates/embedded_text"><em>embedded-text</em></a> crate instead of <em>embedded-graphics</em> text utilities because it offers textboxes with wrappable text out of the box.<br />
I had to use version 0.5.0 because newer version conflicts with version 0.7.0 of <em>embedded-graphics</em> which I have to use because of many errors I get when using it with <em>epd-waveshare</em>. The compiler gives me a warning about some code that will be deprecated in future releases of Rust, but I do not care about it at the moment, I want something that works just now.
By the documentation, I create a text variable holding some text (Lorem ipsum in my case), and then paste the magical lines:</p>
<pre><code class="language-rust">let text = &quot;Lorem ipsum...&quot;;
let character_style = MonoTextStyle::new(&amp;FONT_10X20, Color::White);
let textbox_style = TextBoxStyleBuilder::new()
    .height_mode(HeightMode::FitToText)
    .alignment(HorizontalAlignment::Justified)
    .paragraph_spacing(6)
    .build();
let bounds = Rectangle::new(Point::zero(), Size::new(480, 0));
let text_box = TextBox::with_textbox_style(text, bounds, character_style, textbox_style);
let _ = text_box.draw(&amp;mut display).unwrap();
</code></pre>
<p>The above code feels pretty self-descriptive, but I will write an overview anyway: <code>character_style</code> declares the font size and color of pixels of text; <code>textbox_style</code> sets preferences - how to fit the text in a textbox, how to align it and the paragraph spacing; <code>bounds</code> is a bounding box of the textbox - height 0 works because I<a href="#fn2" id="ref2"><sup>2</sup></a> set a <code>FitToText</code> mode, meaning the textbox will vary its height to the contents; <code>text_box</code> is the thing I will actually pass to the display in the next line.
<img src="/assets/images/postimages/rpiebook/loremipsum.jpg" alt="Lorem ipsum" />
This works like a charm. To make the text more book-like, I changed <code>Justified</code> to <code>Left</code>. Unfortunaely, <em>embedded-graphics</em> does not provide any variable-width fonts. Fortunately, I discovered <a href="https://crates.io/crates/u8g2-fonts"><em>u8g2-fonts</em></a> crate, which supports non-monospace fonts in embedded environments. I spent too long figuring out how to use these two together, so without bothering you with a relation of my frantic journey, I will just show you how I did the thing.<br />
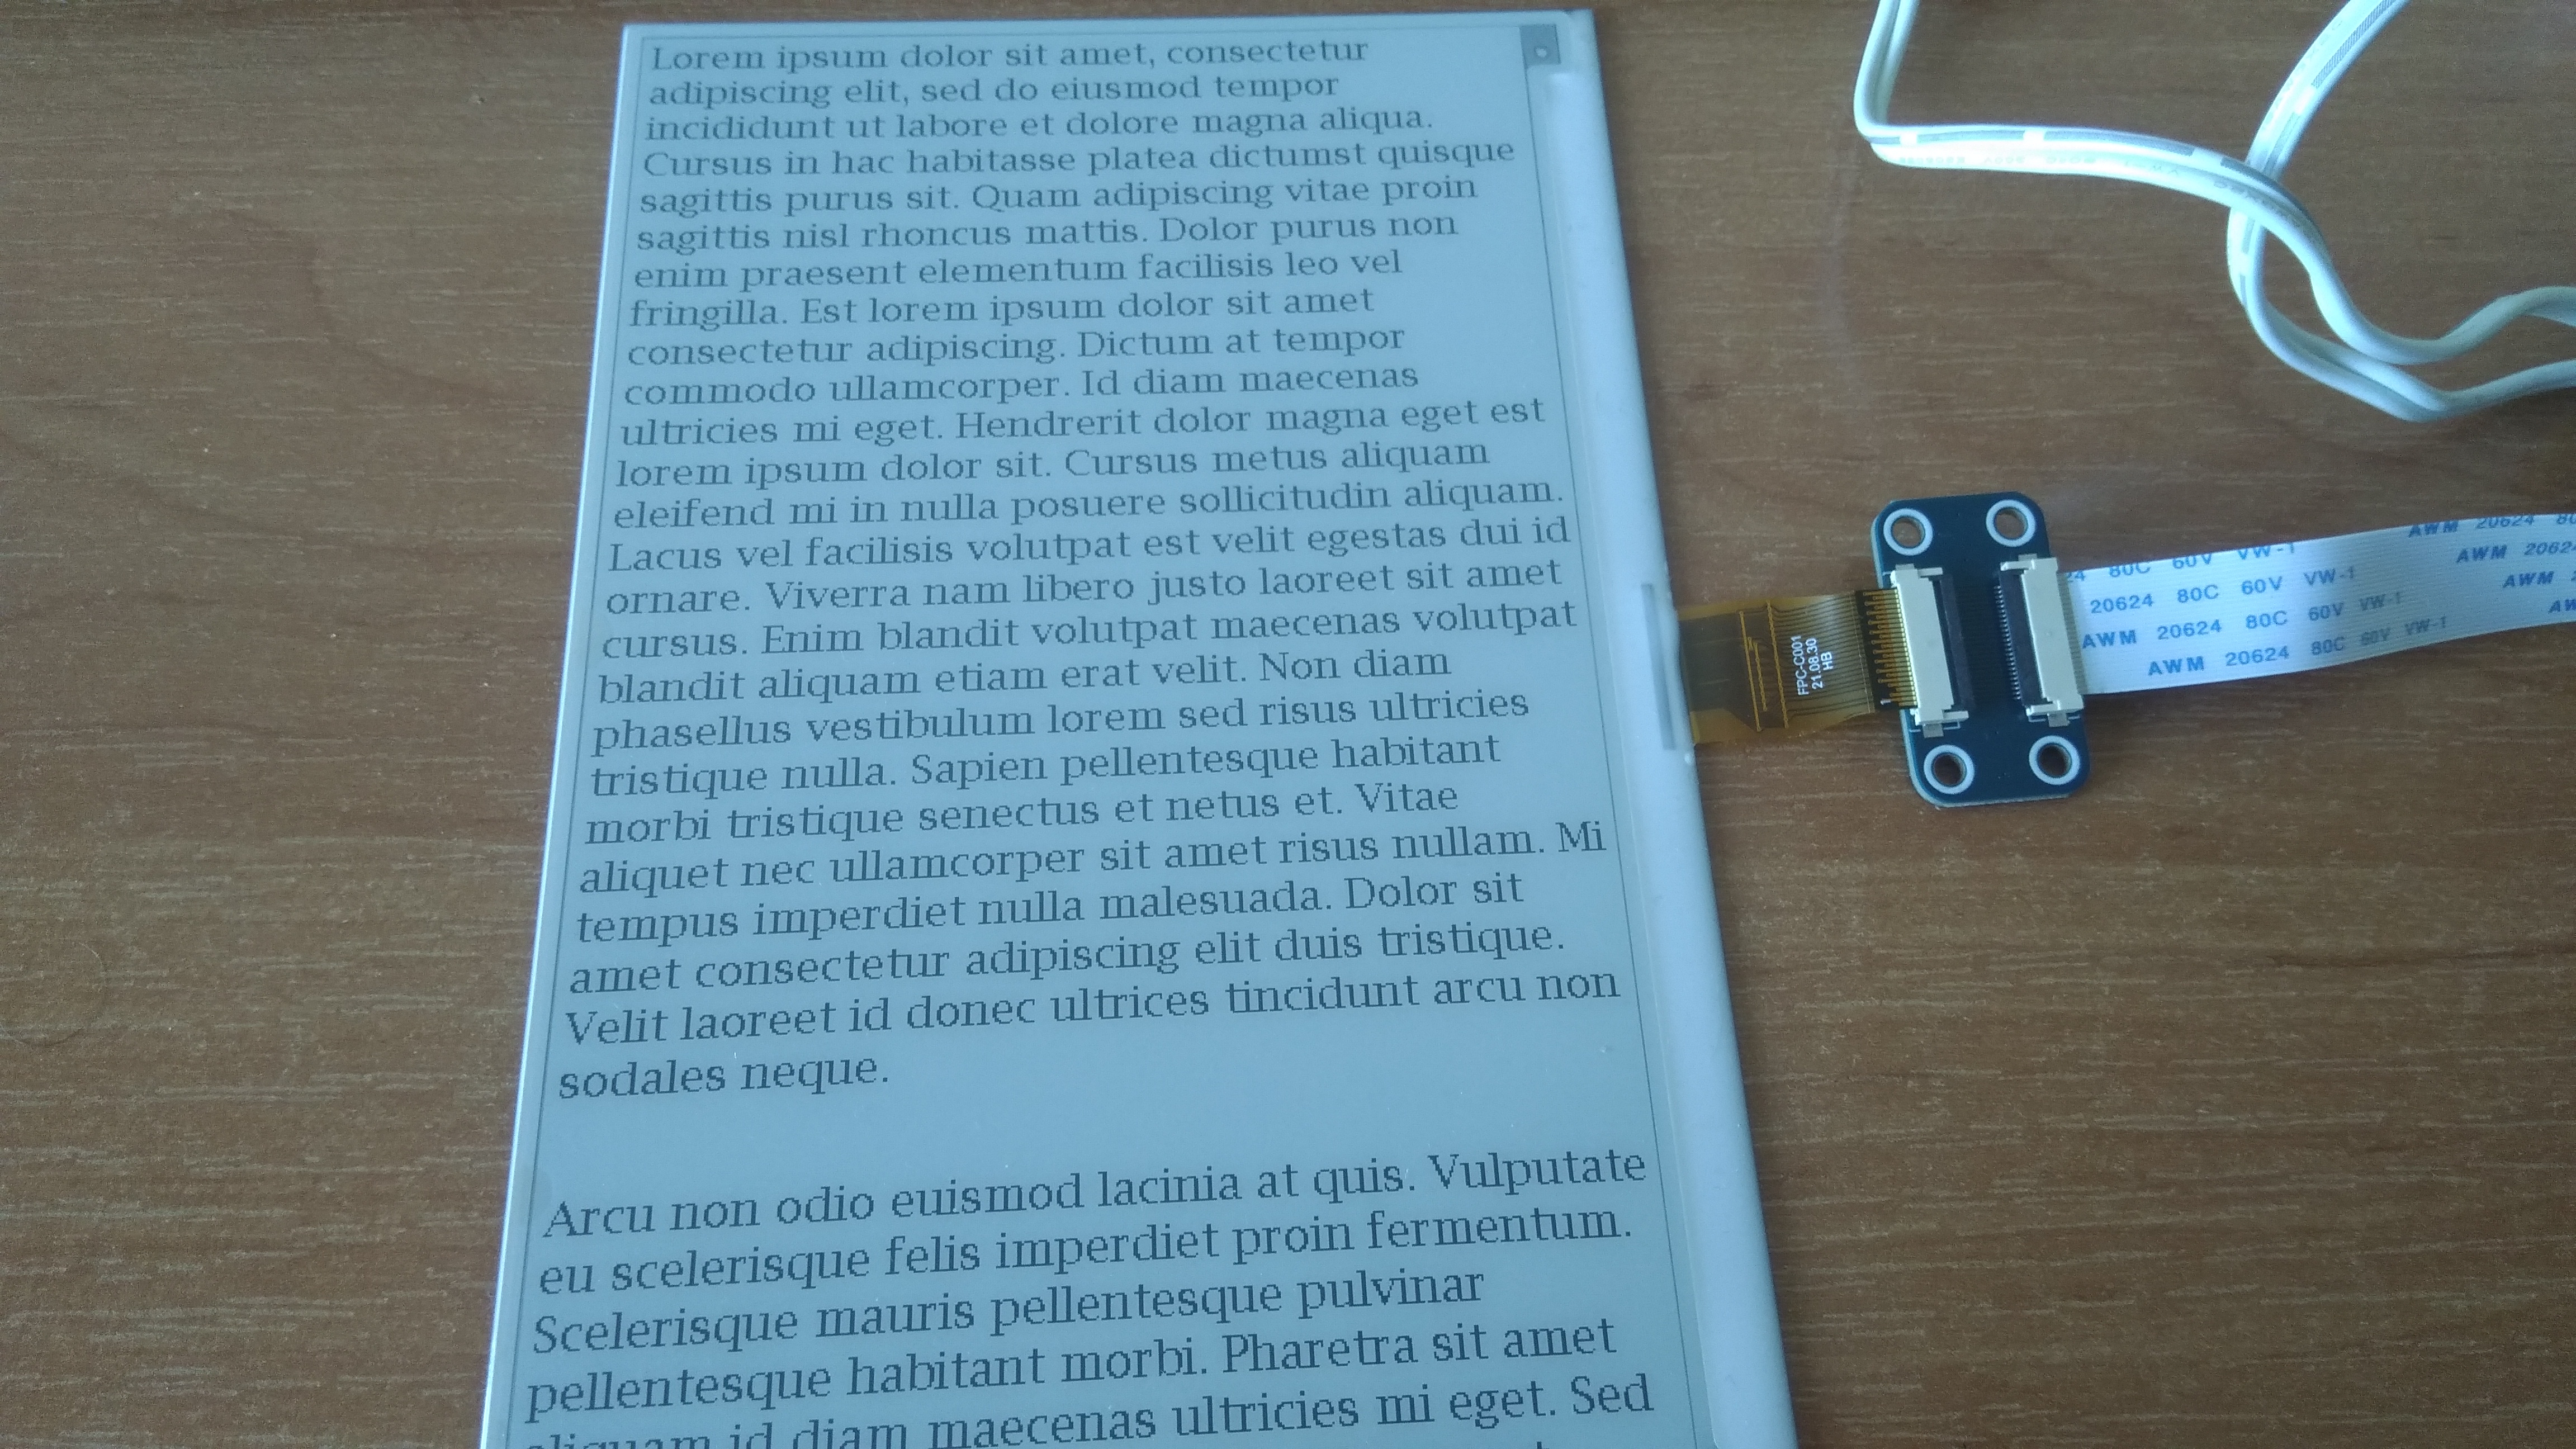
I imported <em>u8g2_fonts</em> with <code>u8g2-fonts = { version = &quot;0.2.0&quot;, features = [&quot;embedded_graphics_textstyle&quot;] }</code> in <code>Cargo.toml</code> - Version 0.2.0 works for me, whereas newer version does not; the feature I am enabling is needed to allow the use of <code>U8g2TextStyle</code> <em>embedded-graphics</em> compatibility layer. The modification of previous code is as follows:</p>
<pre><code class="language-rust">let font = u8g2_fonts::fonts::u8g2_font_lubR14_tf;
let character_style = u8g2_fonts::U8g2TextStyle::new(font, Color::White);
let text_box = TextBox::with_textbox_style(text, bounds, character_style, textbox_style);
let _ = text_box.draw(&amp;mut display).unwrap();
</code></pre>
<p>In a nutshell, I swapped <code>character_style</code> to one from <em>8ug2-fonts</em>. I used the <code>u8g2_font_lubR14_tf</code> font because it looks very non-monospace&#x27;y for the sake of presentation.
<img src="/assets/images/postimages/rpiebook/vwfont.jpg" alt="Variable-width font" />
Text display - check!</p>
<h1 id="what-next">What next</h1>
<p>I know how to control the display, which is a huge step forward in my journey towards DIY ebook reader. For the next part I am planning to master the button input and maybe do some battery-level-dependent behavior. I am leaving the screen clearing problem for another day.</p>
<h1 id="footnotes">Footnotes</h1>
<p><br /><a id="fn1" href="#ref1"><sup>1</sup></a> Yes I am aware that at some level every video driver offers these things; what I wanted to say is that by default you cannot use it like normal screen and, say, install a DE and use it like normal *nix desktop.
<br /><a id="fn2" href="#ref2"><sup>2</sup></a> Or the documentation actually</p></content>
  <author>
    <name>blamster19</name>
  </author>
  <summary type="html">Epaper display is not your usual screen. In this part I will learn how to tame it.</summary>
</entry>
<entry>
  <title type="html"> DIY Raspberry Pi ebook reader, part 2 - setting things up</title>
  <link href="https://blamster19.github.io/2023/09/13/rpi-ebook-2.html" rel="alternate" type="text/html" title="Setting up Nextcloud on Raspberry Pi 3 Model B"/>
  <published>  2023-09-13 22:38:05 +0200</published>
  <updated>2023-09-13T20:38:18+00:00</updated>
  <id>https://blamster19.github.io/2023/09/13/rpi-ebook-2.html</id>
  <content type="html" xml:base="https://blamster19.github.io/2023/09/13/rpi-ebook-2.html"><h1 id="body-and-mind">Body and mind</h1>
<p>Since I have now acquired all the hardware I wanted, I can learn to use it and make something great. Before I delve into designing interface, I must first install required software and check the physical layer for any issues.</p>
<h1 id="prepping-raspberry-pi">Prepping Raspberry Pi</h1>
<p><a href="https://www.raspberrypi.com/products/raspberry-pi-zero-w/">Raspberry Pi Zero W</a> is an SBC which supports full operating systems, in contrast to other popular hobbyist platform Arduino. The usual way of doing things is to install <a href="https://www.raspberrypi.com/software/">Raspberry Pi OS</a> (formerly Raspbian; I liked that name better, shame they changed that), an official dedicated Debian GNU/Linux based distro with a wealth of programs available in its repository. This is an excellent choice for people who do not wish to spend hours fiddling with stuff and who do not care about conserving resources to the extreme while sacrificing their sanity. Obviously this is not me, so I started looking for other things to put in my Pi.<br />
The first thing to come to my mind was BSD. This family of OSes is not exactly known to be the first choice for Raspberry Pi, and I have never actually encountered a project using one. I have never used BSD before, so I was thrilled by the prospect of learning alien system in, I believe, quite niche setup. But then I began to worry about driver support - I have custom hardware to connect, and vendor libraries are mostly written with Linux in mind. The last straw was a table in <a href="https://wiki.freebsd.org/arm/Raspberry%20Pi">wiki</a> which claims that the WiFi in Zero W is unsupported.<br />
Going back to the Linux world, I still did not give up on using something different than <del>Raspbian</del> Raspberry Pi OS. Looking for other options I stumbled across <a href="https://archlinuxarm.org/">Arch Linux ARM</a>. I have never really used Arch before, so the feeling was similar as before. However, doubts started to arise - am I ready to take up all those hardships of learning different distro, hardware control and electronics all at once? Debian-based distros are familiar to me, so at least if matters go haywire I am not stuck fighting with a system, especially package manager.<br />
Defeated, I started seeking <del>Raspbian</del> Raspberry Pi OS derivatives that are not Raspberry Pi OS. From my earlier days of Raspberry Pi experiments I remembered <a href="https://dietpi.com/">DietPi</a>, a lightweight spin on <del>Rasp</del> Raspberry Pi OS with an optimized set of programs. I decided to give it a go, because it scratches that minimalist itch of mine.<br />
The whole process of configuration is unremarkable. I flashed the SD card and edited the <code>diepi.txt</code> and <code>dietpi-wifi.txt</code> files to connect the Pi to the Internet on first boot, just as <a href="https://dietpi.com/docs/install/">instruction</a> told me to. I then put the card in and proceeded to sweep the network in search of the device, so that I can connect through SSH and perform headless install. This process took longer than anticipated, because In my impatience I aborted the process several times thinking I missed something in the config. When I finally found the address, I connected and changed the passwords and such.</p>
<h1 id="environment">Environment</h1>
<p>Now that I had a working platform, I could start thinking about the software stuff.<br />
In terms of my language of choice, I picked Rust - my new favorite toy in programming. Rust is well suited for embedded programming, and work with its package manager Cargo is a breeze.<br />
In terms of gathering drivers and libraries, I began with epaper display. According to the <a href="https://www.waveshare.com/wiki/7.5inch_e-Paper_HAT_Manual#Working_With_Raspberry_Pi">wiki</a> I had to enable SPI interface, which is hidden in <code>Advanced Options</code> of <code>dietpi-config</code>. Then I installed <a href="https://www.airspayce.com/mikem/bcm2835/">bcm2835 library</a> used by Waveshare&#x27;s <a href="https://github.com/waveshareteam/e-Paper">demo code</a>, which I might later cannibalize for screen control.<br />
Button SHIM comes with a Python library. I refuse to use Python outside scientific work, and especially in low-level applications, so I started looking for Rust alternatives. I found something <a href="https://github.com/mzyy94/buttonshim">just for this purpose</a> and thus looked no further.<br />
To use the UPS HAT I just had to enable I<sup>2</sup>C interface.</p>
<h1 id="testing-hardware">Testing hardware</h1>
<h2>Display</h2>
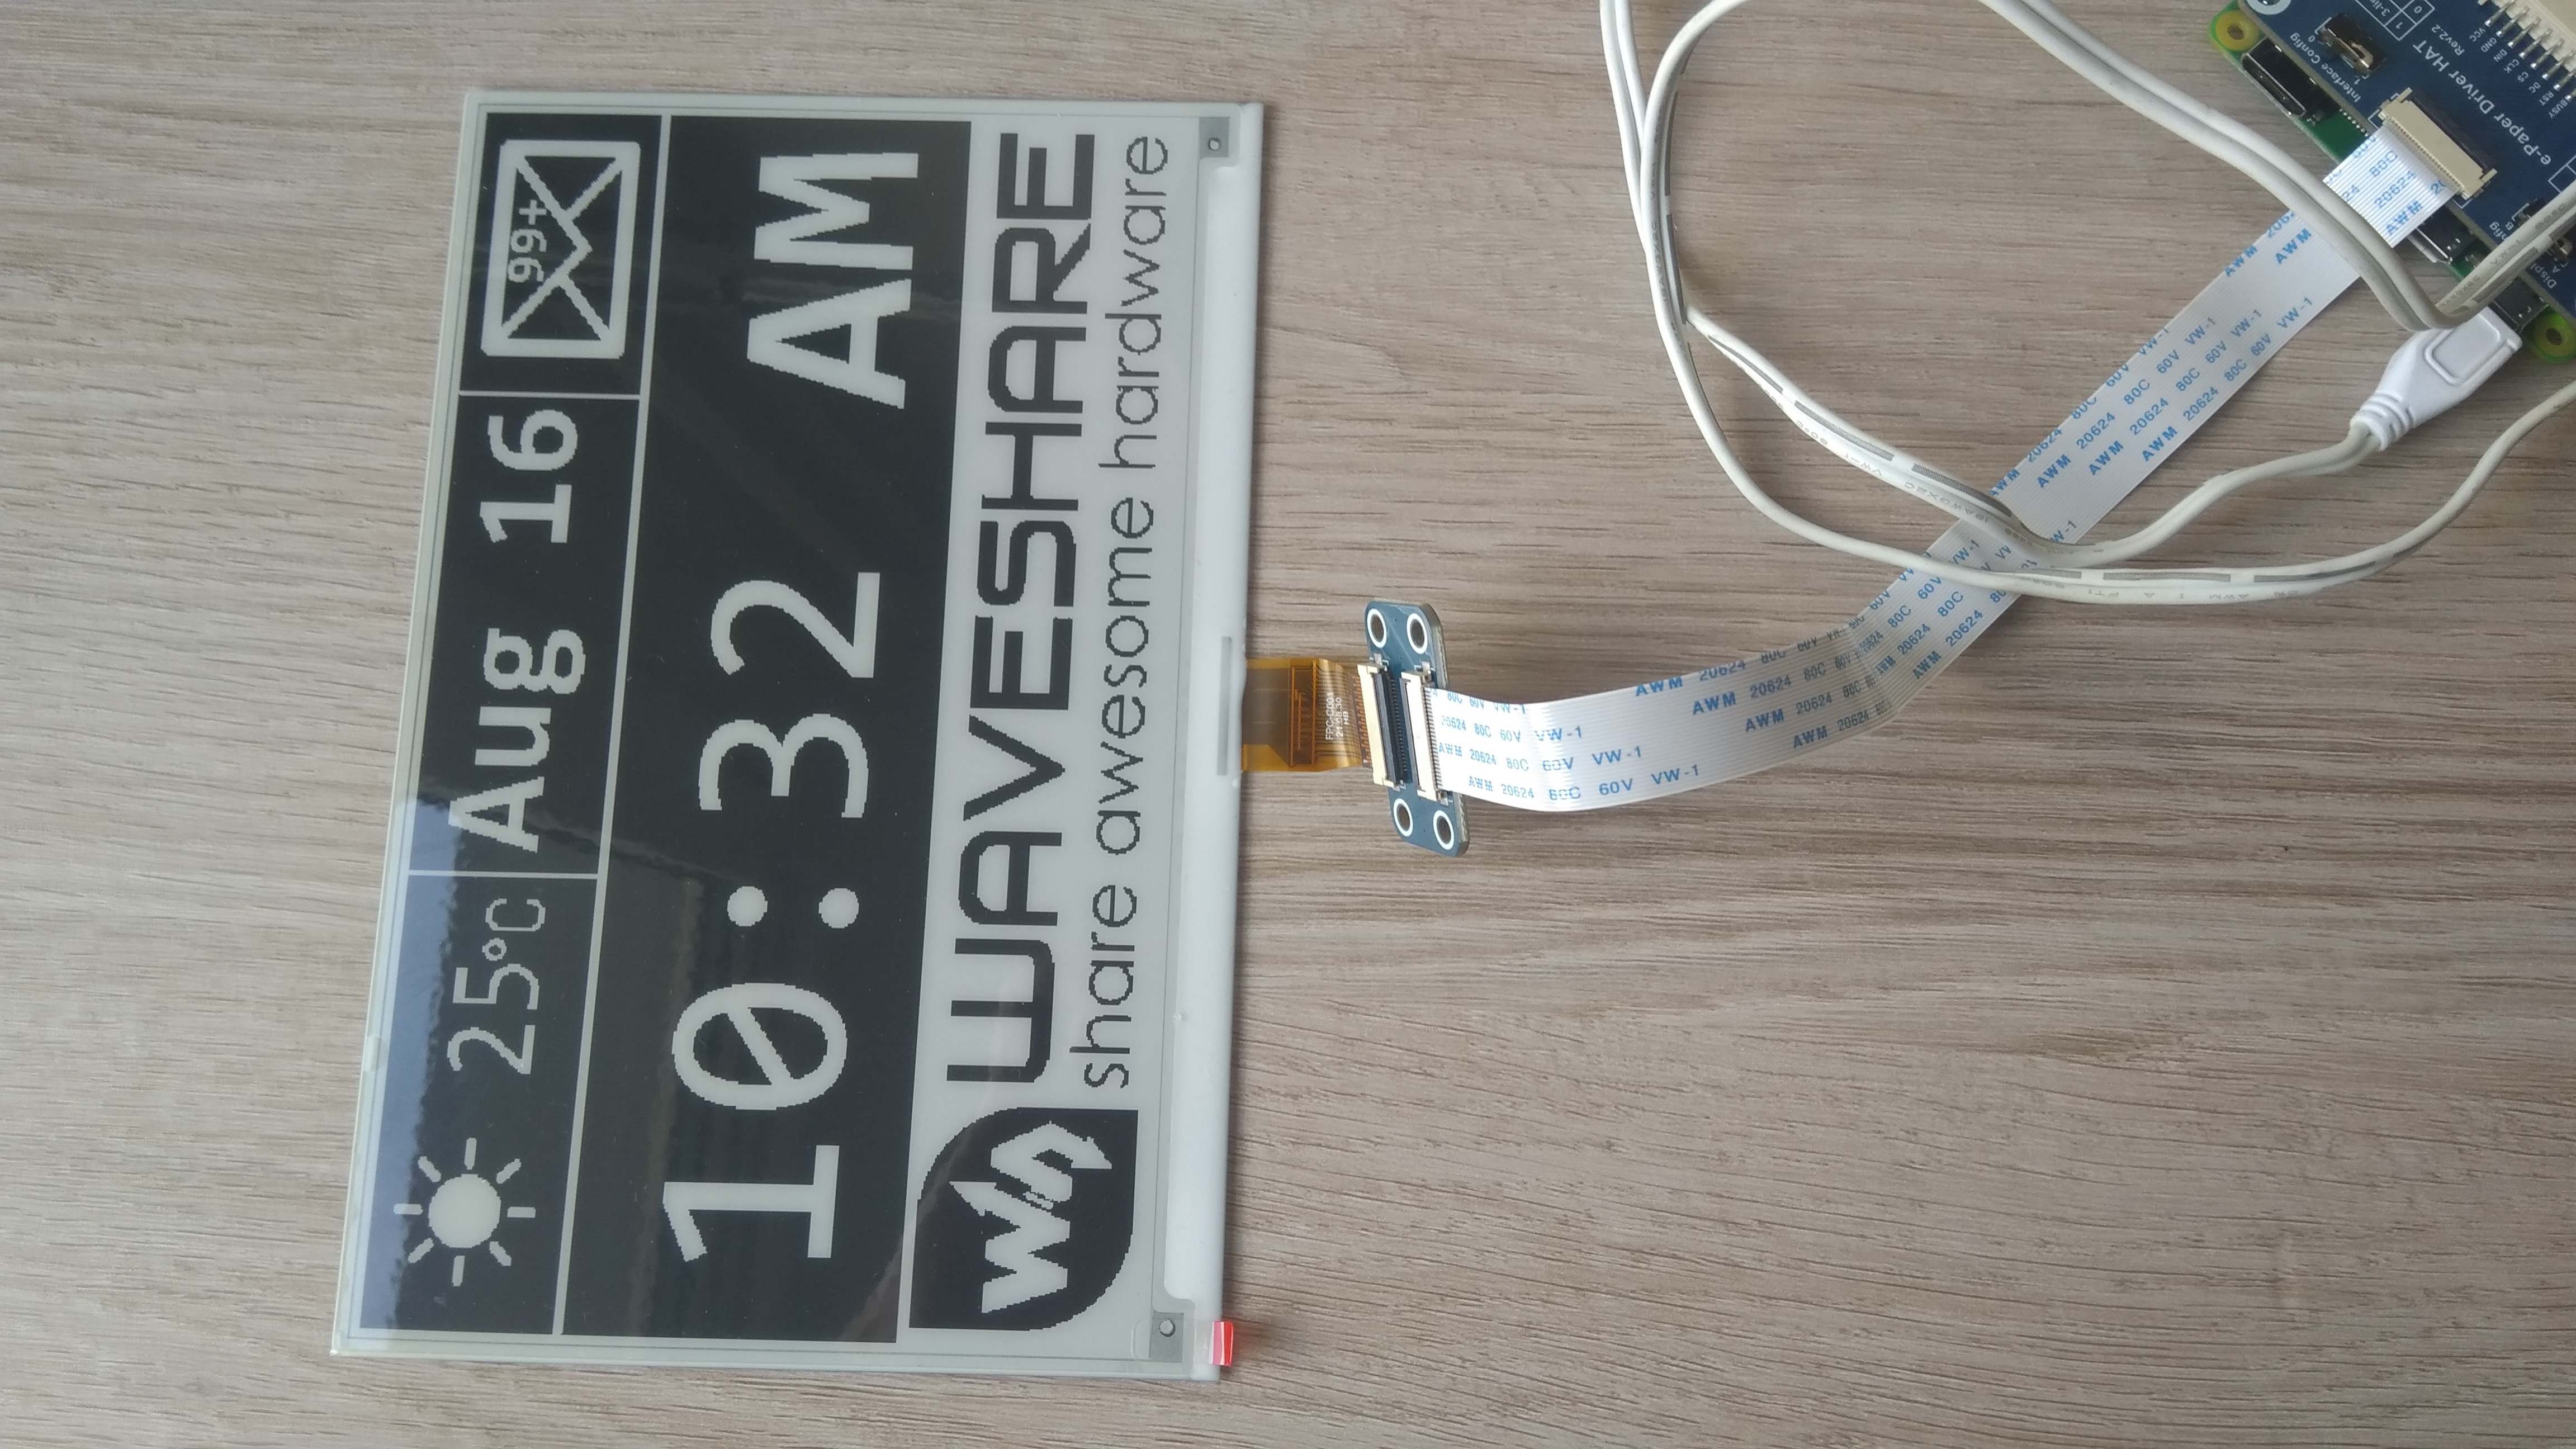
<p>The first component I wanted to test was the epaper display. Thera are two ways of connecting it to the main board: the first and arguably the easiest is to put a HAT on Raspberry Pi, the more challenging way is to use the 8PIN cable that comes with the screen and manually plug in the cables onto header. For the purpose of checking if things are working all right I went the HAT way, because I do not want to risk frying the screen just yet. I connected the flat cables between boards and display and was ready to go.<br />
The demo code I downloaded from Waveshare&#x27;s site is a bit messy, but as they stated somewhere in the files, that is because the library is written for all models they sell and writing redundant code would be pointless. Instead, provided Makefile composes the right demo for chosen display model during compilation. Per included readme, I executed:</p>
<pre><code># make EPD=epd7in5V2
</code></pre>
<p>Make created <code>epd</code> executable in the working directory. When I ran it (with root), the display started flashing black and white and spat out different test pictures. I was quite impressed and satisfied with what I saw.
<img src="/assets/images/postimages/rpiebook/workingepaper.jpg" alt="working epaper display" />
Epaper display - check!</p>
<h2>UPS</h2>
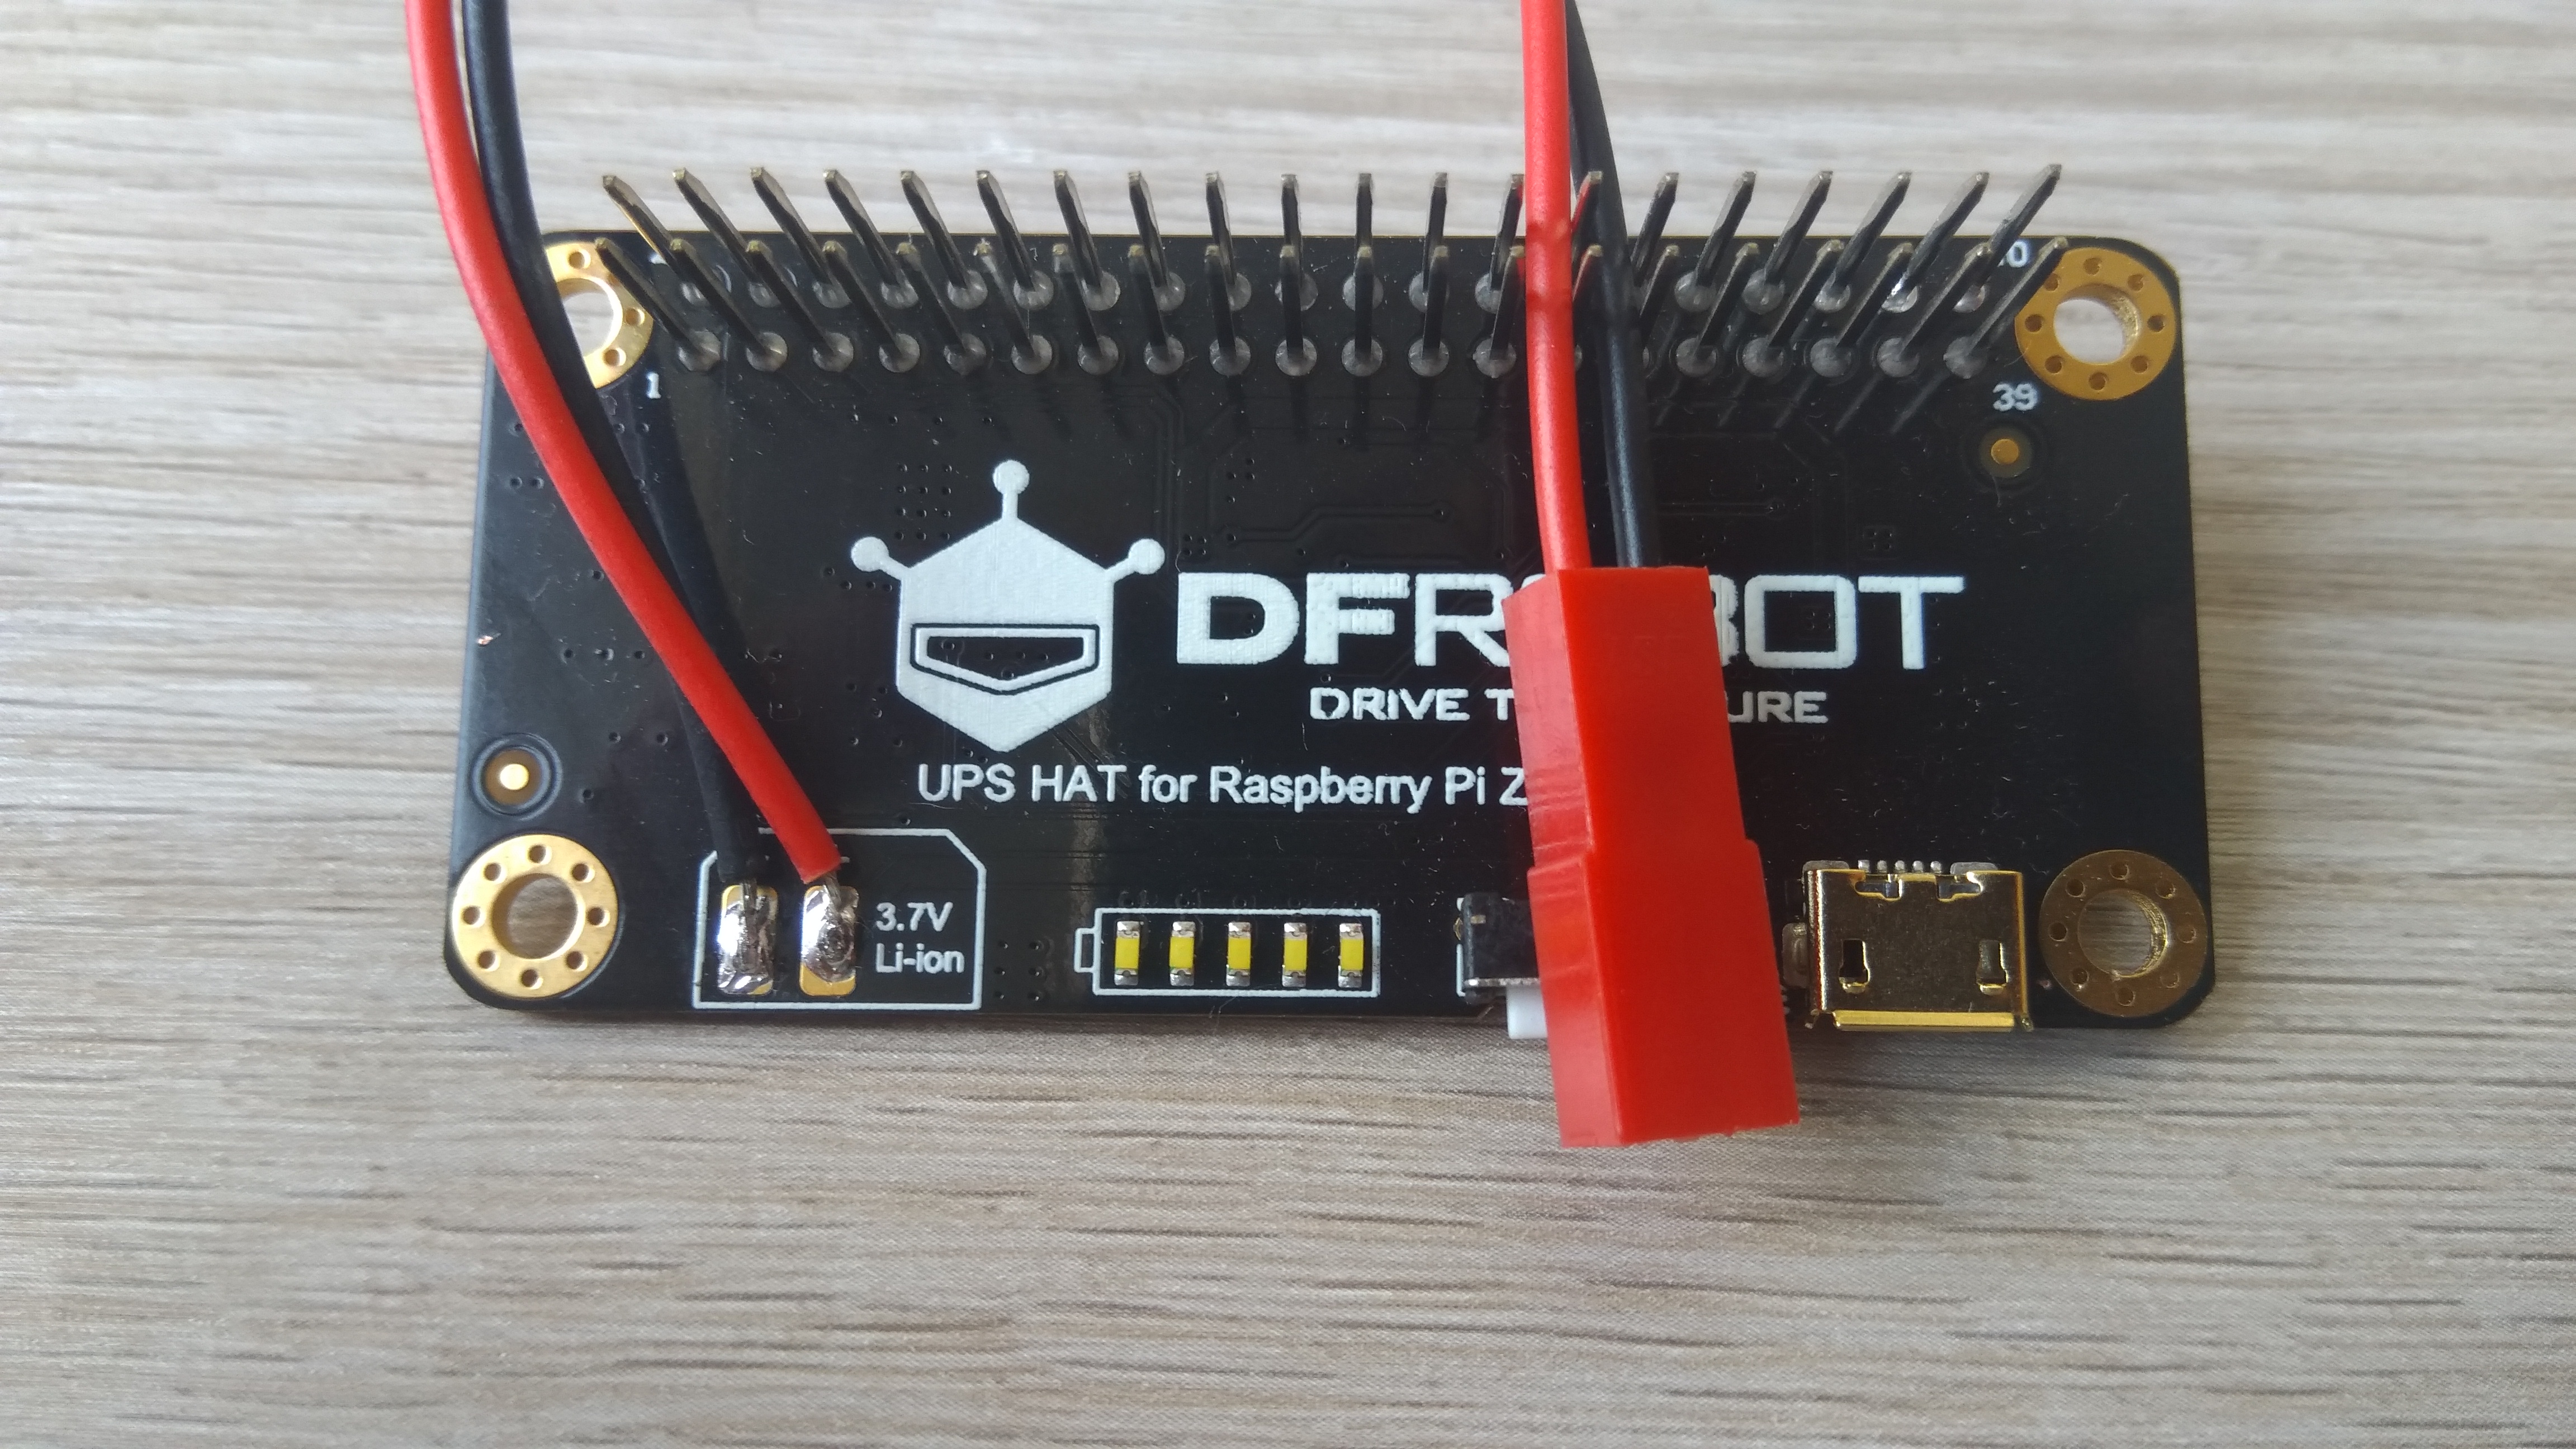
<p>Raising difficulty bar by one level, I proceeded to test the power supply. I want to power my Pi with Akyga LiPol I purchased, which comes bundled with JST-BEC female connector with dangling cables for self-assembly. The board has no JST-BEC socket, but has two soldering pads for custom wiring. I proceeded to solder connector to the board. Whew! I get anxious when I solder so close to the delicate electronics, let alone power supply. Solders passed the test of strength, which made me glad.
<img src="/assets/images/postimages/rpiebook/upssolders.jpg" alt="beautiful job" />
Look at these huge pins! Anyway, I put the HAT on Raspberry Pi and connected the battery. I clicked the button, the battery indicator on HAT flashed bright white and... nothing. I held the button a little longer, the battery indicator flashed bright white and... there it is! The Raspberry Pi green diode switched on. I successfully logged into Pi through SSH.
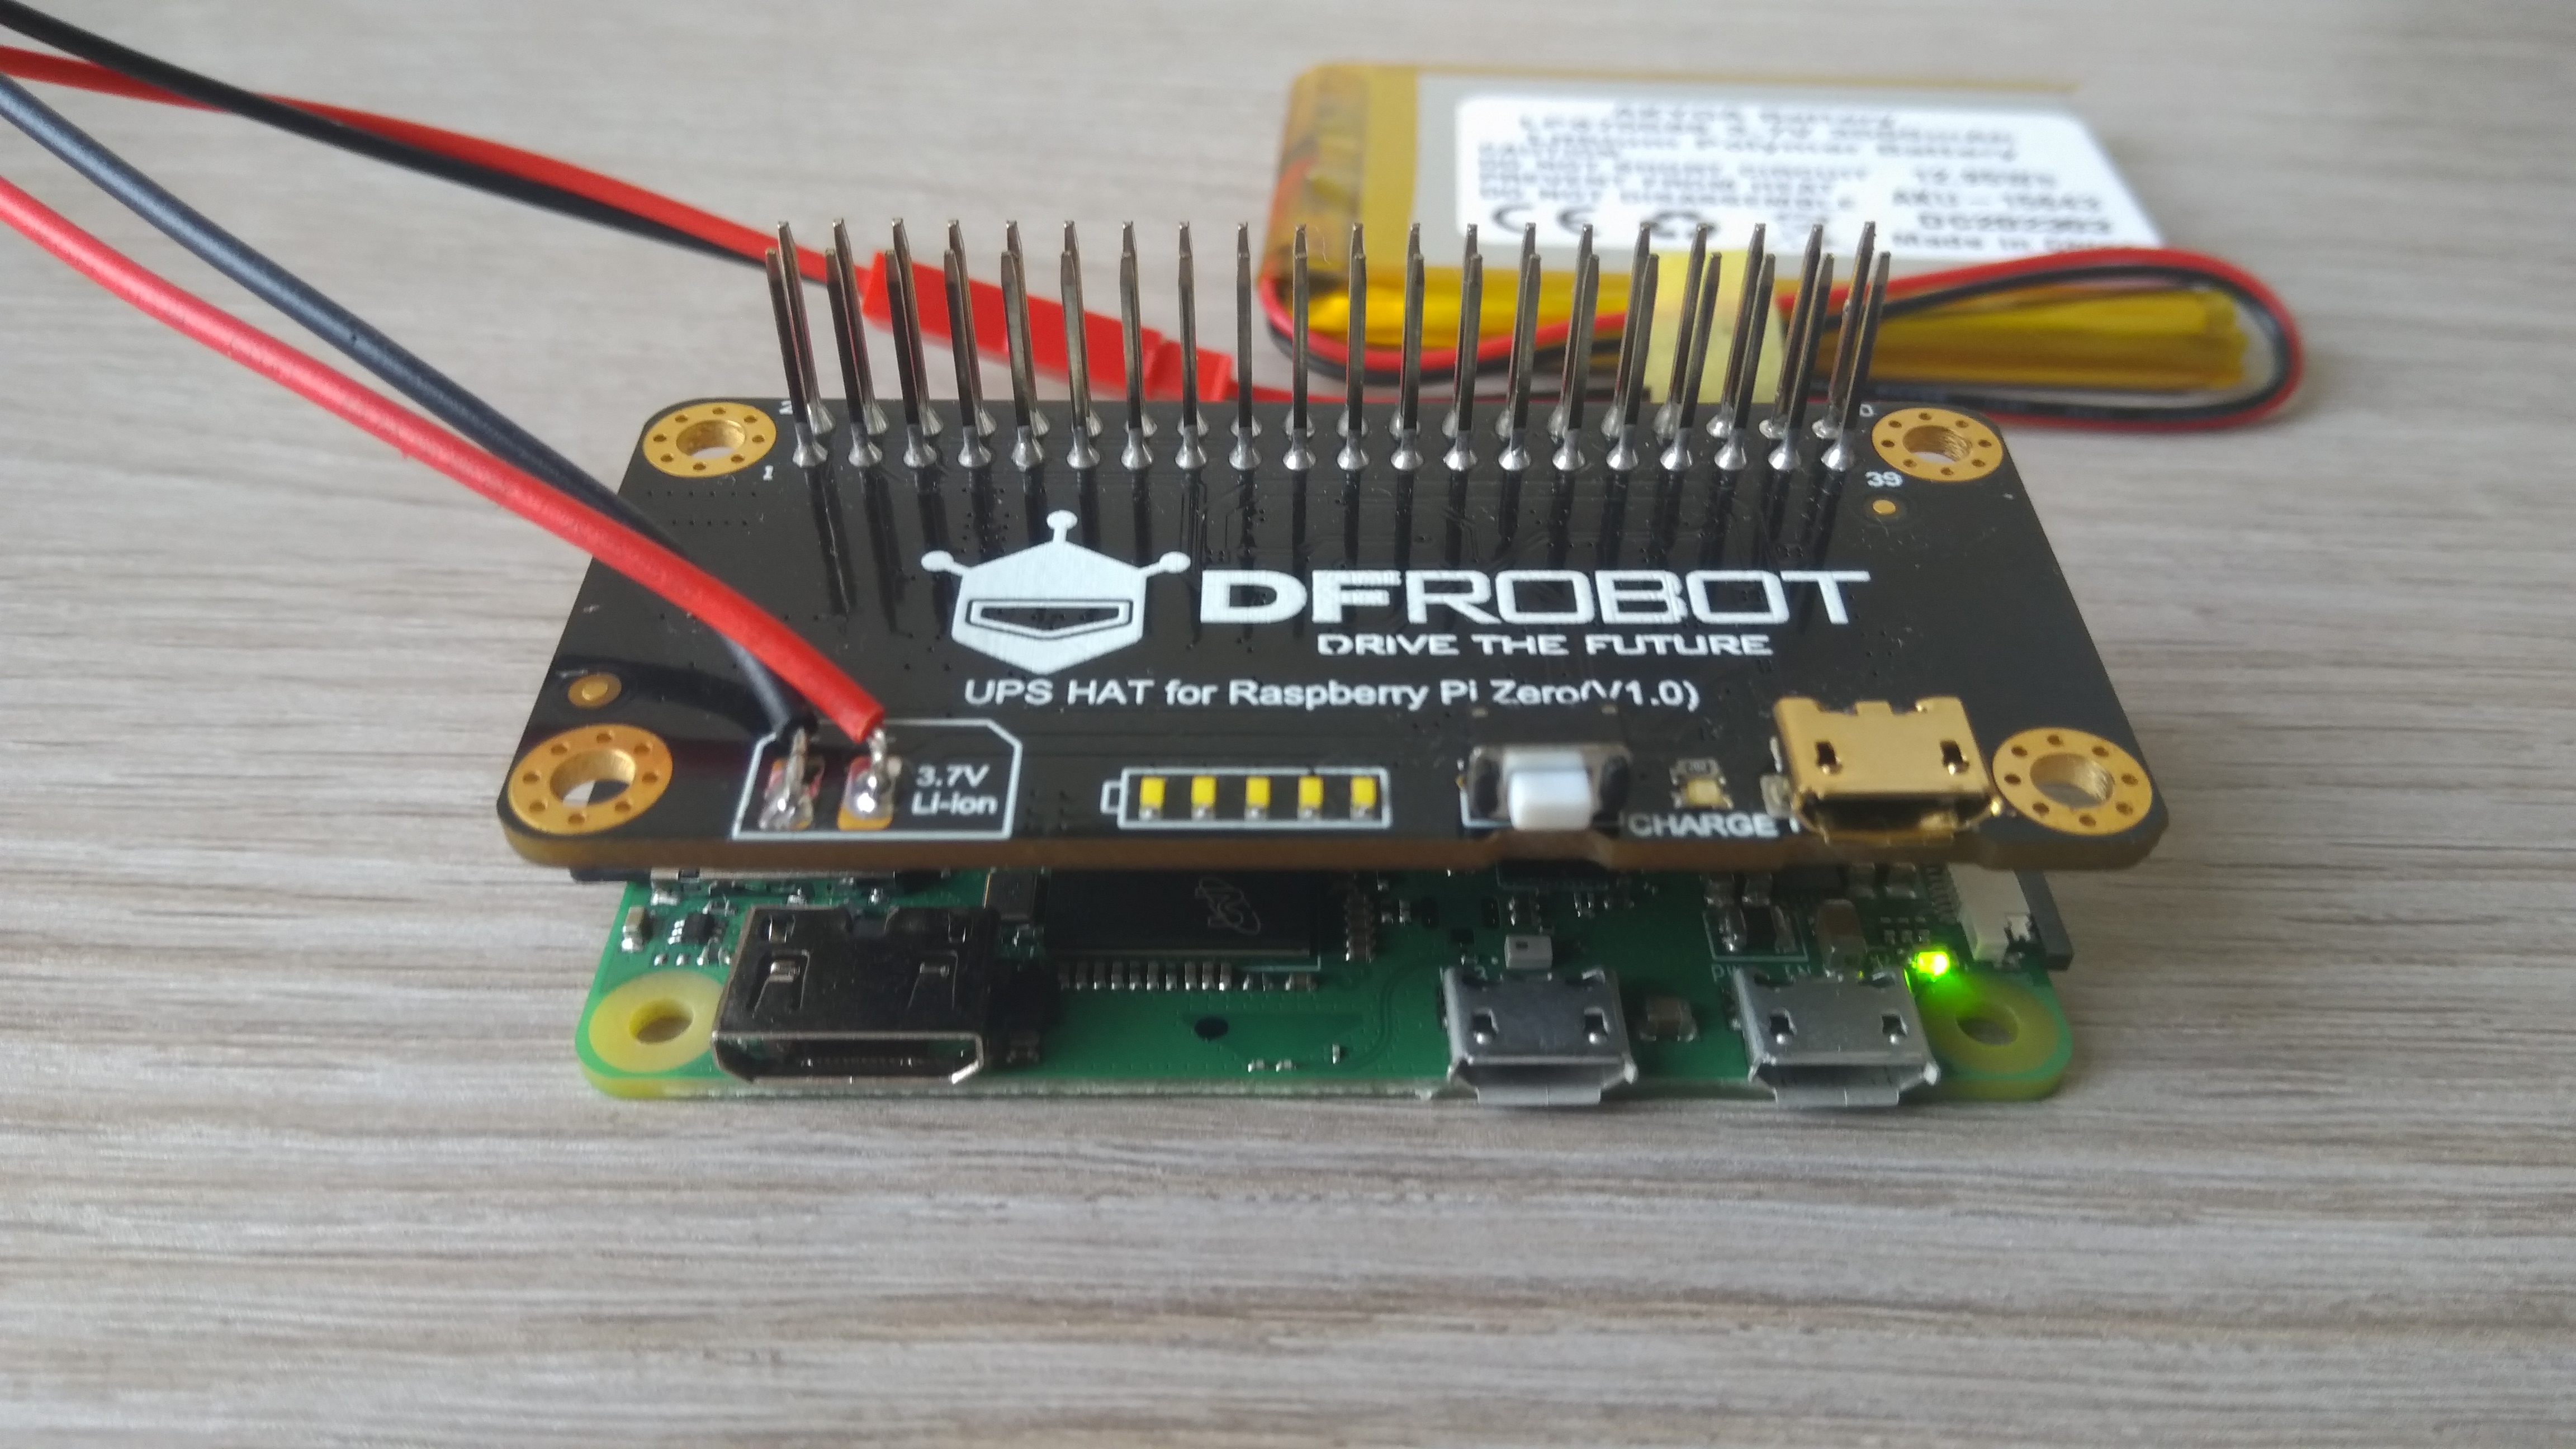
<img src="/assets/images/postimages/rpiebook/upsworking.jpg" alt="IT&#x27;S WORKING!~Anakin Skywalker" />
As I skimmed through the Net I read somewhere that the HAT allows for gentle shutdown when the battery is almost depleted, which is really nice.<br />
UPS HAT - check! Moving on.</p>
<h2>Buttons</h2>
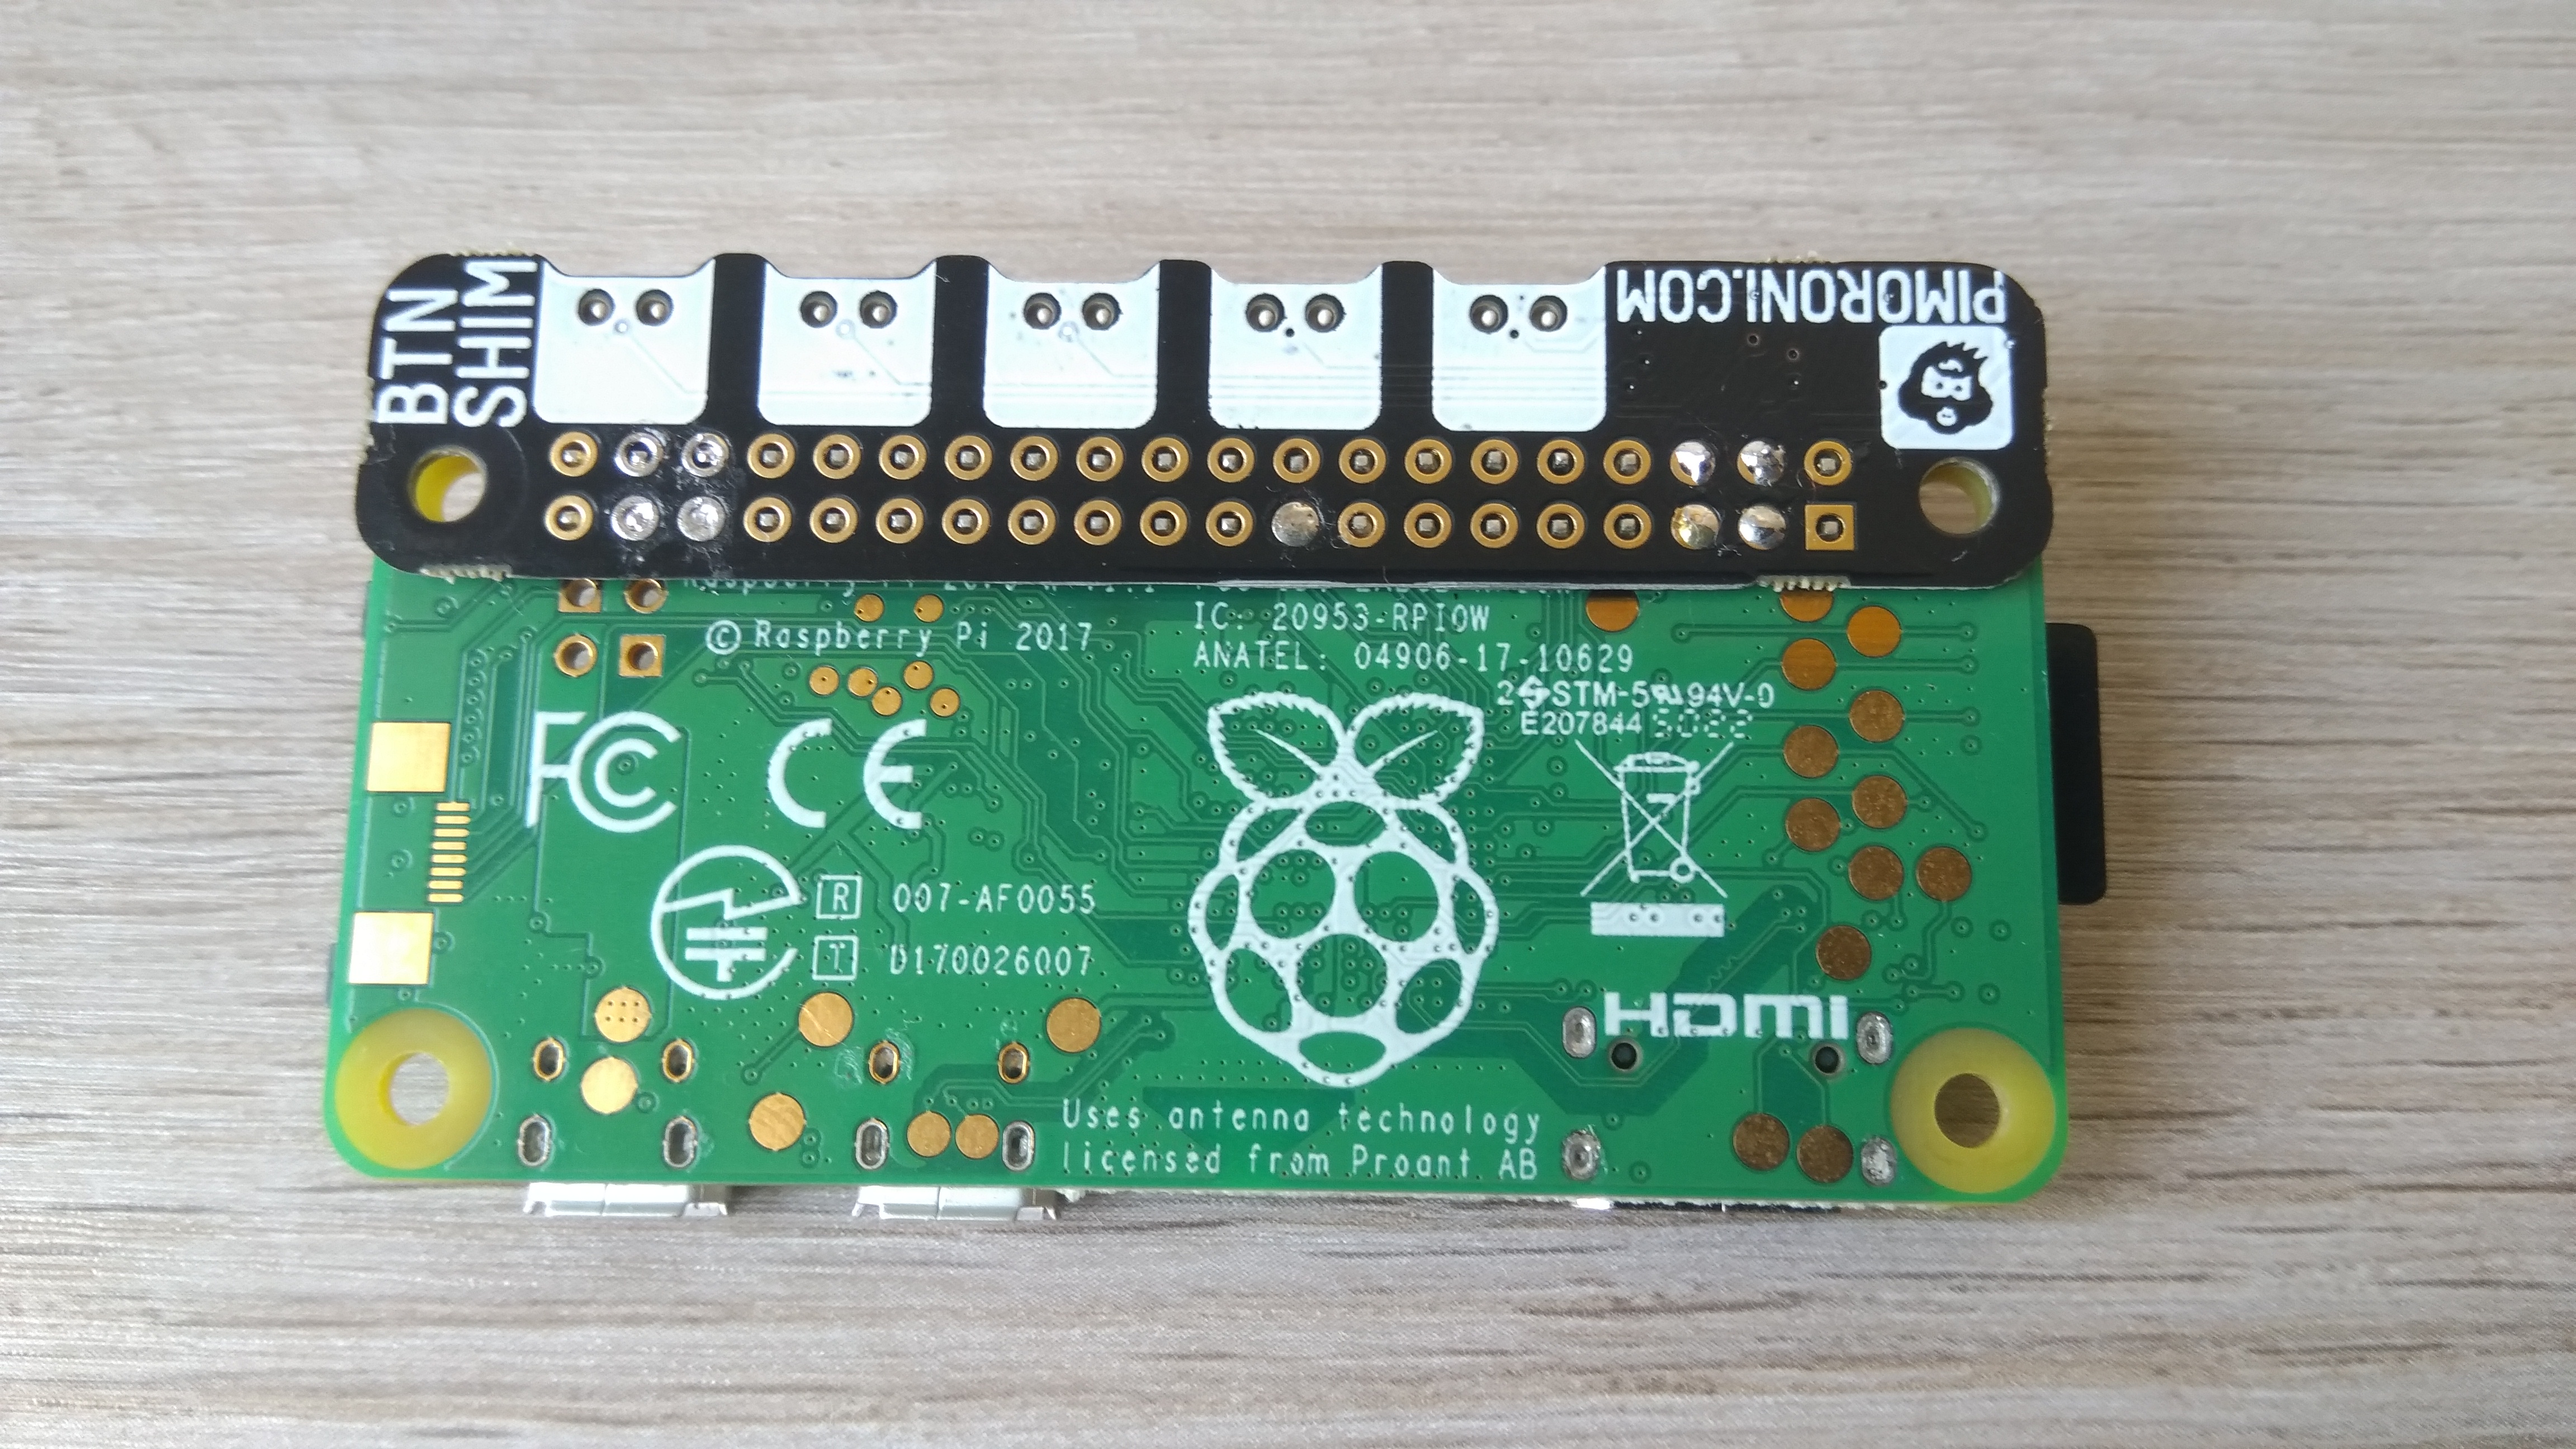
<p>The trickiest part to test was the button SHIM, because the only way to connect it is to solder it. As I stated in the previous post, I want it connected to the underside of Raspberry Pi. I do not know whether it is going to bite me in the bottom later, but now it seems to be a great idea. <a href="https://pinout.xyz/pinout/button_shim">pinout.xyz</a> said I needed to solder pins 3, 4, 5, 6, 17. After I soldered everything I was mortified - I had it upside down! Thankfully I did not have to unsolder, just make more solders and this time in correct places.
<img src="/assets/images/postimages/rpiebook/buttonssolders.jpg" alt="had a little accident" />
I know, they are not pretty, but I moved forward. As you can see, I tried to unsolder the wrong ones, but at the end of the day it does not matter. To test the buttons I had to set up Rust on my main machine to cross-compile to Raspberry Pi.</p>
<h1 id="rust-for-raspberry-pi">Rust for Raspberry Pi</h1>
<p>Setting up Rust and compiling on Pi would take too long to be worth it. To cross-compile from x86_64 machine to Raspberry Pi Zero W, first I had to add a new target:</p>
<pre><code>$ rustup add target arm-unknown-linux-gnueabihf
</code></pre>
<p>I had no luck with a toolchain provided by my distro&#x27;s repository, so I had to grab one from <a href="https://github.com/raspberrypi/tools">here</a> and put it in my project directory under <code>rpi_tools</code>. Then I created file <code>.cargo/config</code> with the following contents:</p>
<pre><code>[build]
[target.arm-unknown-linux-gnueabihf]
linker = &quot;rpi_tools/arm-bcm2708/arm-rpi-4.9.3-linux-gnueabihf/bin/arm-linux-gnueabihf-gcc&quot;
</code></pre>
<p>In this file I specified the custom linker I just downloaded. Rust is now ready to compile for Pi.</p>
<p>To get a quick glance over the operation of SHIM I used the <code>rainbow.rs</code> example included with mzyy94&#x27;s <a href="https://github.com/mzyy94/buttonshim">library</a>. I compiled the file issuing:</p>
<pre><code>$ cargo build --release --target=arm-unknown-linux-gnueabihf
</code></pre>
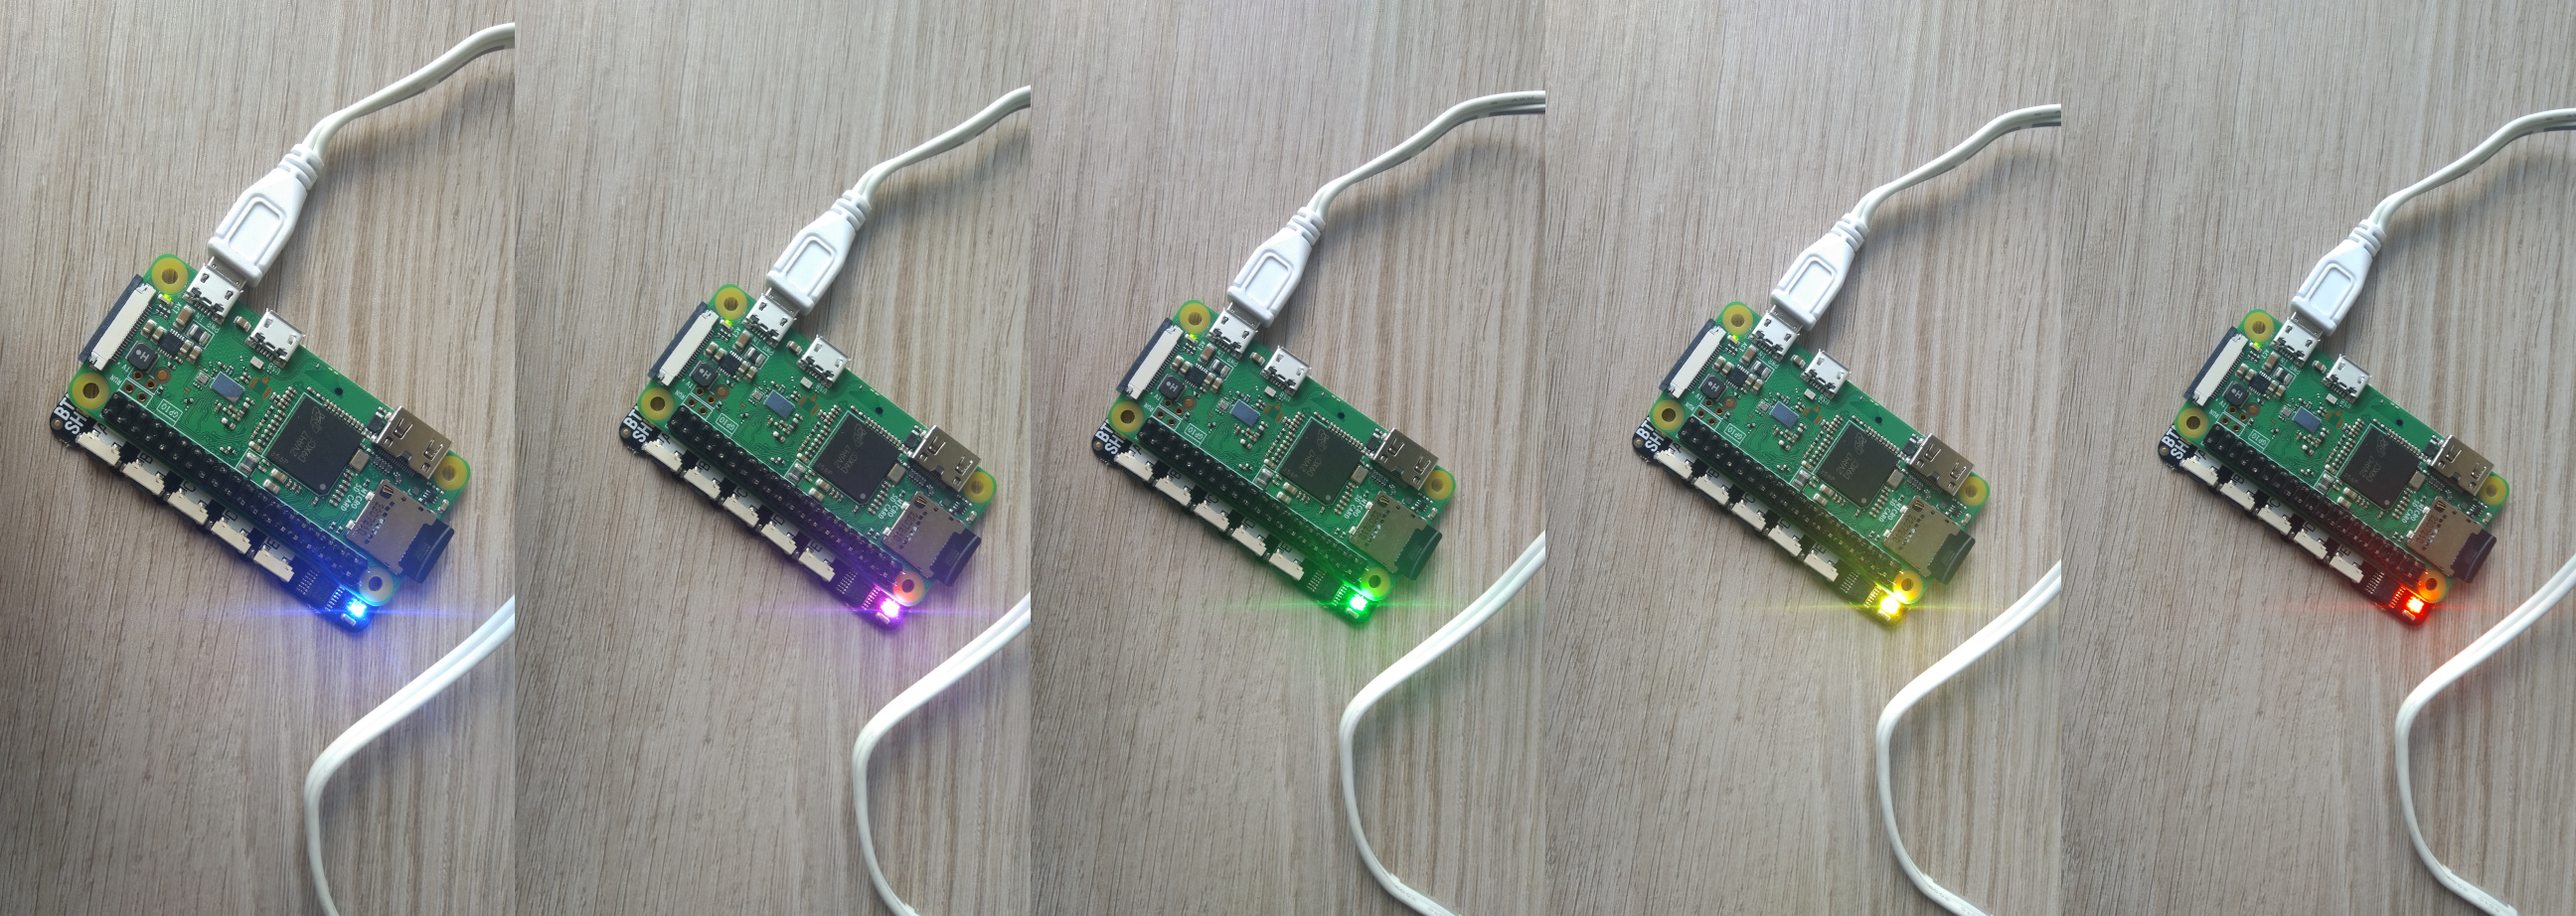
<p>and <code>scp</code>&#x27;d it to my Pi. The LED of Button SHIM changes color with button presses as intended.
<img src="/assets/images/postimages/rpiebook/buttonsworking.jpg" alt="colored lights" />
Buttons - check!</p>
<h1 id="conclusion">Conclusion</h1>
<p>I managed to successfully test all hardware without problems. With Rust set up to producing ARM binaries I am ready to write software for this device.<br />
In the next step I will be trying to make the display show whatever I order it to. I will also decide how I want to interact with the finished contraption, i.e. whether I should write a whole custom program a&#x27;la Kodi and encapsulate all functionality within it, or to make it more like a Linux box with access to the underlying OS.</p></content>
  <author>
    <name>blamster19</name>
  </author>
  <summary type="html">With all the hardware onboard, it is time to see it in action. I have to test it before assembly.</summary>
</entry>
<entry>
  <title type="html"> DIY Raspberry Pi ebook reader, part 1 - acquiring hardware</title>
  <link href="https://blamster19.github.io/2023/09/09/rpi-ebook-1.html" rel="alternate" type="text/html" title="Setting up Nextcloud on Raspberry Pi 3 Model B"/>
  <published>  2023-09-09 02:07:50 +0200</published>
  <updated>2023-09-10T00:51:48+00:00</updated>
  <id>https://blamster19.github.io/2023/09/09/rpi-ebook-1.html</id>
  <content type="html" xml:base="https://blamster19.github.io/2023/09/09/rpi-ebook-1.html"><h1 id="let-x27-s-build">Let&#x27;s build</h1>
<p>When I digged through ebook readers available on the market, it occured to me that every option is unappealing to me due to lack of customizability. Huge part of it lies in closed-source nature of those devices, which to me as an open source enthusiast is a major turn off. This, coupled with a hunk of free time during summer break, led me to the idea of building my own ebook reader. Happy with having a new project to hone my soldering skills, I enthusiastically set about making preparations.</p>
<h1 id="goals">Goals</h1>
<p>To instill some sense of direction into the project, I imagined it would be best to try and reach incremental goals. My first goal would be to connect every element one by one and check if every part works as intended. Next, a stage which will either make or break the whole endeavor, is to put everything together and make sure there are no conflicts between parts. And, for the last part, find some ebook software to actually use the thing, or, in the worst case, write one.</p>
<h1 id="the-innards">The innards</h1>
<h2>Core</h2>
<p>I want my contraption to be both functional and similar in form to commercial counterparts. It has to be lightweight and handy, while allowing a degree of flexibility in customization. Since I have no infrastracture, means and skills to manufacture custom boards, I am bound to SBCs, which is not at all bad considering saved money and time. Ebook, like tablet or smartphone, is rather slim, which means very limited range of connection ports. There is no space and energy to spare for active cooling, so the chip has to run cold. Frankly, it does not have to be as powerful as aforementioned devices, because its primary purpose is to print text. Taking all that into consideration my vote went to <a href="https://www.raspberrypi.com/products/raspberry-pi-zero-w/">Raspberry Pi Zero W</a>. Arguments for this pick were my familiarity with Raspberry Pis, wealth of documentation and code, a range of ready-made extensions and ease of use. Integrated Wi-Fi allows for smooth hassle-free software deployment while also being a nice feature of the finished project. Model Zero is also much thinner and energy efficient than its full-sized siblings, making it a perfect fit for my application. Another chief asset of Zero is that it is powerful just enough to run a full Linux distribution, so no need to play with low level embedded. I would gladly take version 2, but sadly, they were out of order wherever I looked, and summer break is too short to wait. For convenience, I settled for Raspberry Pi Zero WH, with soldered header.</p>
<h2>Power</h2>
<p>Much to nobody&#x27;s surprise, there are myriad ways to power Raspberry Pi. Obviously, battery power is the only sensible choice, but even that can be done in many ways.<br />
The most barebones solution is to construct appropriate circuit and plug in the source. The upside of it is being able to custom tailor every aspect of power supply. The downside is required knowledge and ease of screwing things up. I never feel confident enough in my tinkering abilities when it comes to powering things, so I immediately discarded this option.<br />
Another popular solution is to cannibalise power bank. This is handy, as powerbanks come with charging module, so you just plug in the cable and you are set. However, powerbanks are often a little bulky and poorly regulated, which would cause a lot of random restarts upon voltage drops. After all, they are meant to store energy, not act as a power supply, so manufacturers could not care less about stability. Another missing thing is feedback - powerbanks do not return their status to devices they power, so going below certain threshold would always cause abrupt shutdown and, over time, murder the SBC.<br />
This leads me to the third option, which is dedicated Raspberry Pi power supply board. These little circuits provide stable voltage, have integrated charger, output battery level and play nicely with Pi, due to the whole <a href="https://www.raspberrypi.com/news/introducing-raspberry-pi-hats/">HAT</a> design which enables stacking of extension boards.<br />
After quite some time spent on researching the topic and looking through offers I chose <a href="https://wiki.dfrobot.com/UPS%20HAT%20for%20Raspberry%20Pi%20%20Zero%20%20SKU%3A%20DFR0528">DFRobot DFR0528 UPS HAT</a>. It fulfills all my requirements, is quite cheap and available. The official wiki seems to nicely explain how to enable battery level reading.</p>
<p>When it comes to power source, the obvious choice would be either Li-Ion or Li-Pol battery. I wanted something thin, light and capacious, so I chose Li-Pol Akyga 3500 mAh 1S 3,7 V which I found in local eshop. The battery comes with connector cable ready to be soldered to UPS HAT.</p>
<h2>Screen</h2>
<p>From the beginning it was clear that I want e-paper dispay. E-paper is easy on eyes, legible in sunlight, extremely power efficient and looks cool. In this day and age there is an array of different sizes of e-papers made for Raspberry Pi. Since I want to build a reader, I need quite a lot of surface area, but the bigger the surface, the slower the refresh rate. This is further exacerbated when different colors come into play, where refresh procedure can take up to thirty seconds. This is unacceptable to me, so I decided I am content with fast but b/w display. Finally, I found a nice compromise, <a href="https://www.waveshare.com/7.5inch-e-Paper-HAT.htm">Waveshare 800x480 7.5inch E-Ink Display</a> which comes with a HAT. The screen communicates through SPI, has a refresh rate of 5 s, resolution of 800 by 480 pixels and dimensions of 163,2 by 97,92 mm.</p>
<h2>Buttons</h2>
<p>I almost forgot that in order to actually do stuff with my ebook, I need to control it somehow. For a while I thought I would build something from parts from my local (and physical) shop, until I found <a href="https://shop.pimoroni.com/products/button-shim">Pimoroni Button SHIM</a>, which seems perfect for my use case.</p>
<h1 id="the-design">The design</h1>
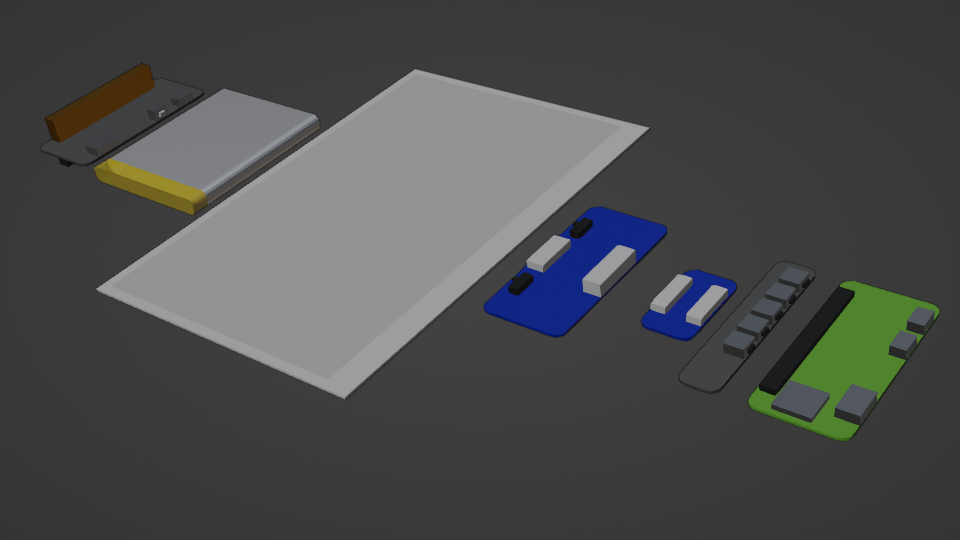
<p>This project takes on highly experimental approach, and I am not much of a planner when it comes to those things. I very much like to get my hands dirty first and construct something that works, then worry about the details (like how to actually put the parts in place). However, perhaps, if I want to write a few blog posts about my adventure, then the usual way of doing things is not very good for that. I should pave a roadmap and pull together some kind of schematic. Without further ado I fired up Blender and made models of my parts.<br />
<img src="/assets/images/postimages/rpiebook/parts3d.png" alt="3D parts one after another" />
The first thing that is striking is that UPS HAT&#x27;s pins are huge, sprouting 1 cm from both sides. This is non-ideal in my case, so I will have to unsolder that thing or find another way to slim down the board.<br />
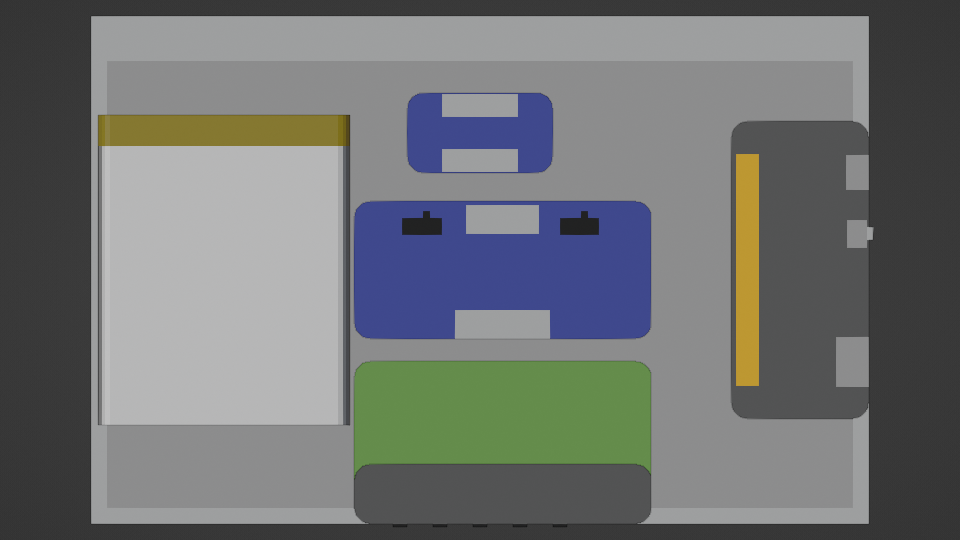
While the idea of HATs is amazing in its own right, stacking just one extension board on top of Pi makes the whole setup really thick. Luckily, every board uses just a few pins from the whole header, so the idea to connect appropriate pins with cables and position all boards horizontally is not completely bonkers. To further slim down the setup and to get better access to Pi pins, I chose to solder button SHIM to the underside. I had to keep all boards with buttons and ports at the edge and also remember not to strain the FFC cable too much. Taking all that into consideration I attempted to make a draft in Blender and am pretty happy with the looks of it.<br />
<img src="/assets/images/postimages/rpiebook/layout3d.png" alt="3D parts one after another" /><br />
The layout feels a bit off, because Raspberry Pi with its button shim are positioned to align the middle button with the center of the screen; likewise, e-paper connector is aligned with screen tape at the top (not rendered).</p>
<h1 id="closing-remarks">Closing remarks</h1>
<p>After fruitful team participation in robot competition I felt like taking up a solo project this time. I wanted to actually learn the process of doing project from start to finish, but now on my own terms. Ebook reader involves just a few parts, does not require much soldering, and poses a great opportunity to get a hands-on experience in electronics.<br />
In the next step I will install and configure the OS, set up development environment, install necessary libraries and test all acquired boards.</p></content>
  <author>
    <name>blamster19</name>
  </author>
  <summary type="html">Best personal projects are the projects which later serve a purpose. Ebook reader strikes me as the best balance of ease and utility.</summary>
</entry>
</feed>